Showing posts with label Macedonians. Show all posts

Monday, November 22, 2021

Battle Report: Wars of the Republic- Romans vs. Greeks at the Book Launch


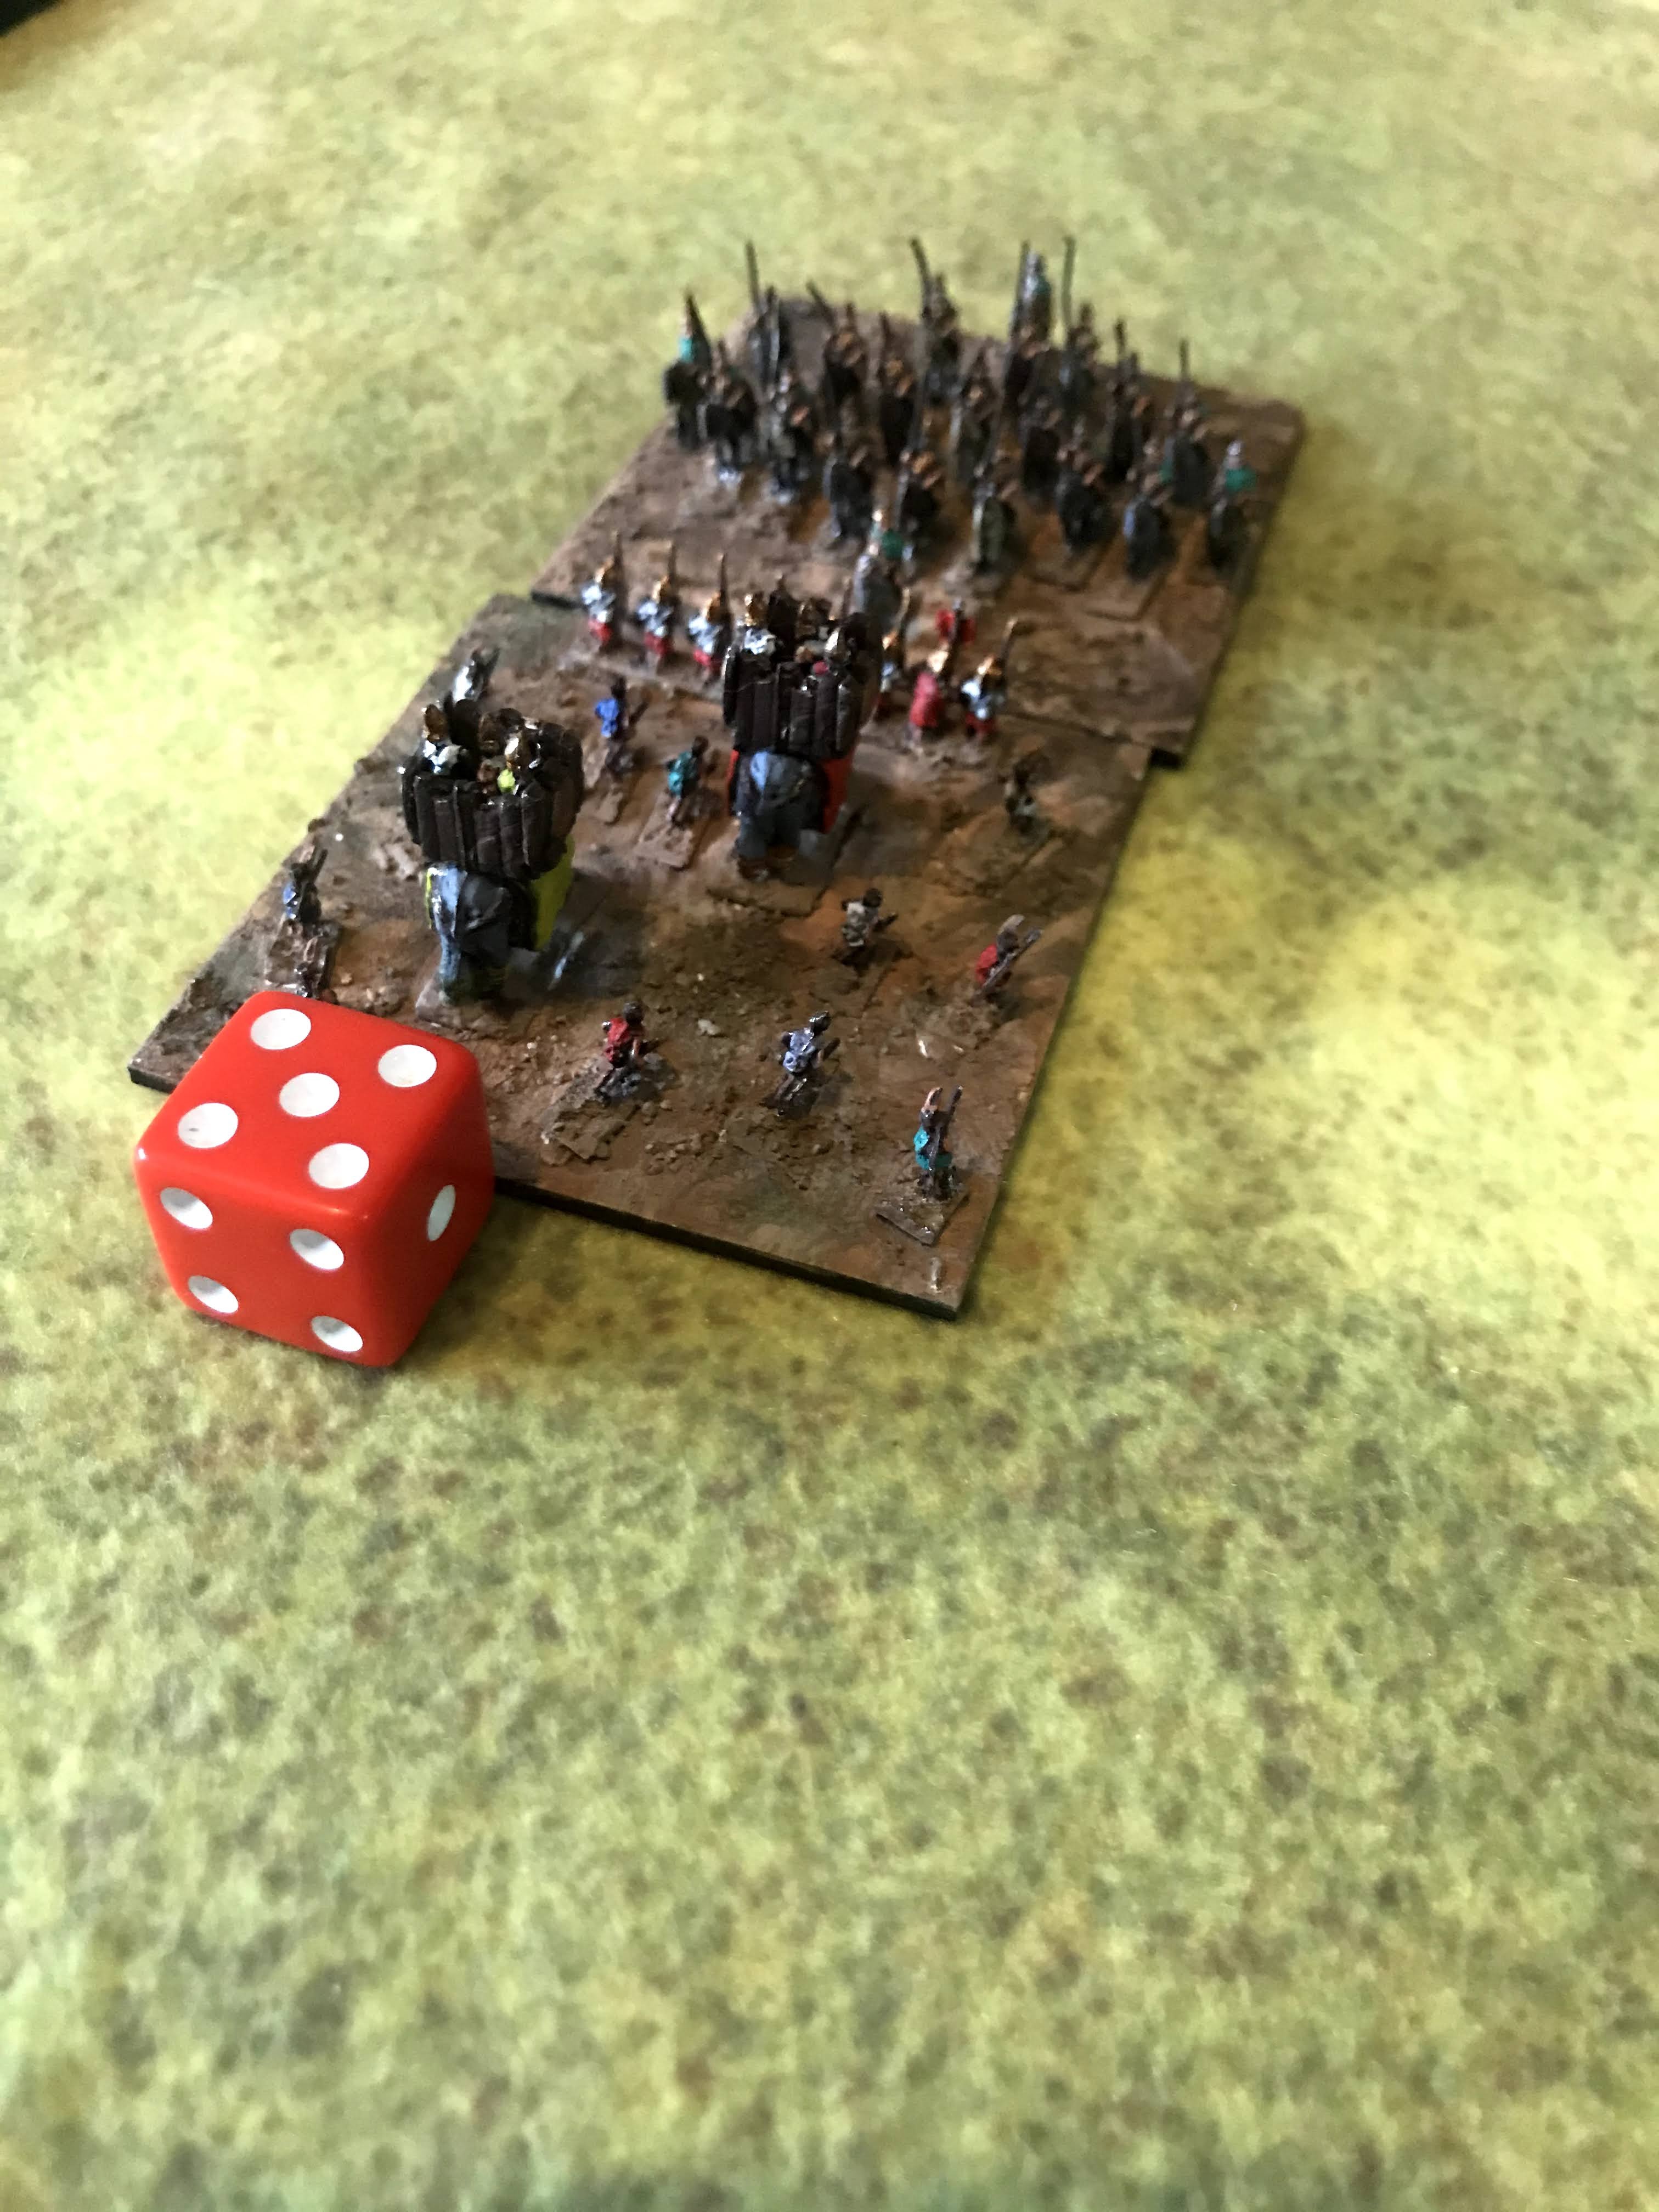
This battle was the main Demo table at the Wars of the Republic launch party at Gestalt Studios in Powell, Wyoming.  As such, there were a few different generals and my main role was as referee, host, and rules interpreter.  The launch party had a surprising amount of people show up looking to game, talk ancient history, talk wargaming, and talk about being an author.  Sadly, I did not get to spend as much time with everyone as I wanted to and I look forward to doing more wargaming events in the area!  

The Greeks of Pyrrhus of Epirus came to Italy to aid their fellow Greeks of Tarentum.  However, they faced a rising power in Rome.  The successor mercenary and opportunist, Pyrrhus; was looking for a way to make cash to keep bank rolling his efforts in Greece.  The situation in Italy seemed like a good way to do it!  However, the Romans proved to be stiffer opponents than Pyrrhus suspected.  After three costly victories, Pyrrhus left Italy and went to Sicily instead.  This gave control of Italy to the Romans.  

At the launch party, the main Demo table had a combined arms army of Greeks vs. Republican Romans.  Each side had about 3 generals controlling wings of the armies.  These players rotated in and out through out the battle, to give more people a chance at the game. We also had a secondary table of Etruscans and Romans, but I did not get to observe that battle much.   

Since I was hosting the event and referee, I do not have full pictures of the battle.  The following is a high-level recap. 


Forces: 

Greeks of Pyrrhus of Epirus

Center: 
War Elephants
Silver Shields 
Bronze Shields

Right: 
Heavy Cavalry
Light Hoplites
Archers

Left: 
White Shields
Peltasts
Light Cavalry

Republican Romans

Center:
Triarri x2
Hastati

Right: 
Hastati
Principes
Velites

Left: 
Hastati
Principes
Velites

Mission:

The game had no complications and was a simple pitched battle.  

Set-up: 
The table had a dangerous river on the Roman right/Greek left with an impassable temple on the opposite shoreline.  A road slanted across the center of the board.  On the Roman left/Greek right there was a difficult field, and on the Greek side a Difficult forest. 

The Greek line stretched across the board from left to right it was: 
Peltasts, Light Cavalry, White Shields, Bronze Shields, Silver Shields, War Elephants, Heavy Cavalry, Light Hoplites, and Archers.  The Archers and Light hoplites were deployed in the woods.  

The Romans formed up in their typical checkerboard fashion.  Hastati were the front line, with off-set Principes on the edges, and off-set Triarri in the rear.  Each flank had a unit of Velites.  The Velites were near the river on the right, and approaching the field on the left.         


The Battle Overview
Both sides cautiously moved forward, with the Greeks often willing to let the Romans win initiative and not bothering to interrupt.  The Roman Velites crossed the river on the right and approached the Greek Flank, protected by the Peltasts.  The Velites on the left took to the fields.  

The Romans sent a Hastati unit supported by Principes forward on the left, along the road.  Meanwhile, the Greek Light Cavalry roamed out ahead of the Phalanx units as they closed.  

Soon, the Heavy Cavalry and War Elephants rushed forward and contacted the approaching Hastati.  Their initial charge hit hard, but not hard enough.  The Light Hoplites moved up to support on the edge, but they got bogged down by skirmishing Velites.  However, the Greek Archers put them to flight with a barrage of arrows.  


The Light Cavalry, seeing the wall of Roman shields quickly darted back behind their own lines.  Meanwhile, the Peltasts and Velites skirmished along the river banks, trading javelins.  

The Principes moved up to support the forward Hastati on the left, and soon the battle was joined by the Greek Light Hoplites too.  It became a swirling melee and neither side was gaining the upper hand. 

The swirling melee soon drew in the Silver Shields on the flank, and the Greek LIght Cavalry darted around and hit the Romans in the rear.  Meanwhile, the rest of the Phalanx faced across the field and held the rest of the Roman line in place.  

With heroic efforts, the Roman Hastati and Principes managed to fed off the Greek shock troops, but at the cost of their own lives!  The Roman left flanks was shattered, but the Greek main shock arms were also routed in the melee!  With the ensuing Collapse tests, the Greek Peltasts and Archers fled the field of battle.  No longer eager to fight.


This tore the heart out of the Greek army.  However, they still had a formidable Phalanx.  The Roman Velites crossed the river and attacked the inexperienced Greek White Shields in the flank.  The Greeks responded, and were able to throw off the attack, but were left wavering and battered.  The Velite were routed, but the rest of the Roman army stayed strong.    

The last Greek phalanx charged forward, and were met by a counter-charge by the Roman line.  The experienced Roman troops led, with the Hastati on the edges for support.  There was a mighty clash, but the Greek pike blocks were thrown back and disorganized into a wavering mob.     

The Greek Officers surveyed the field, and decided to fall back and leave the field of victory to the Romans.  


Conclusion
The Romans were victorious.  As can happen in ancient battles, the Greeks over-committed on their initial thrust, and did not have the reserves to exploit the gap made on the flank.  Some of their best units were relegated to "support" roles instead of leading the attack.  The formidable Roman meatgrinder did their job and clever use of supports ensured that they had the manpower late in the game.   

Overall, many of the generals had never played a wargame before, but quickly understood the basics of the game, tactics of the period, and how the rules worked.  They enjoyed the battle and were wondering when the next one would be.  


The quick reference guide began with the Most Important Rule of Wars of the Republic.  Have Fun and help everyone else have fun.  Overall, I would say the Most Important Rule was met!  

You can pre-order the rules for Wars of the Republic from Osprey/Bloomsbury Publishing here.


Become a Patron and get access to all the cool stuff, a peak behind the curtain of Blood and Spectacles, and early-access to playtest games!  


You can follow Blood and Spectacles Facebook page or Instagram for more fun! 

Check out the latest publications and contact me at our Blood and Spectacles website

Or purchase all out games at the Blood and Spectacles Publishing Wargames Vault Page! 


Monday, September 14, 2020

Battle Report: Heirs Of Empire- Perdiccas vs. Persian Rebels II

I finished painting my 6mm Diadochi armies from Baccus Miniatures and I wanted to celebrate with a game of Heirs of Empire.  This was the game I built to use these armies in.  It focuses specifically on the Wars of the Diadochi after Alexander's death.  As an added bonus, I am going to add the rules for Heirs of Empire on the Wargame Vault so you can pick them up for yourself!   

Today, we are going to look at a side show operation after the Conference at Babylon established Perdiccas as the Royal Regent.    

After Perdiccas solidified his position as Regent defending Roxanne and her unborn son, he had a great deal of work formalizing and consolidating Alexander’s gains.  This was no longer a campaign to push the boundaries of the empire, instead it was stabilizing the internal arrangements of the Macedonian Empire.  This included regions bypassed by Alexander for various reasons.  One of his first goals was to re-open the old Persian Royal Road.

Perdiccas turned his attention to a Persian Satrap that had still been loyal to the old regime.  This rebel still possessed a formidable force and threatened the re-opening of the roadway.  Perdiccas mustered the army and marched to overthrow the Satrap. 

History does not record who this was, but we do know that Perdiccas fought two battles with his Persian foe before defeating his army in central Anatolia.  We fought the first of the two battles, and the Persians barely scraped by with a victory.  The mighty Silver Shields were laid low!  

Now, Perdiccas has sent the Silver Shields off from his Royal Army to escort a caravan of Gold to the royal treasury.  They will not be with the army as they need time to rest and recover after their defeat.  This will give them time to stay out of Perdiccas' hair for a while.  After all, Antigenes and his veterans were spoiled pre-Madonnas.  Historically, at some point the Silver Shields were sent on such a mission and separate from the Royal Army.  We know nothing of the Persian Satraps forces.      

Forces

Perdiccas' Royal Army

Right Wing:
Companion Cavalry

Center:
Bronze Shields
War Elephants
Skirmishers
2 Theuropheroi

Left:
Epilektoi Cavalry

Rebel Persian Satrap

Right Wing:
Epilektoi Cavalry
2 Asphract Cavalry (Javelins)

Center:
White Shields
White Shields
Skirmishers

Left Wing:
2 Skirmishers
2 Archers

Both armies made changes going into this rematch.  Perdiccas ditched the Silver Shields and replaced them with War Elephants and some Skirmishers.  The Persians removed the Theuropheroi and replaced them with another Archer unit and Skirmisher unit.  Both of the removed units were disappoint for their respective armies last game. The Persians also changed up the composition of their Wings. 

Scenario:
We randomly rolled a scenario, and got a Breakthrough instead of a Set Piece Battle.  That means, Perdiccas needs to get 15+ points of troops off the opposite board edge in 8 turns to win.  That could be tough as he is out numbered with a more "elite" force.  However, the re-alignment of the Persian wings may give him a chance to out-maneuver the Persians with his cavalry wings. 

This scenario makes sense with Perdiccas objective of opening the old Persian Royal Road, and taking the rebel Persians main city. 

Set-up: 
We follow the guidelines for set-up found in the Heirs of Empire rules.  Today, the battle will be played on a 48MU x 48MU board.  1 MU is 1 inch. 

We decide to place the Royal Road down the center of the board stretching from edge to edge.  We decided movement on the road would be at +1 MU.  A small cluster of buildings is along the center edge.  It is an old Persian messenger station and its perimeter is difficult terrain.  Along the Macedonian right we placed rugged hills.  On the Persian right are some fields.  They are all difficult ground.  The fields and the hills may hem in and hinder the cavalry operations of both sides.

The Persians have their Cavalry wing cover the gap between the fields and the villas.  The Center confidently moves up the road.  The Persian left is the weakest, as it is covered by the Skirmishers and Archers.  However, the depth of their formation will make it hard to break through there.  Their flank is anchored by the cliffs.  A formidable position.  

Persians Deploy
The Macedonians are the Companion cavalry across from the skirmishers and archers, the center is across the road and approaching the buildings.  The Epilektoi are close to the left wing and ready to move up between the fields and messenger station.    

Turn 1: 
Both sides roll up Commander's Gaze for their armies.  The Persian rebels do not roll very well, and end up with about 5 Gaze.  Meanwhile, Perdiccas gets the best possible roll with 10 Gaze.  He easily bids 6 to the Persian 2.  

Perdiccas' army moves out.  Everyone moves forward.  The Companion Cavalry stays with the battle line.  The Left Wing Epilektoi moves to the edge of the plains and pivots.  However, they seem content to not stray too far ahead.  The Persians do not try to interrupt.  On their turn, they also move out across the line and move towards the center of the board.  The idea is to narrow the field of battle and pin the Macedonians away from the edge of the board. 

   
Turn 2: 
Again Perdicccas' gets a perfect Commander's Gaze roll, while the Persians are lack luster.  This time, the Persians do no bother to bid any Gaze, as they may want to use their limited number.  Perdiccas bid 6, to shut the Persians out of going first.  

The Royal army moves forward again.  This time, the Elephants and Light Infantry make for the left side of the villas, while the Skirmishers cross behind and get ready to enter the compound.  The Macedonians remember how hard it was to dislodge the Persians from the Oasis last time they met.    The Epilektoi Cavalry waits and falls in behind the Elephants.  The Phalanx continues up the road, with the Light Infantry and Companions with Perdiccas covering their flank.  The Persians again do not interrupt.  

The center White Shields boldly move up the road, supported by a unit of skirmishers.  The Skirmishers get to the edge of the Post-Station and toss their javelins and rocks at the Royal Skirmishers, but are just out of range.  On the Persian Left, the skirmishers eagerly rush forward and also throw some Javelins, but are far short.  The Archers stay back and let the Skirmishers screen them. 


On the Persian right, the Javelin armed Asphracts close the gap and pepper the Perdiccan Theurophoroi with Javelins, causing them to lose 3 Courage, but they do not waver.  The Persian Commander holds back with the Heavy Cavalry and waits for a potential enemy break through.  
  
Turn 3: 
This time, the Commander's Gaze rolls are not so lopsided.  Perdiccas gets 6 to the Persians 5.  The Persians have a tough decision, use Gaze to try and go first, or save it for Evades and interrupts?  Perdiccas needs his for charges.  Perdiccas ends up bidding two to the Persians 0.  

On Perdiccas's right, the peppered Thuerephoroi decide to try to charge into the Persian light horse.  The Persians try to Evade, but are just barely caught by the Light Infantry thanks to a Pursue.  Both sides take a beating, but the Asphracts lose 2 Courage compared to the Infantry's 1.  The Asphracts also begin to Waver.  The melee is pushed back towards the Persians 2 MU.  

The unengaged Persian Cavalry goes into Open Order and falls back to act as a buffer for any break throughs.  Then, the Asprachts and Theurophoroi on the left annihilate each other and rout.  The Skirmishers and the Bronze Shields keep fighting in the Villas. 

Meanwhile, Persian Skirmishers on the Persian left charge into the Perdiccan Light Infantry and Companions respectively.  It goes bad for the Persians with the Light Infantry annihilating the Skrimishers, but losing 2 courage, and the Companions doing the same but only losing 1 Courage.  That may have been a bad idea! 

With Persian Momentum spent, the Royalists took over.  With the timely charge of the Perdiccans Skirmishers into the Post Office, the Persian skirmishers were decisively pushed out of hte area, and reduced to 1 Courage and wavering.  Once out of the buildings, a flank charge by the Epilektoi sent the Persians reeling into rout! 


The War Elephants made for the Persian bulwark to break through.  However, the troops with the Elephants started to Waver after seeing their fellow light infantry get routed.  

On the Persian side, the fleeing Skirmishers caused the lead White Shields to start to waver.  The Archers also decided to Collapse.  This left the Persian Left completely open!  That Skirmisher charge WAS a bad idea!  

Turn 4: 
Well, the tables turned pretty quickly with some ill-conceived offensive on the Persians part!  They were trying to tar pit the enemy units, but they simply obliterated the Skirmishers and caused a collapse of the Persian left flank!  The Persian losses limited their Commander's Gaze to 6 total spread across the two wings, while the Macedonians had 9 spread across three wings.  The Persians bid 2, and the Perdiccans 3.  

With the left flank gone, Perdiccas immediately rode hard to get past the Persian army and into the gates of the city beyond.  The Persians try to seize the initiative, and do so successfully.


The Persian Cavalry re-formed and the Javelin Asphracts attempt to chase down the Companions.  However, without any Commander's Gaze remaining, they can not charge to catch up or attack with their Javelins.  With that, the Perdiccans re-gain the initiative with a Commander's Gaze.

The War Elephants charged into the Persian Satrap and his bodyguards.  The horses were not pleased to be so near such smelly, big animals.  However, the Persian line held, only losing one courage and being pushed back 1 inch.  Now, one of their best chances at stopping the Perdiccans was tied up in combat. 
 

The Light Infantry on the Perdiccan right moved up towards the road and tossed their Javelins at the wavering White Shields, causing them to lose another Courage.  The White Shields used a Commander's Gaze to remove their wavering status.  

The Perdiccan Epilektoi pivoted and made for the enemy city, following the lead of their Commander with his Companion Cavalry.  Finally, the wavering Perdiccan Skirmishers rallied.  

Things look bad for the Persians this time. 
 

Turn 5: 
This time, the Persians rolled up 5 Gaze to the Perdiccan 6.  The Perdiccans bid all 6 to go first, the Persians bid 0.  They opt to hold it for interrupts and re-rolls. 

Perdiccas and his Companion Cavalry successfully ride off the board edge and towards the Persian city gates.  They have Broken through, but it isn't enough to win yet.  The Persians attempt to interrupt, and succeed.  

The Persian light horseman go into Open Order, turn around, and charge into the Perdiccan Epilektoi, using up all of their Commander's Gaze.  It is a flank charge.  The clash dissolves into a swirling melee, but the heavy cavalry clearly have the upper hand over the Javelin wielders.  The Asphracts have 1 Courage left and are wavering, to the Epilekoti's 3 Courage.  


The Persian White Shields charge into a Perdiccan Thuerophoroi with a desperate battle cry.  The fighting on the roadway's edge is fierce, and the White Shields lose 1 Courage and begin to waver.  However, the Light Infantry decides to break and flee, their Courage spent.  

The War Elephants and Epilektoi bodyguards keep hacking at each other, The Elephants keep wavering and are pushed back with the loss of 2 courage.  However, the Persians also lose 1 Courage. 

In the End Phase, the Perdiccan Light Infantry flees.  The Bronze Shields and Skirmishers see it, but do not waver.  All the Macedonian Royalist pass Collapse tests.  

     
Turn 6: 
This time, the Persians have more Commander's gaze with 7 total.  The Perdiccans have 5.  Persians bid 0, while the Perdiccans bid 1.  

The Macedonians start with the Cavalry fight.  This time, it is one sided as the Thessalian Epilektoi annihilate the Asphracts.  The Persians try to seize the initiative and fail.  

The War Elephants push back and manage to surge into the Persian horseman, reducing them 1 Courage.  However, they do not Waver!  However, the effort costs the War Elephants a Courage as well.  

The Perdiccan Skirmishers emerge from behind the Post-Office and toss their Javelins to reduce the White Shields a further Courage.  they fail their Morale test, and since they were all ready Wavering.   They break and flee.  

The Bronze Shields hold position in the buildings.  However, the last White Shields is not content to let them hold Persian ground.  They charge in an try to dig them out.  Thanks to re-rolls both units lose a point of Courage in hard fighting. 


In the End Phase, the first White Shields unit flees.  The remaining Persians pass their Collapse tests.  

Turn 7: 
The Persians have the most Gaze, but even going first there is no way to stop the Perdiccan Epilektoi from leaving the board and breaking through.  The Perdiccans bid all of their Gaze with 2, and the Persians bid 3.  

The Persian Satrap and his bodyguards reduce the War Elephants to 1 Courage, but can't break them.  However, they avoid losing any further Courage and do not rout!  

In the center, the Phalanxes keep pushing on each other.  Both sides lose a point of Courage, but do not Waver.  The Skirmishers join in and cause the White Shields to be pushed back from the buildings.  The tide is turning against the Persians there as well.


Finally, the Thessalian Epilektoi of Perdiccas' Royal Army just barely prances off the board towards the Persian satrap's city gates.  

Conclusion
Decisive Perdiccan win!  In the history books, it took Perdiccas two battles to best the rebel Persian Satraps along the Persian Royal Road.  The same happened here as the Persians won the first battle, but Perdiccas returned and decisively beat the Rebels.  The losses were pretty lop-sided in this battle, 2 Macedonian Light Infantry to most of the Persian army.  Ouch! 

It is pretty obvious that I got too aggressive at the end of Turn 3.  The intent was to bog down the heavier and quicker Perdiccan troops into a tarpit of Skirmishers, that would delay the Macedonians long enough to keep them from being able to clear the board edge.  That was a huge mistake as the Skirmishers were quickly blown away and the Archers fled.  It would have been much better to keep them as a force in being and a threat.  Instead, I handed them to the Macedonians on a silver platter.  Woops!  

The War Elephants were tough to crack and just stuck around.  That tied up my reserves.  They were a good addition to the Perdiccan army.  The Skirmishers are also tough to weed out of difficult terrain, as it should be.  Missile fire was again surprisingly effective in weakening enemy units.  Finally, the reduced charge ranges of +3 MU helped make Evade and Pursue useful skills again.  Overall, a fun game despite me blowing it.   

Perdiccas cavalry unit was able to storm the gates of the rebel Satrap's city while his Royal Army mopped up the rest of the Persian army.  To the Persian troops, Perdiccas was merciful and allowed those useful to him to join his own army.  However, he was less than merciful to the Satrap.  His family was ritually tortured, as was the Satrap himself.  The cruel treatment was custom for the region, but Perdiccas' fellow Diadochi marked it out as a sign of Perdiccas' cruelty and "easternization".  It sowed the seeds for the coming break-up of the Diadochi as each decided to try and grab Alexander's Empire for themselves.  

That was in the future.  For now, the Royal Road had been re-opened.  Travel across Asia Minor had been restored.  Perdiccas and the Royal Army had been victorious.  Now, the elaborate funeral procession for Alexander could begin.  

Monday, May 25, 2020

Battle Report: Wars of the Republic- Anabasis of the Seleucids


Anabasis of the Seleucids

The Seleucid Empire was founded by the successor’s of Alexander the Great.  These successors fought a series of wars with each other for control of his empire.  Eventually, the Successors and their children were able to establish their own stable empires.  All though smaller than that of Alexander, they were regional power players. 

The Seleucid Empire covered much of the Middle East and Eastern parts of the known Ancient world.  They were a major player in the Hellenization of the Near East.  Their main power base was in Syria but their empire extended into the East and even came up against the Mauryan Empire of India. 

When Antiochus the III came to power, he went eastward and restored various vassal states back under Seleucid control.  This included Parthia and Greco-Bactria.  During this process, Antiochus defeated the leader of a Greco-Bactrian king named Euthydemus at the battle of Arius.  Interestingly, this man was also Greek and previously aligned with the Seleucids.

After the Battle of Arius, the Bactrians retreated back to their capital.  Antiochus III put the city under siege for three years before they came to a negotiated truce.   

Today’s battle will be using the Wars of the Republic rules, but again I am using the lists creatively to simulate other ancient combat to test what they can do.  Today will be the Seleucid successor list vs. the Lesser Satrapy list to represent the Bactrians.  We will be using a Scout the Area scenario to represent the advanced forces of both armies scouting out the geography. 

Forces

Seleucids
1 Heavy Cavalry
1 Bronze Shields- General
1 White Shields
1 Agema

Greco-Bactrians
1 Heavy Cavalry Cataphracts- General
1 Bronze Shields
2 Light Infantry
1 Archers

Seleucids will have 5 Commander’s Gaze, while the Bactrians will have 6

Mission
The Secure the Area scenario has 6 tokens scattered across the board, and is set-up by the defenders after terrain is set-up.  As a unit puts a token into their Zone of Control, they have scouted the terrain there and can put the token on their side of the board.  The side that uncovers the most tokens wins OR if they can force the enemy to collapse in 8 turns. 

Set-up
Today’s game is using 1 inch as an MU, and is being played on a 72 by 48 MU board.  

For terrain, we used the terrain placement rules straight from the rule book.  The Seleucids got to place terrain first.  In the center terrain on their side of the board a small wall was placed towards the left corner.  The Satrapy matched it on the opposite side with a grove of trees in the forward right corner.  This left the center a bit congested.  On the left corner in the Satrapy's side of the board the Seleucids placed a 1 level rocky hill in the center of it.  On the Satrapy's left flank grid space they placed another rocky, one level hill towards the front of it, again blocking up the center of the board.  The Seleucids placed a wall on their right flank grid space to act as a defensive location for the flank.  Finally, on the Seleucid left flank the Satrapy placed a small rock hill in the center of the grid space.  

The Exploration tokens were then placed in on these terrain pieces.  The battlefield was somewhat congested in the center of the board, and that would make capturing objectives there a bloody pushing match.  The Seleucid Phalanxes liked there chances there.


For Deployment, the Seleucids were the attackers and began to deploy first.  This was an alternate deployment process so the Defenders could react to where the Attackers were located.  Interestingly, the Seleucids decided to put their Phalanxes in the center, across from the enemy light infantry.  The Greco-Bactrian Phalanx and Archers were on the right, and facing the Agema.  The Cavalry forces were facing each other on the left flank.  Some interesting match-ups.  

Most of these two armies have miniatures EXCEPT the cataphracts are paper templates!  Boo!  Hiss!

Turn 1
Both sides collect their Commander's Gaze, and weigh their options.  The Seleucids gets 5 to the Greco-Bactrian 6.  The Seleucids opted to make their Phalanx unit their commander for extra resilience, while the Greco-Bactrians choose the Cataphracts for mobility and power.

The Greco-Bactrians choose to bid all of their Commander's Gaze to get initiative.  The Seleucids do not bid any, and decide to try to interrupt whenever they can.  However, none of the interrupts actual succeed, and the Greco-Bactrians move out undisturbed.  The Bronze Shields in Open Order move to the foot of the rock outcropping but can not claim the objective there yet.  The Cataphacts also fail to get to their objective as they are shy due to difficult terrain as well.  The middle troops move forward.


The Seleucids respond with the Heavy Cavalry able to reach their objective on the rocky hills.  The Center Phalanx formations march ahead.  The Agema stay in open order and make for the walls and their objective.

Objectives: Seleucids 1, Greco-Bactrians 0

Turn 2
Both sides pick up their Commander's Gaze and bid 2 for first go.  The roll-off has the Seleucids win.  The Agema rush forward and take a defensive position.


The Greco-Bactrians successfully interrupt.  The Bronze Shields secure their objective.


The Light Infantry move up supported by the Archers.  One unit uses Commander's gaze to Skirmish and grab an objective in the Grove.


The Seleucids interrupt successfully.  Now the White Shields go into open order and line up on the objective better as they approach.  The Bronze Shields also march ahead.


The Greco-Bactrians interrupt successfully and the Cataphracts secure their marker on the rocky hills.  The Seleucid Heavy cavalry moves forward as best they can, but judge that it is too early to change into a wedge formation or to successfully charge over the terrain.

Objectives: Seleucids 2, and Greco-Bactrians 3

Turn 3
Again, the Greco-Bactrians bid all their Commander's Gaze to go first.  They are gambling to grab the last objective and get a decisive lead by snagging the last objective.  Seleucids bid 2. 


The Greco-Bactrian plan backfires as the Light Infantry can not use Skirmisher to get over the walls to the objective.  They fall short of claiming it and are in front of the approaching White Shields.  The Archers give the Light Infantry some covering fire and reduce the White Shields 1 Courage due to being in Open Order.  However, the shouts of the Seleucid officers keep the native recruits steady.

The Light Infantry in the Grove stay put.  They are unable to move and shoot or Skirmish due to a lack of Commander's Gaze.  They are in no hurry to approach the Seleucid Bronze Shields closer.


The Greco-Bactrian Cataphracts fall back from their forward position to avoid an enemy charge, as they do not have enough Commander's Gaze to successsfully charge themselves.  They are trying to avoid the Seleucid Heavies getting the drop on them, and possibly get a flank charge on the White Shields.

Finally, the Greco-Bactrian Bronze Shields stumble off their rock pile, but they are still in Open Order.

The Seleucid commander waited patiently for the Greco-Bactrians to try and mitigate the coming battle before taking over initiative and getting ready to put the hurt on the upstarts.  The White Shields form up into Phalanx, and charge the enemy Light Infantry.  The Greco-Bactrian commander thinks for a few moments, and then decides to have the Archers support the Light Infantry.  Their reasoning seems sound as the White Shields have lost 1 Courage all ready, are a weaker unit, and the Greco-Bactrians will have the extra armor of being in cover.

Next, the Bronze Shields use Commander's Gaze to charge the Light Infantry in the Grove.  The Light Infantry can not try to Evade as they do not have any Commander's Gaze left!  However, they do have extra armor for being in Cover.  They might be able to hold out long enough for reinforcements to save them.... from..... somewhere.....

Melee:
The White Shields charge over the objective and reach over the old walls with their pikes towards the Light Infantry beyond.  There is a desperate struggle, with the Light Infantry supported by close range archer fire.  Both sides manage to reduce the enemy by 1 Courage.  Neither side seems willing to give ground or waver at this point.

The Seleucid Bronze Shields also charge into the Grove and a swirling battle erupts as terrain forces them into open order.  The battle is also fierce as the Pikes are hard to use amongst the trees, however the Phalanxes momentum drives the Light Infantry back 3 MU and causes 1 Courage loss for none in return.  The Light Infantry hold together and dig in for a long fight.


Objectives: Seleucids 3, Greco-Bactrians 3.  it know comes down to a traditional battle and who breaks first.   

Turn 4: 
Neither side has lost any units, so there is no change in Commander's Gaze tokens handed out.  The Seleucids bid 0 choosing to hold onto it for re-rolls in combat.  The Greco-Bactrians bid 1 so get to go first.

Despite going first, difficult terrain is hamstringing the Greco-bactrians ability to respond.  The Bronze Shields on the Greco-Bactrian Left are hung up on a rocky hill, and their large unit is having a tough time maneuvering off it.  They finally manage, and get into open ground.  The Cataphracts also have a similar problem.  The General decides that even with a charge, getting out of the rocky hills will not allow them to flank charge the Seleucid White Shields.  Instead, they again maneuver away and behind the melee for a better position.  The Greco-Bactrians have no more units to maneuver.

The Seleucids had managed to get their Heavy Cavalry out off terrain last turn.  They now form up into a Wedge and charge into the flank of the combat between the Greco-Bactrian Light Infantry and the White Shields.  The Melee phase is going to get rough.


The Agema hold their ground behind the wall, ready to throw Javelins at the Greco-Bactrian Bronze Shields or fight them off the edge of the wall if needed.

Melee:
The Greco-Bactrian player decides to complete the Melee in the Grove first, hoping to burn off some Seleucid re-rolls before the big battle at the wall.  Instead, the GB's use one of their re-rolls and both sides are reduced 1 Courage.  The Light Infantry starts to Waver as they are beginning to see that they can not win.  They are pushed back 1 inch this turn.


Now, the big battle at the Wall.  The Cavalry charge into the Flank is telling, as the Light Infantry is blasted down 3 Courage, to 1 remaining.  In addition, they are pushed back 3 MU from the wall and start to Waver.  They do not have enough Discipline to avoid Wavering.  In return, the White Shields also lose 1 Courage down to 2, but stay solid.


Objectives: Seleucids 3, Greco-Bactrians 3- The winner will be decided by who breaks first.

Turn 5: 
Both sides still have all their Units so they get their full Commander's Gaze, but the Greco-Bactrians look to be on the ropes for this battle.  Neither commander cares who goes first and save their Gaze for Re-rolls.  They were critical in the last turn.  The Seleucids win the roll-off.

The Agema uses skirmisher to get out from behind the wall and in front of the Greco-Bactrian Bronze Sheilds, they form a shield wall Phalanx and taunt them to come and get them.  The rest of the Seleucid army is tied up in Melee.


The Cataphracts realize that charging in and helping the melee at the wall is pointless and will only get them killed.  Instead, they wait to see who wins and then possibly pick off a weakened unit.  The Greco-Bactrian Pike Phalanx has a similar choice.  Do they support the wavering Light Infantry to try and turn the tide there, but at great risk, attack the Agema who are ready and at full Courage, or wait and try to pick off a weakened Seleucid Bronze Shield unit?

When you are a hammer, everything starts to look like a nail.  The Bronze Shields form up and charge the Agema, who promptly Counter-charge.  Looks like another slug fest is forming on the Greco-Bactrian left flank.


Melee: The Seleucids decide to start at the battle for the wall.  The Seleucids look like they have scored enough hits to rout the Light Infantry with their White Shields and decides to hold onto re-rolls.  However, the Greco-Bactrians throw in all three re-rolls to try and break the White Shields and the heavy Cavalry in one swoop!  However, they only score 3 hits, which is 1 short of what they needed!  The White Shields are reduced to 1 Courage and are Wavering!  The Greco-Bactrian Light Infantry and Archers are routed.  They are turned around until the End phase for Collapse and Morale tests.

In the Grove, The Seleucid Bronze Shields use their re-rolls to good effect and route the Greco-Bactrian Light Infantry, and lose another Courage themselves, but do not Waver.  The Greco-Bactrian center has been routed.

On the Greco-Bactrian left, the Agema and Bronze Shields clash together with a dull roar.  The two sides are both reduced 1 Courage and stand firmly.  Now the shoving match will begin.....

End:
The Cataphracts pass their Morale test from seeing the Light Infantry flee.  The Bronze Shields and Cataphracts manage to pass their Collapse tests.... for now.

Turn 6:
The Seleucids collect 5 Commander's Gaze to the Greco-Bactrians 3.  The Seleucids bid 2 to go first.  The Greco-Bactrians hold onto theirs for re-rolls.  Looks like we might finally get that cavalry engagement that was being set-up all game!

The Seleucids form wedge, and charge.  The Cataphracts counter-charge.  The two meet in the plains and a fierce battle erupts.  Meanwhile, the Bronze Shields stay in Open Order, turn, and charge the Greco-Bactrian Bronze Shields in the flank to help finish off that Melee.


The White Shields move back behind the wall for cover.  They stay wavering and at 1 Courage as all the Seleucid Commander's Gaze has been spent.

Melee:
The Cataphracts prove their mettle as they smash the Seleucid Heavy Cavalry.  They are reduced 3 Courage, while the Cataphracts lose only 1.  The Seleucids start to Waver and are pushed back 1 inch. 

Even with the help of the Bronze Shields, the Agema start to lose ground to the Greco-Bactrian Bronze Shields.  They lose 2 Courage, reducing them to 2 while the Greco-Bactrians lose only 1 down to 3.  However, neither side starts to waver and pushed back into the walled area up to 3 inches.


Turn 7: 
The two forces get their Commander's Gaze, but everyone is in combat except the White Shields.  Neither side bids any Commander's Gaze.  The Greco-Bactrians go first via the roll-off.

They have no movement, and hold their Commander's Gaze for Re-rolls.  The Seleucids decide to use two Commander's Gaze to remove the Wavering from the White Shields and Harangue them up 1 Courage point.  This makes them 2 Courage.  They stay huddled behind their wall.

Melee:
The Greco-Bactrian Player starts with the Cataphracts, because a win there, might be good enough to cause a Collapse or open the road to the weakened White Shields in the final turn.  Re-rolls again play a key part in the battle, as they put both sides over the top to cause damage.  The Cataphracts are reduced a further 1 Courage to 3 total and avoid Wavering.  The Seleucid Heavy cavalry is routed from the field!  This will force some Discipline Checks in the End Phase.

Over on the Greco-Bactrian left, the push continued.  The pushing match continues as both sides are reduced 1 Courage.  Both sides start to Waver from the Brutal battle.  The Agema has 1 Courage, while the Bronze Shields have 2!  This will be a close battle.

End:
The White Shields pass their Wavering check as cavalry men stream but their position in a rout.  Being behind the wall gives them confidence.  The rest of the Seleucid force also passes their Collapse test.

Turn 8: Final Turn
This is it.  This is a close battle.  The Seleucids now have 4 Commander's Gaze, while the Greco-Bactrians have 3.  The White Shields need to get formed into Phalanx so the Seleucids bid 1 Gaze to 0.  They win initiative.

The Seleucid player forms the White Shields into Phalanx behind the wall, and spends 1 more Commander's Gaze to Harangue them once more for battle.  They are now Courage 3.  The Seleucids have no other movement.

The Greco-Bactrian Cataphracts predictably form Wedge and Charge into the White Shields.

Melee:
The Seleucids decide to start with the White Shields and the Cataphracts Melee.  The charge takes the White Shields down 1 Courage.  The Cataphracts lose 2 Courage and are reduced to 1 left.  Neither side Wavers.  The native phalangites held!

On the left, the two sides continue to smash against each other, swinging swords, slashing with spear, and pushing with their pikes.  Both sides are routed in the final push.... including the Seleucid general! 

End:
The White Shields see the Seleucid commander fleeing and they Collapse.  The Greco-Bactrian Commander holds his Cataphracts steady.  The added discipline of these troops allow the Greco-Bactrians to barley win the skirmish. 

Conclusion: 
Wow, that was a wild ride that went down to the last dice rolls.  Isn't that the way it is supposed to be?  Discipline is what won the day, just like an Ancient battle!

So, I got to try out a few different rules in this battle such as....

1. Using Commander's Gaze to Harangue a units' Courage
2. Supporting Troops going on the side (Archers and Light Infantry) rather than behind
3. Fighting in difficult terrain and pushing through and around it
4. New Scenario

I am not entirely satisfied with the scenario, as both sides ended up just being in a standard battle by Turn 4.  However, it did force us to deploy differently and break up the usual way we do things and that forced the eventual battle to turn out very different.

Unit wise, the Cataphracts did an amazing job against the enemy cavalry, and then faltered in a decisive battle.  Their lack of maneuverability was a disadvantage early but once they got stuck in.  They did just fine.  Their improved Discipline is what won me the match!

I was a bit surprised that the Light Infantry got spanked by the Bronze Shields in the Grove.  I expected that to be a tougher fight.  I also expected the Agema to do a bit better, especially with support from Open Order Bronze Shields, but it ended up backfiring spectacularly as the Seleucids fell into their own trap on the left flank!  That probably cost them the battle.

Overall, everything seemed to work as intended.  Next time, I need to get more Romans on the table and see how they fare.


You can follow Blood and Spectacles Facebook page for more fun: https://m.facebook.com/pg/BloodandSpectacles/posts/?ref=bookmarks&mt_nav=0

Or our website:

Or our Messageboard:

Or our Wargames Vault Page:


Monday, May 4, 2020

Men of Bronze: Armies in the Field- Spartans, Corinthians, Macedonians

I have been slowly working on a few armies for Men of Bronze over the last 18 months.  My armies are all 28mm Victrix models based on 25mm bases.  Some of the bases are from Victrix while others are just washers.  My main paints for this project have been Army Painter, with a spattering of Big Box retail craft paints and brushes.

The armies were based on the sample armies found in the main Men of Bronze rule book.  Therefore, they are designed to fit standard point games, and use 1 inch as a base width.  Of course, the game itself is base and model agnostic, so you can do something totally different with your armies. 

First up is the Sample Spartan army from the book.  I think most people are familiar with the Spartans.  Hailing from Laconia they had a rigid and structured caste system.  Spartiates were the citizen soldiers of the city-state.  They were raised from a young age to be Hoplites, and many considered them the best soldiers of the ancient world.  The Spartiate hierarchy was held up by a slave caste called Helots and a network of nearby villages and towns called the Perikoi.  Helots were slaves while the Perikoi were free men.   

My Spartan army is composed of the following units:

2 Elite Hoplites- Spartiates
1 Drilled Hoplites- Perikoi
2 Psiloi- Helot Javelinmen


In the picture, the Perikoi are on the left, then the Spartiates with Psiloi behind them.  This army represents a more elite focused army where the Hoplites need to do all the heavy lifting of combat.  However, it is less mobile and less flexible as there are few Arete Points generated to spread around.

Next up is the Corinthian Army.  Corinth was a rival city-state to Sparta on the isthmus of Corinth.  Access to the Peloponnese and Lacodamia over land was over the isthmus.  Therefore, the area of Corinth frequently saw conflict with Sparta.  The most well know was probably the Corinthian War.  However, Corinth was also a well known Naval power and was often a rival to Athens as well.

The Corinthian Army is composed of the following units and match the sample army list in the book:

2 Drilled Hoplites- Corinthian citizen-soldiers
1 Militia Hoplites- Allied towns and villages
1 Archers- Naval troops
1 Peltast- Mercenaries
Psiloi- Low status citizens


From left to right we have the Peltasts, Drilled Hoplites, Militia Hoplites, Drilled Hoplites, and Archers.  The Psiloi are in front screening the force.  This force has more range and light troops to secure outlying objectives and to support the core of Drilled Hoplites.  The Militia Hoplites are good at supporting or driving off lighter enemy troops.  They are a more flexible force on the table.       

The Macedonians were based to the North of what is commonly considered "Classical Ancient Greece".  Many of the City-state based Greeks thought of the Macedonians as semi-barbarous.  The Macedonians had their own royal line and tended to be a Monarchy supported by a landed nobility.  Typically, their are two major military forms for Macedonia.  The first if often refereed to as Pre-Reform Macedonia.  The army lists and sample army in the book are from the Reformed Macedonian army based on the changes made by Phillip II.  These changes allowed him to grow in power and eventually subjugate much of mainland Greece.  This army was also used successfully by his son Alexander the Great to conqueror the Persian Empire and beyond.

The Men of Bronze rules have two lists that I tried to build my army for.  The first was in the Sample army list section.  It included the following units:

2 Macedonian Phalanxes- Professional soldiers
1 Light Hoplites- The Foot Companions
2 Peltasts- Mercenaries
1 Psiloi- Peasant militia     


You can see this list here.  You can see the Peltasts as a forward screen, then the two Macedonian style phalanxes, the light hoplites on the left, and then the Psiloi in the back.  This force is a hard hitting force, with enough light troops to keep the enemy lights at a distance, and handle rough terrain.  It is relatively flexible with a strong fighting core.

In addition to this list, the rules also have a historical scenario featuring the Macedonians.  The Battle of Chaeronae saw the Macedonians crush the last resistance of Mainland Greece and bring them under Macedonain control.  The list for his army in the booklet is:

2 Macedonian Phalanxes- Professional soldiers
1 Light Hoplites- Foot Companions/Hypaspists
1 Psiloi- Peasant militia
1 Heavy Cavalry- The Noble Companion Cavalry


This is the army that was used in the IF battle report.  It has few light troops and less flexibility, but adds another powerful striking arm that allows for Alexander's favorite hammer and anvil tactics.  However, this army has bigger challenges with rough terrain and Arete Points.

You can expect to see these guys showing up on the blog, Facebook, and Instagram a lot over the next few months.


You can follow Blood and Spectacles Facebook page for more fun: https://m.facebook.com/pg/BloodandSpectacles/posts/?ref=bookmarks&mt_nav=0

Or our website:

Or our Messageboard:

Or our Wargames Vault Page: