Monday, November 21, 2022

On The Painting Desk- Ferals for Under the Martian Yoke


I have been working on various projects to help support the releases of my own games on the Wargame Vault.  Today, I am focusing on creating adversaries for my game Under the Martian Yoke.  It is a survival horror game set after the Martian Invasion of the Orson Wells' broadcast.  The game is designed to be a solo/co-op/versus experience as the survivor's of the Martian attack struggle to escape Martian territory and to freedom.  


The game has a number of adversaries that survivor's may encounter.  The biggest and most dangerous are the Martian Tripods of various types.  Thankfully, I have a variety of Tripod models from the now defunct All Quiet on the Martian Front.  However, there are a variety of other tripod models available on the market as well.  

In addition to the the Martian Tripods, there are smaller foes as well.  That includes various drones, animated human corpses, modified animals, and even wild, feral dogs to face off against.  I have a few drones from Alien Dungeon and plenty of Irish Wolfhounds thanks to my Dark Age Irish army from Wargames Atlantic.   

Last time, you may recall that I was working on building up my adversaries, and created various cadaver troops to oppose the human survivors.  These foes are re-animated human corpses operating on Martian technology.  These undead troopers roam the Martian control zones to track down and kill lone or small groups of humans.  Worse, they can flush out humans for the Martians to capture for their own nefarious purposes later.  

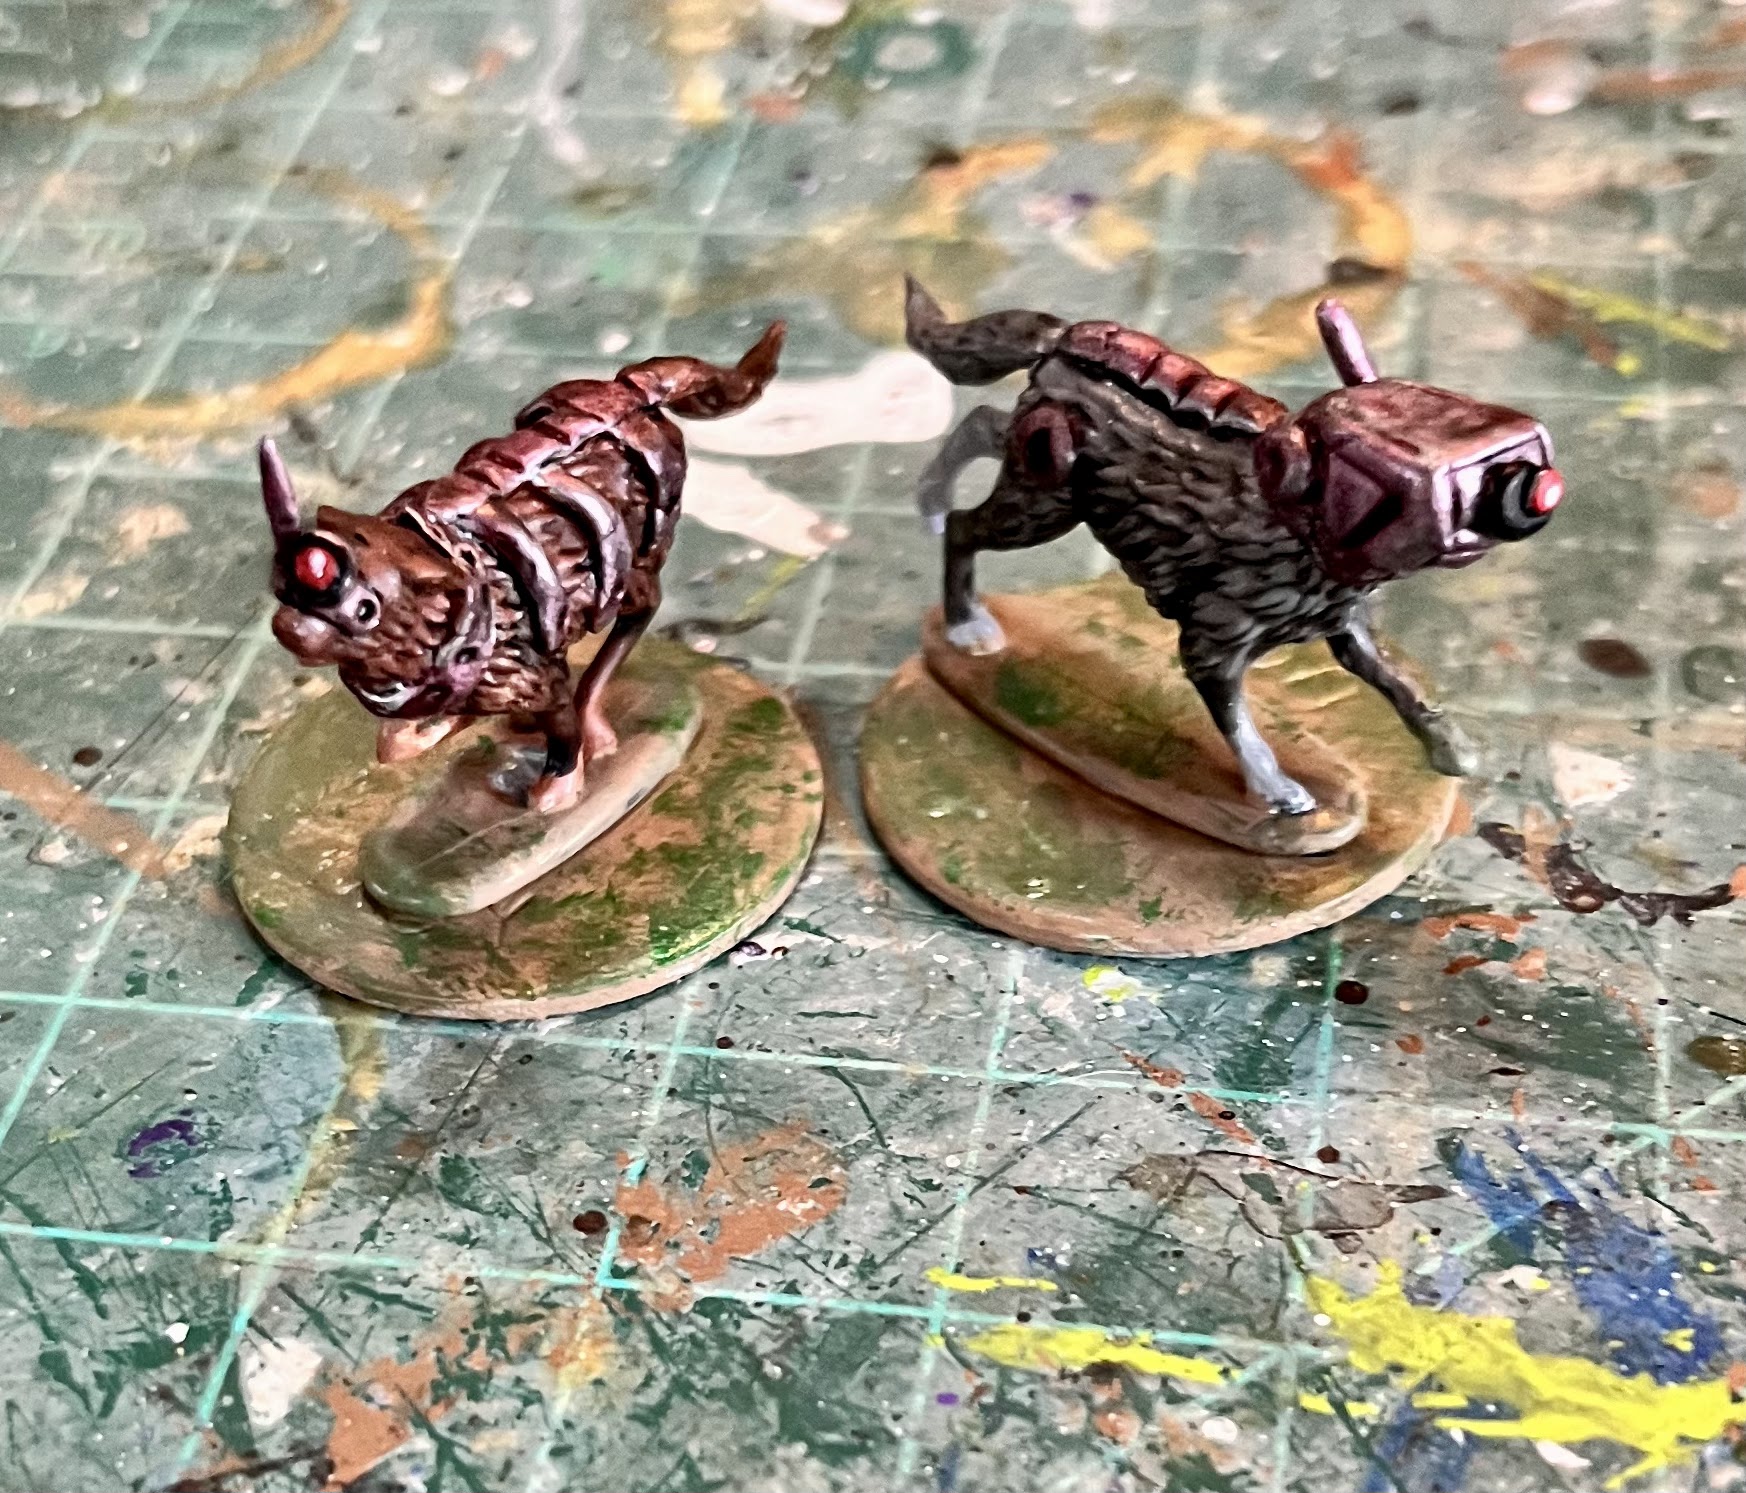
In addition to reanimated humans, the Martians also reanimated various animals using their advanced, Martian technology.  It is unclear if the Martians actually know the difference between humans and animals, and if they even care.  These re-animated animals are known as Ferals.  They will viscously attack any humans they come across! 

You may recall that I made two Ferals out of Irish Wolfhounds from the Wargames Atlantic Dark Age Irish kit.  Plus, I also use these as wild dogs.  With some green stuff, and paint they ended up looking like this....


 My initial plan to expand my Feral collection was to get a box of plastic barnyard animals and convert them in a similar manner.  However, a fellow hobbyist was taken by the idea of barnyard astro-zombies and decided to design some for 3D printing!  You can find them on CookAndrewB's Thingiverse page here.  There is a ton of cool stuff, so check it out.  

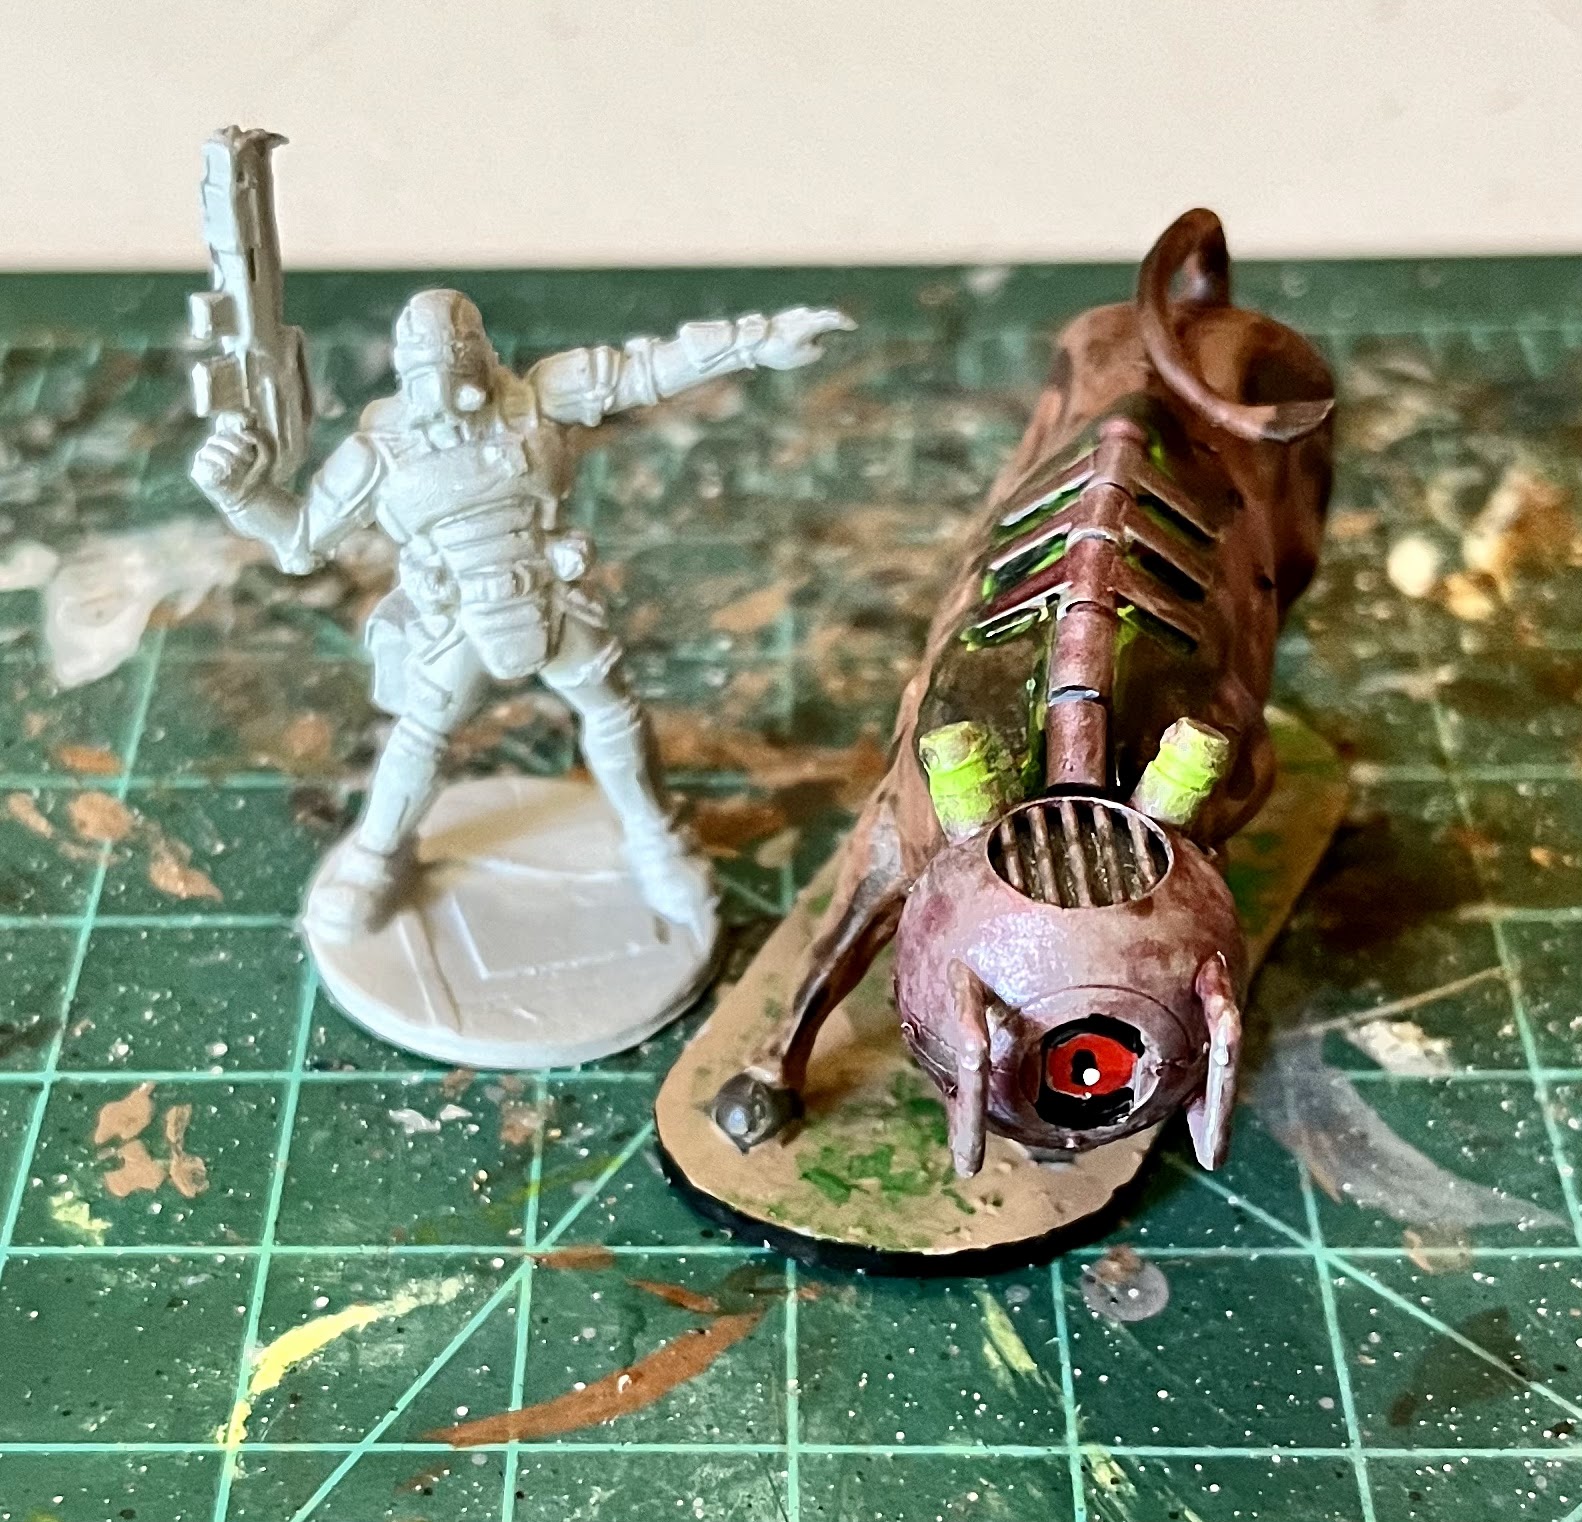
A Feral bull that was 3D printed

So armed, and after a bit of trial and error, I was able to print 1 Cow, 2 Goats, and 4 chickens.  Suffice to say, I am not very good at 3D printing yet so this project was a huge learning curve for me.  However, at the end of it, I feel like I have a good idea of printing projects going forward.  I look forward to continuing to press my boundaries here.  

From there, I set about painting up the Ferals.  This time, I was able to base coat them with grey seer primer.  Then, I painted them various shades of brown.  The metal was plate mail silver with a red ink wash.  Then, the traditional Martian eye of red, white, and black.  Then, I gave it all a nice light tone wash to finish it up.  Here is what they ended up looking like.  


The bases I just painted brown with a few dabs of green here and there.  Nothing fancy.  Then, a black ring to help set them off. 

I took a lot fewer pictures of the Goats and Chickens, but here is an action shot of the "Barnyard of Martian Terrors"!  With these new additions, my Cadaver troops, the Drones, and the Alien Dungeon Tripods I have enough foes to keep going with some great games and a plethora of opponents.   


You can find the rules for Under the Martian Yoke on the Blood and Spectacles Wargame Vault page.  

Finally, I also spent some time painting up a team of "Knights" to help me keep play testing Darkest Knights.  These are all Reaper Bones (White) models that I then painted with various Armypainter paints.  Two are from the Savage Worlds lines, and two are from the Chronopia line, I think.   

A friend of mine, The Painted Dwarf; showed me that GW's grey seer primer does a great job prepping Reaper Bones White models.  I had trouble getting good undercoats on them in the past, but the GW primer did the trick. This made them MUCH easier to paint. 


 I also got a bunch of portals and enemies from the Hellboy board game to use as Shadowpoints and potential enemies.  I still need to get those painted up, but I think you can expect to see some more playtesting on that system soon too.  

Onward! 


Become a Patron and get access to all the cool stuff, a peak behind the curtain of Blood and Spectacles, and early-access to playtest games!  


You can follow Blood and Spectacles Facebook page or Instagram for more fun! 

Check out the latest publications and contact me at our Blood and Spectacles website

Or purchase all out games at the Blood and Spectacles Publishing Wargames Vault Page!       


Monday, November 14, 2022

Battle Report: Men of Bronze - Solo-Play(?)


As many of you know, I have been working on a campaign booklet for Men of Bronze focused on the Persian forces and the Ionian Revolt.  As part of the book I have been working on some alternate scenarios including; sea battles, sieges, and solo/co-op play rules for the game.  Today will be a dry run of the Solo-play rules.  It is important to note, that the solo-play rules are not intended to replicate an actual opponent, but are designed to keep the player on their toes and dealing with mounting difficulties in completing their objective. 

The Spartan scouts returned to camp and let the Stratego know about the enemies approach.  The Spartans had camped up in the hills, at the edge of the river.  It seemed a good place, easy to defend, and accessible to water.  Knowing that the enemy was approaching, meant that the Spartans themselves needed to prepare themselves for battle.  They would sally out of the valley, and face the approaching foes on the river valley where they could divide and destroy them .  

Forces: 
I decided to use my Spartan army for this battle.  

2 Elite Hoplites  
1 Drilled Hoplite
2 Psiloi


Mission:
I followed the rules found in the main rulebook for choosing a scenario and complications.  We rolled up Hungry and Thirsty, but all the Spartan units passed their check.  Essentially, there would be no further impact from the Hungry and Thirsty complication.  

The scenario was going to be a standard decisive battle.  Again this was essentially straight from the rulebook as well.  This battle will last 6 turns or until the Spartan collapse.

Set-up:
The solo rules have slightly modified rules for setting up terrain.  The side that I deploy on use the basic rules found in the Men of Bronze rulebook.  For that, I got a hill, a spring/pond/swamp, and another hill.  On the other side, there are slightly modified and randomized terrain set-up and placement.  However, it ended up being a Open terrain, spring/pond/swamp, and open terrain.  Instead of the spring I decided to swap it out for a river across the board with a ford in the middle.  The river was Dangerous, with the ford being difficult terrain. 

We then followed deployment per the new Solo rules.  Again, it was slightly modified.  I placed my first unit of Psiloi by the hill on the Spartan right on the opposite side of the river.  Then, a token was randomly deployed for the enemy, but not a unit.  We kept taking turns deploying until the enemy forces had 1 token deployed more than I had units.  

My deployment was Psiloi, river, Elites, Drilled, Elites, and Psiloi on the hill.  


Across from us on the left was a single token in the center, two in the middle grid coming up the center, and three on the left grid square deployed forward.  


Turn 1: 
The Enemy force will win initiative unless I big 1 Arete point, which I decide to do.  The opponent then rolls a d6, and that is how many units I can move before it will try to interrupt.  

I move my right flank Psiloi forward, using a Arete Point to skirmish.  I am close to getting the markers into Line-of-sight, but can not reveal them just yet.  The Psiloi on the other side also move up onto the hill on that side.  Then, my Spartiates start to march forward.  

Before the Perikoi can move forward, the Enemy attempts to interrupt but fails.  I finish moving up.

With all of my units moved.  My make-believe foe and rival moves all their tokens forward.  This reveals a Drilled Hoplite unit in phalanx approaching both hills on my flanks.  The one on my right is also supported by a Psiloi unit.  


The tokens I just revealed are recycled back to the baseline in a random location as they will be follow-on forces later.    


Turn 2: 
As the Spartans, I again decided to bid 1 Arete point to go first.  I started by moving my Perikoi drilled hoplites forward and formed into Phalanx, and they revealed two units of the enemy approaching me.  One was a unit of archers, and oddly a unit of Militia Hoplites was coming down the rive in Phalanx formation!  The enemy tried to seize the initiative, but failed!  Next, I moved up my Spartiates on the right flank near the hill, and also put them in Phalanx. 


This time, the enemy managed to seize the initiative and started to move forward.  The started on my left flank and moved across the board with revealed units first.  The Drilled Hoplites there pressed tot he base of the hill, still in formation.  The Militia Hoplites moved up into cover, still in the river.  So far, they had not lost any courage due to the terrain.  The Archers were not in range to shoot, so moved forward as well.  Finally, on the right side the Drilled Hoplites broke ranks as they started climbing the hill there.  

My Spartan Psiloi used Arete to seize the initiative and throw their Javelins with the last Arete point.  Despite being out of formation, the Drilled Hoplite shrugged it off.  The Psiloi fell back, but not very far as they did not have the Arete to skirmish.  


On the left flank, my psiloi also fell back and moved towards the river, looking to cross when they had more Arete points and to avoid the incoming Drilled Hoplites.  The last Elite Hoplite unit moved up towards the ford, but were not in formation yet! 

With the last unit moved, the Enemy took over again.  The last Psiloi unit moved forward to the base of the hill on the right.  Then, from left to right all the remaining "blips" moved forward.  Looking at the force arrayed against me, perhaps recycling blips was a tad too many foes?  

Turn 3: 
I again decide to use an Arete Point to go first.  I decide to get aggressive, and my Perikoi charge into the enemy archers!  This triggers the Militia Hoplites in the river, who counter-charge in to support the Archers.  The Perikoi have 8 attack dice vs the enemy 7!  However, since the primary unit was archers, the Perikoi easily blast through the enemy forces with the loss of 1 courage.  

The enemy forces are turned around, and this puts them in a position to reveal two new enemy units, which are more Militia Hoplites in Phalanx, and a unit of Greek cavalry.  


I then move my Elite Spartiates to the ford, and form Phalanx.  The Enemy steals the initiative from me at this point.  They begin by activating revealed units on my left.  The Drilled Hoplites clamber up the hill after the Psiloi.  The Cavalry and newly arrived Militia hoplites move forward.  

The Drilled Hoplites on the right hill start to move to attack the Spatraites at the foot, but they are far too slow.  The enemy Psiloi though easily clamber up on the hill, and toss Javelins at the Spartan Psiloi.  The Spartans lose 1 Courage.  

As additional follow-on forces begin to move up, a Peltast unit is revealed moving towards the ford.  In addition, on the far right, a unit of slingers is revealed nearing the hill.

Play reverts to me, as I decided not to interrupt.  I have 3 Arete left.  I spend one so the Psiloi on the left fall back to safety across the river with a skirmish move.  The ones on the right charge at the enemy Psiloi, who try to evade.  It is not enough, and the Enemy Psiloi and Drilled Hoplites get pulled into the fight! I roll 4 dice, and so does the enemy.  I get three hits, and use my last Arete point to re-roll.  It is enough to route the enemy Psiloi and Drilled Hoplite!  In return, I take 2 courage loss, and am reduced to 1.  However, I do not waver! 


With my flank now secured, I move up my last Spartiate unit.  

End: 
I remove 4 enemy units from the board.  This triggers a several wavering tests.  The Militia Phalanx and Cavalry begin to waver! 

Turn 4:
I again decide to hold the initiative by spending a precious Arete Point.  

My Psiloi on the right throw their Javelins at the Slingers, but fall just short.   Disappointed, I have the Elite Spartiates on my right charge the wavering Militia Hoplites, and the wavering cavalry snaps to their flank in support.  With 10 attack dice, I have a terrible roll and need to use 2 Arete Points to get 1 hit on the Enemy unit.  However, they push back the enemy far enough to reveal another unit of cavalry that immediately snaps into the melee!   


The Perikoi see  that the decisive action is swirling in front of them with the Spartiates and cavalry fighting up close.  They use the last two Arete points to break formation, re-align, form up and charge in.  The attack drives home, and causes the Militia to be reduced down to 1 Courage, with no loss in return.  However, the Militia holds on by passing their Wavering check.  


The last Elite Spartiate loses formation as they begin to move across the ford.  The left Psiloi follow along with them.  

Play turns over to the Enemy Greeks.  They always begin on their right (my left) and move across from there.  Drilled Hoplites who have successfully taken the hill, turn and begin the slow march towards the ford.  The Peltasts charge into the Spartans in the Ford, and catch them flat footed.  Since they all ready chose to move, they can not fight back.  However, thanks to the terrain, the Spartiates shrug off the attack.  

This leads to the Slingers on the right, who fire at the Psiloi on the hill and in cover. It is enough, and the Spartan forces there are routed!  


After all the revealed enemy units have gone, the blips move next.  A quick check shows that on of the blips on the Spartan right is revealed to be a Drilled Hoplite unit in Phalanx.  This causes another blip to be removed and recycled on that side of the board. The Spartans really need to shut that entry point down! 

End:
My Spartan Psiloi flee the battle, but no one is around to see it.  They are not enough points to trigger any Collapse tests.  Thankfully.  

Turn 5:
I eagerly pay the 1 arete point to go first.  I need to clean up the center of the board fast!  I will have drilled hoplites coming onto my flank very soon.  Looks like the enemy will let me activate all my units before trying to interrupt this turn.  That is a relief! 

My remaining Psiloi are in a position to support my Elite Phalanx in the ford, however I instead decide to have them start going across the back of my lines to help on my collapsed right flank.  Maybe next turn they will be in a position to take some of the heat off.  

Next, I decide to resolve the huge melee in the center of the board with my Perikoi and Spartiates fighting two units of cavalry and some Militia Hoplites.  The wavering status of the enemy makes a big difference as the Perikoi are able to route the enemy with no losses of their own.  The pushback is strong enough to reveal the last two units on the right are another Drilled hoplite unit and an archer unit.  

In the Ford, the Elite Spartans manage to push back the Peltasts out of the river, but not enough for them to cross.  With the use of all the Spartan Arete points, they reduce the enemy to 2 Courage, but they do not start to waver.  They suffer no losses.  This also reveals the next enemy troops on their right, more peltasts.  It also recycles another blip! 


With the Spartan effort spent, play turns over to the Enemy.  

The Drilled Hoplites finally get off the hill, and form phalanx at its base.  The new Peltasts charge in to help their buddies at the Ford, and cause the Spartiates to lose 1 Courage from the unexpected ferocity of the enemy counter-attack.   

On the other flank, the newly arrived Enemy forces reform up on the Spartan flank and prepare to attack next turn.  However, they will be seeing a lot of their comrades fleeing in the End phase.  The last blip moves forward.
 

End: The Enemy Militia Hoplites, and two Cavalry units flee the field in full view of much of the Enemy army on my right flank.  However, they all pass their Discipline tests and stay firm.  

Turn 6- Final Turn
Well, I pretty much have to spend the Arete Point to seize the initiative or my goose is cooked. I do, leaving myself with only 3.  I have to use 1 in order to reshuffle my Spartans that are exposed in the center.  I then use another to charge.  The enemy is close, so they counter-charge with two units snapping into support.  Another huge melee kicks off!  A terrible roll gives the Spartiates 0 hits.  The counter-attack.  It sends the Spartans reeling back 3 MU and down to 2 Courage!  They also start to Waver! Ouch! 

The Enemy also tries to seize the Initiative! Thankfully, they fail!  I decide to countermand the Psiloi's previous orders and they rush back and begin to support their allies in the ford.  I use my last Arete Point so they can charge in to help.  This is the difference and the Peltasts are pushed out of the ford and routed! 


The enemy again tries to steal the Initiative, and succeeds this time.  The Drilled Hoplites at the foot of the hill near the Ford charge into the flank of the ongoing rout.  This is the last turn, and they will be routed in the End phase, but they are going to try to route the Spartans in the process.  Normally, the AI has to wait until the rout is over, but I made an exception for drama reasons!  As the player, I can do that!  The attack causes a momentary pause in the pursuit, and causes the Spartans to lose 1 Courage.  However, it is not enough not stop the rout.  

On the opposite flank, the slingers attack the exposed Spartans and pepper them with sling stones.  They also lose 1 Courage, and the Perikoi start to Waver from the attack! 

The last blip on my left moves up and is revealed to be Psiloi. 

End: 
The enemy forces on my left flank rout away.  The Psiloi see it, but do not waver.  


Conclusion: 
With that, the Enemy pipers and trumpeters sounded the retreat.  The day was waning, and the Greeks needed to withdraw with enough time to gather and mourn their dead, and allow the Spartans time to erect their trophy.  The Spartan forces were battered and exhausted, but they had held the field.  

Wow, I think I used just about every non-Macedonian Phalanx unit I had for this one.  I even had to dive into the Macedonians for some stand-in Hypaspists and Heavy Cavalry for Militia and Cavalry units respectively.  I guess I have an excuse to paint up some more regular Hoplites now, and a reason for why my Persian force is going to be so large!  

Well, it was nothing like a "real" game of Men of Bronze.  The AI was making decision that an experienced player of the game would not make.  The biggest example was when the Drilled Hoplites kept trying to climb hills, and supported a Psiloi unit.  That helped clear a flank of pressure early.  Their were also strange combinations of units and deployments players would not make.  

The Spartans plowed through a lot of enemy units, and only lost one.  However, if you look at the end table I started with 5 units but at the end; lost 1 unit, had 2 wavering, and had lost 10 of my starting 23 Courage points.  I was on the breaking point.      

However, the goal is not for a solo-game of Men of Bronze to play like a game against an opponent.  It is designed to keep the player of the game on their toes and surprised on the battlefield.  That was true for me.  I kept having to make decisions through out the game of how I was going to counter enemy positions, if I was going to push to seal of deployment zones, who was going to support and where, and how to get the best unit vs. unit combinations.  

The game taught me a lot, and I made I jotted down a few notes to update the rules and streamline game play.  You can expect the solo-play rules to come out with the release of the Ionian Revolt supplement on the Blood and Spectacles Wargame Vault page.  You might want to keep your eyes peeled.  

Onward! 


Become a Patron and get access to all the cool stuff, a peak behind the curtain of Blood and Spectacles, and early-access to playtest games!  


You can follow Blood and Spectacles Facebook page or Instagram for more fun! 

Check out the latest publications and contact me at our Blood and Spectacles website

Or purchase all out games at the Blood and Spectacles Publishing Wargames Vault Page!          


Monday, November 7, 2022

On The Painting Desk- Calling up the Persian Troops


One of my long running goals for 2022 was to release a supplement for the Ionian Revolt for Men of Bronze onto the Wargame Vault.  I have a similar supplement called Hercules Abroad that greatly expands the Greek world across the Mediterranean and adds more armies and supplements.  I also have a similar supplement for Wars of the Republic called Revolt! that focuses on the 3rd Servile War.  

Before Men of Bronze was released, I wrote up an article and campaign to play the Ionian Revolt for Wargames, Soldiers, and Sailors.  However, due to a lack of a Persian army for photographing, the article was not published.  Instead, I did a piece on the Battle of Delium instead.  However, I still had my notes and what I wrote for the Ionian Revolt.  

It was these notes and this article that would form the basis of the Ionian Revolt supplement.  In addition, the Ionian Revolt seemed like an ideal venue to take a closer look at the Persian Empire lines-of-battle, and revisit some of their non-Greek foes as well.  

However, in order for any of that to happen I needed to get over one big hurdle.  I needed a Persian Army! This had thwarted my initial article and at the time, there were not any great plastic models available.

You may recall that I had initially put together 40 Persians using the Unarmored and Armored kits from Victrix Unlimited.  I went ahead and base-coated them all white, and started painting.  Normally, I batch paint all at once, and I started the process with these 40.  However, the armored unit was so different from the others, that I found myself focusing on them and ended up completing a unit of Persian Immortals first!  That is not normally how I do things! 

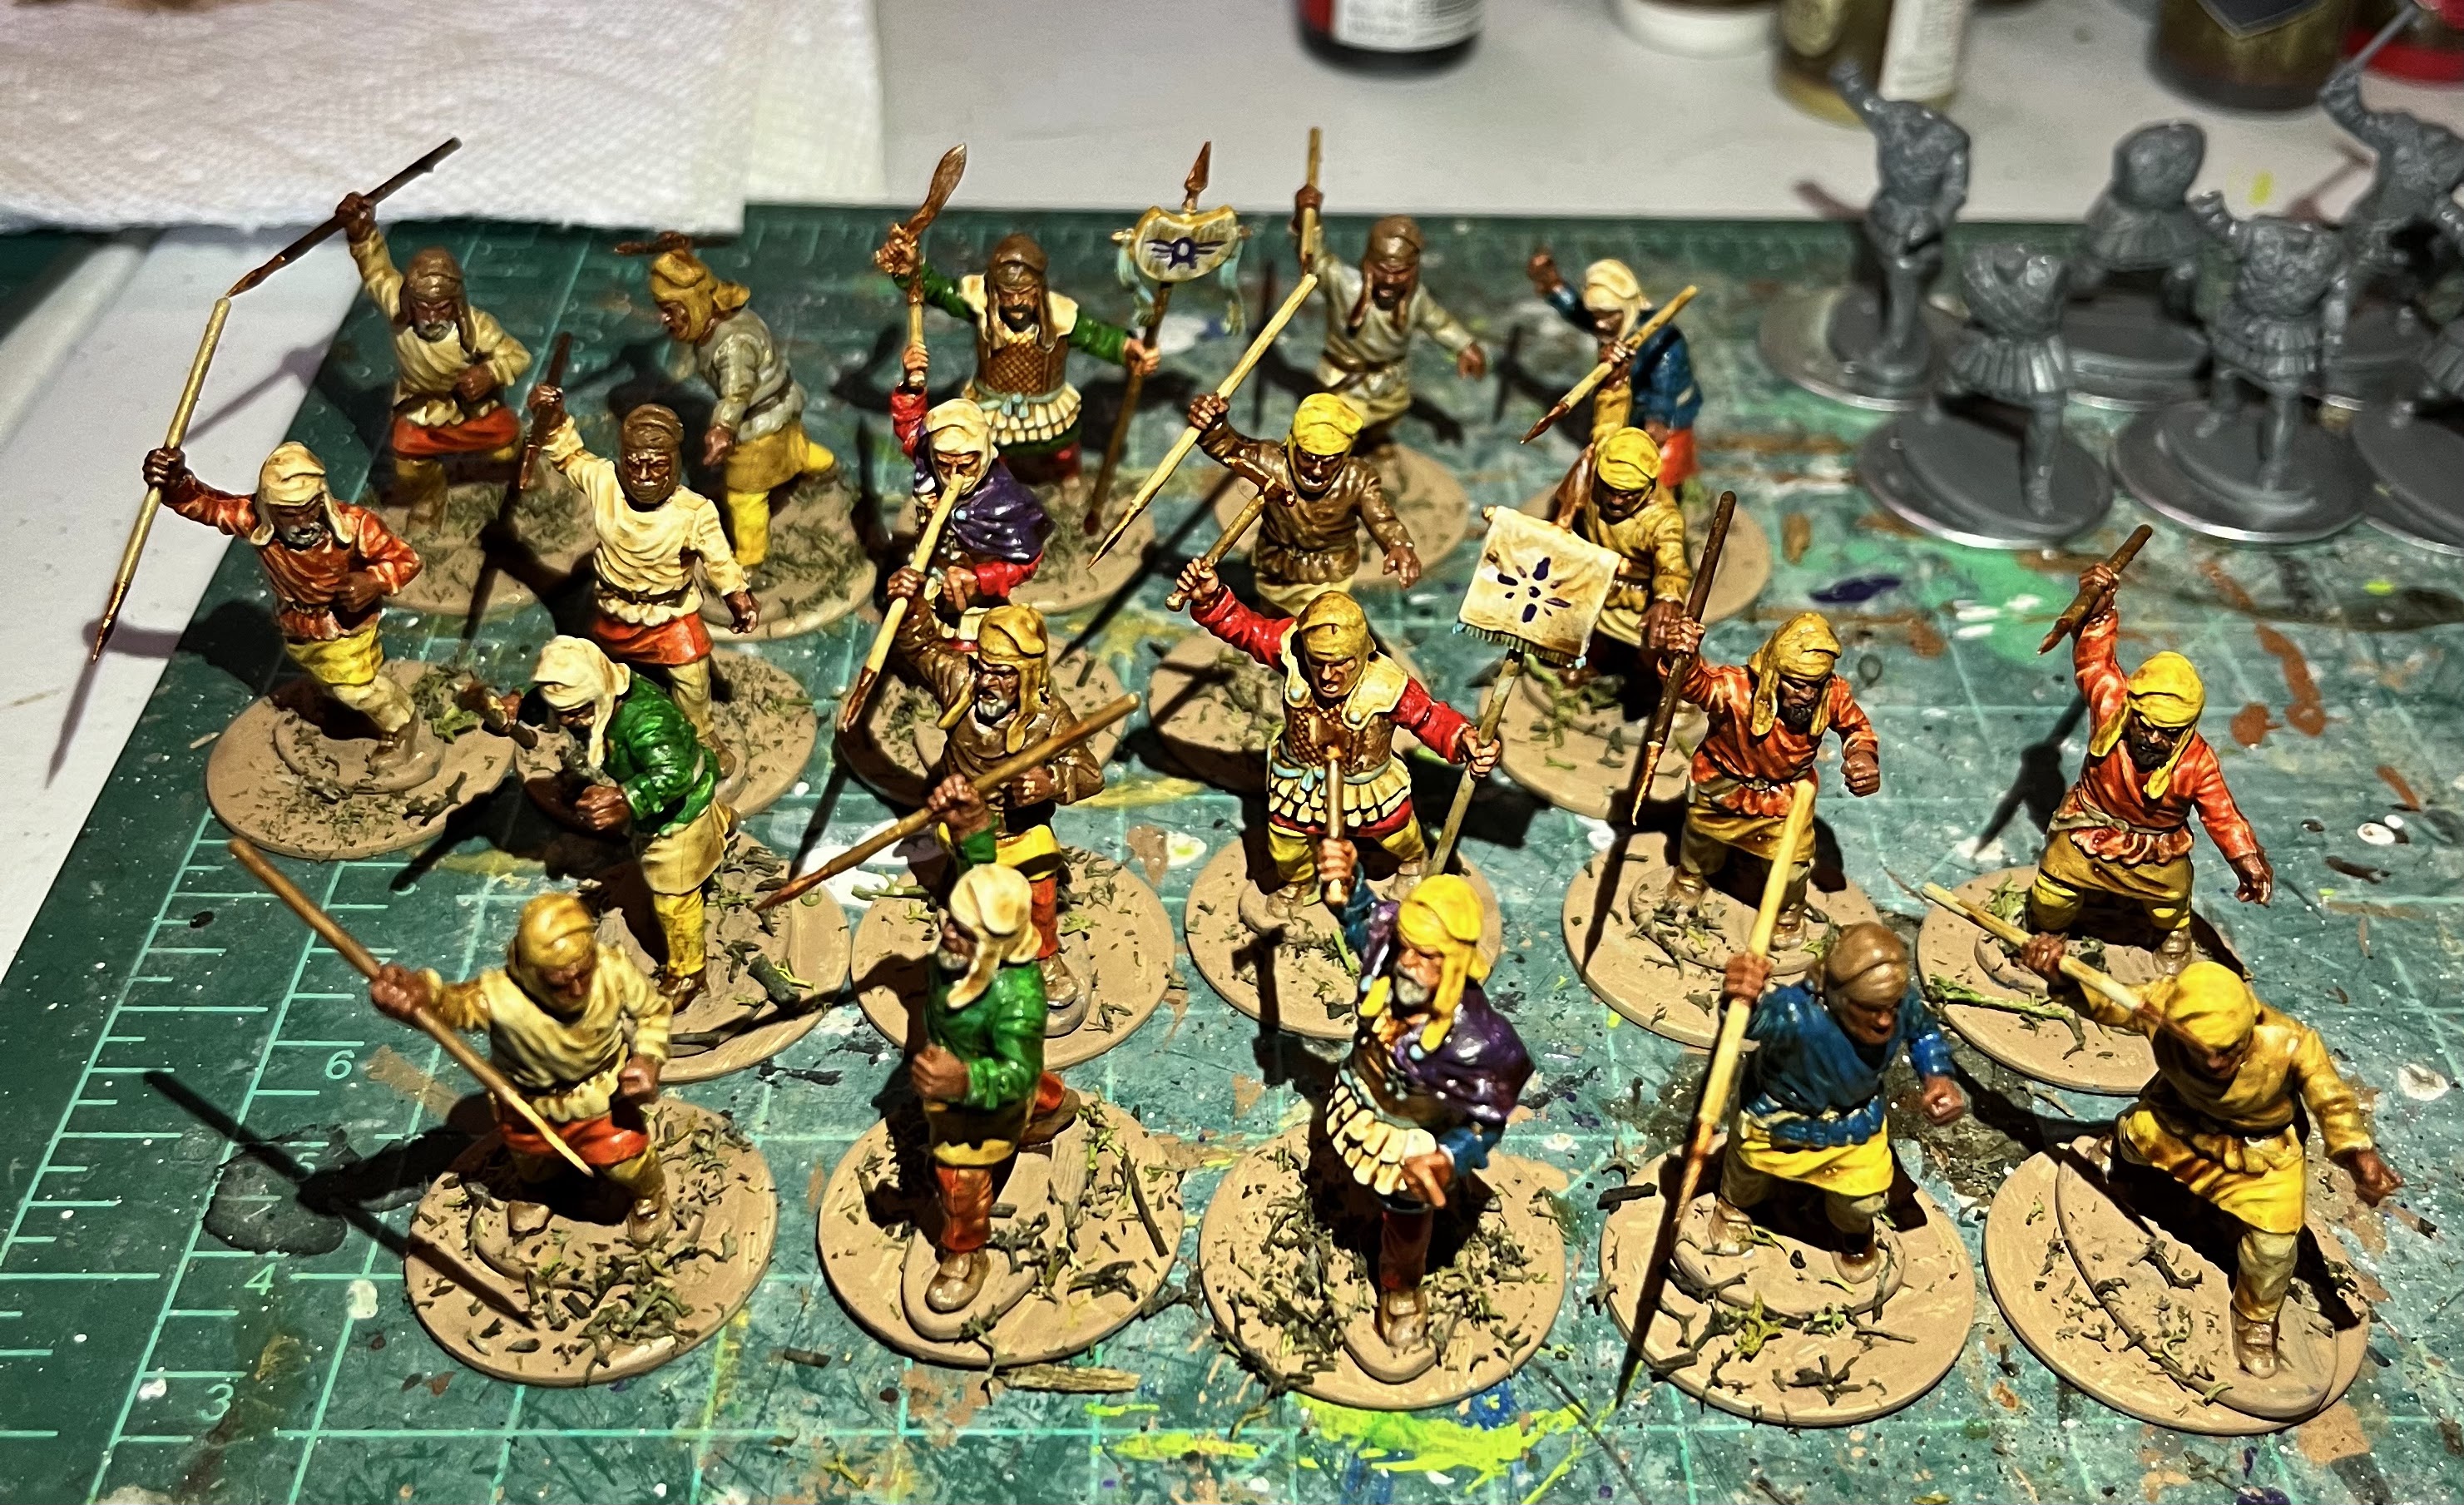
With that unit done, I still had 30 more Persians to go.  I again went back to batch painting in layers.  However, I again found myself getting off track and attracted to a single unit to complete first.  This time, it was the Irregular infantry for the force.  I was mostly using Rust Red, Demonic Yellow, Dessert Yellow, Skeleton Bone, and Mummy Robes with the occasional Pure Red, Ultramarine Blue, or Emerald Green thrown in for a bit of spice.  Once all the base coats were put in place, I then gave them all a nice light tone wash to complete them.    


As usual, I painted the shields after the models were done.  I painted them on the sprue to make things easier.  They were mostly the same brown tones of Dessert Yellow, Skeleton Bone, Leather Brown, and Mummy White as a base.  I kept the fronts white when I was going to use a transfer.  In this case, I wanted to stretch my Little Big Man Transfers further, so I decided to only put them on one rank of troopers.  The back rank I decided to free-hand.  Some of you may recall, that I do not enjoy painting shields; so I must have been crazy to decide this course of action. 

I also based them Territorial Brown of cheap acrylics and then sprinkled crushed moss onto their base.  This was leftovers from the corners of my terrain box.  Waste not, want not! 


Another unit done, just two more from my initial batch to go.  Again, I started batch painting.  I tend to divide the unit into small groups, and put the color they need to be for the layer I am working on together.  This small step of dividing the minis up helps clear my mind and recharge for the next step of batch painting, allows me to see the progress and focus on the results.  I was using the same palette of colors for the next set of psiloi/skirmishers.  


One interesting note about the Persian Unarmored troops kit is that the officers are very different from the rank and file.  This is a big departure from the Greeks and Romans I had been painting where they all basically had the same gear. The Persian officers have much fancier armor and gear than their fellows.  This means when you go to paint the standard bearers and commanders they are much harder to do "in the batch" with everyone else.  This kept tripping me up and slowing my progress.  I expect the same thing to happen when I paint the Unarmored Persian Archer kits, but I did not run into this issue with the Armored Persian kits yet.

On the standards, I planned on using decals for them.  However, I realized that I did not have the right size of decals to go onto them.  Even trimming was not going to work out like I did with the Immortals standard.  Instead, I was going to have to free-hand them again.  Ugh.  Not my forte.  This unit also did not have shields, so that was a bonus to help me complete them quicker.  Despite not having shields, these two units were slow going for me.  

 I based them the same as the previous unit, and called them done.  


That is 8 points of a 24 point army done now!  Yeah me!  However, I am not really painting it up to army size, I am painting units at a time instead.  Only 50 infantry and 30 cavalry left to go on this army!  Next up is a unit of Sparabara with the big shields, and a Drilled Infantry unit with crescent shields.  

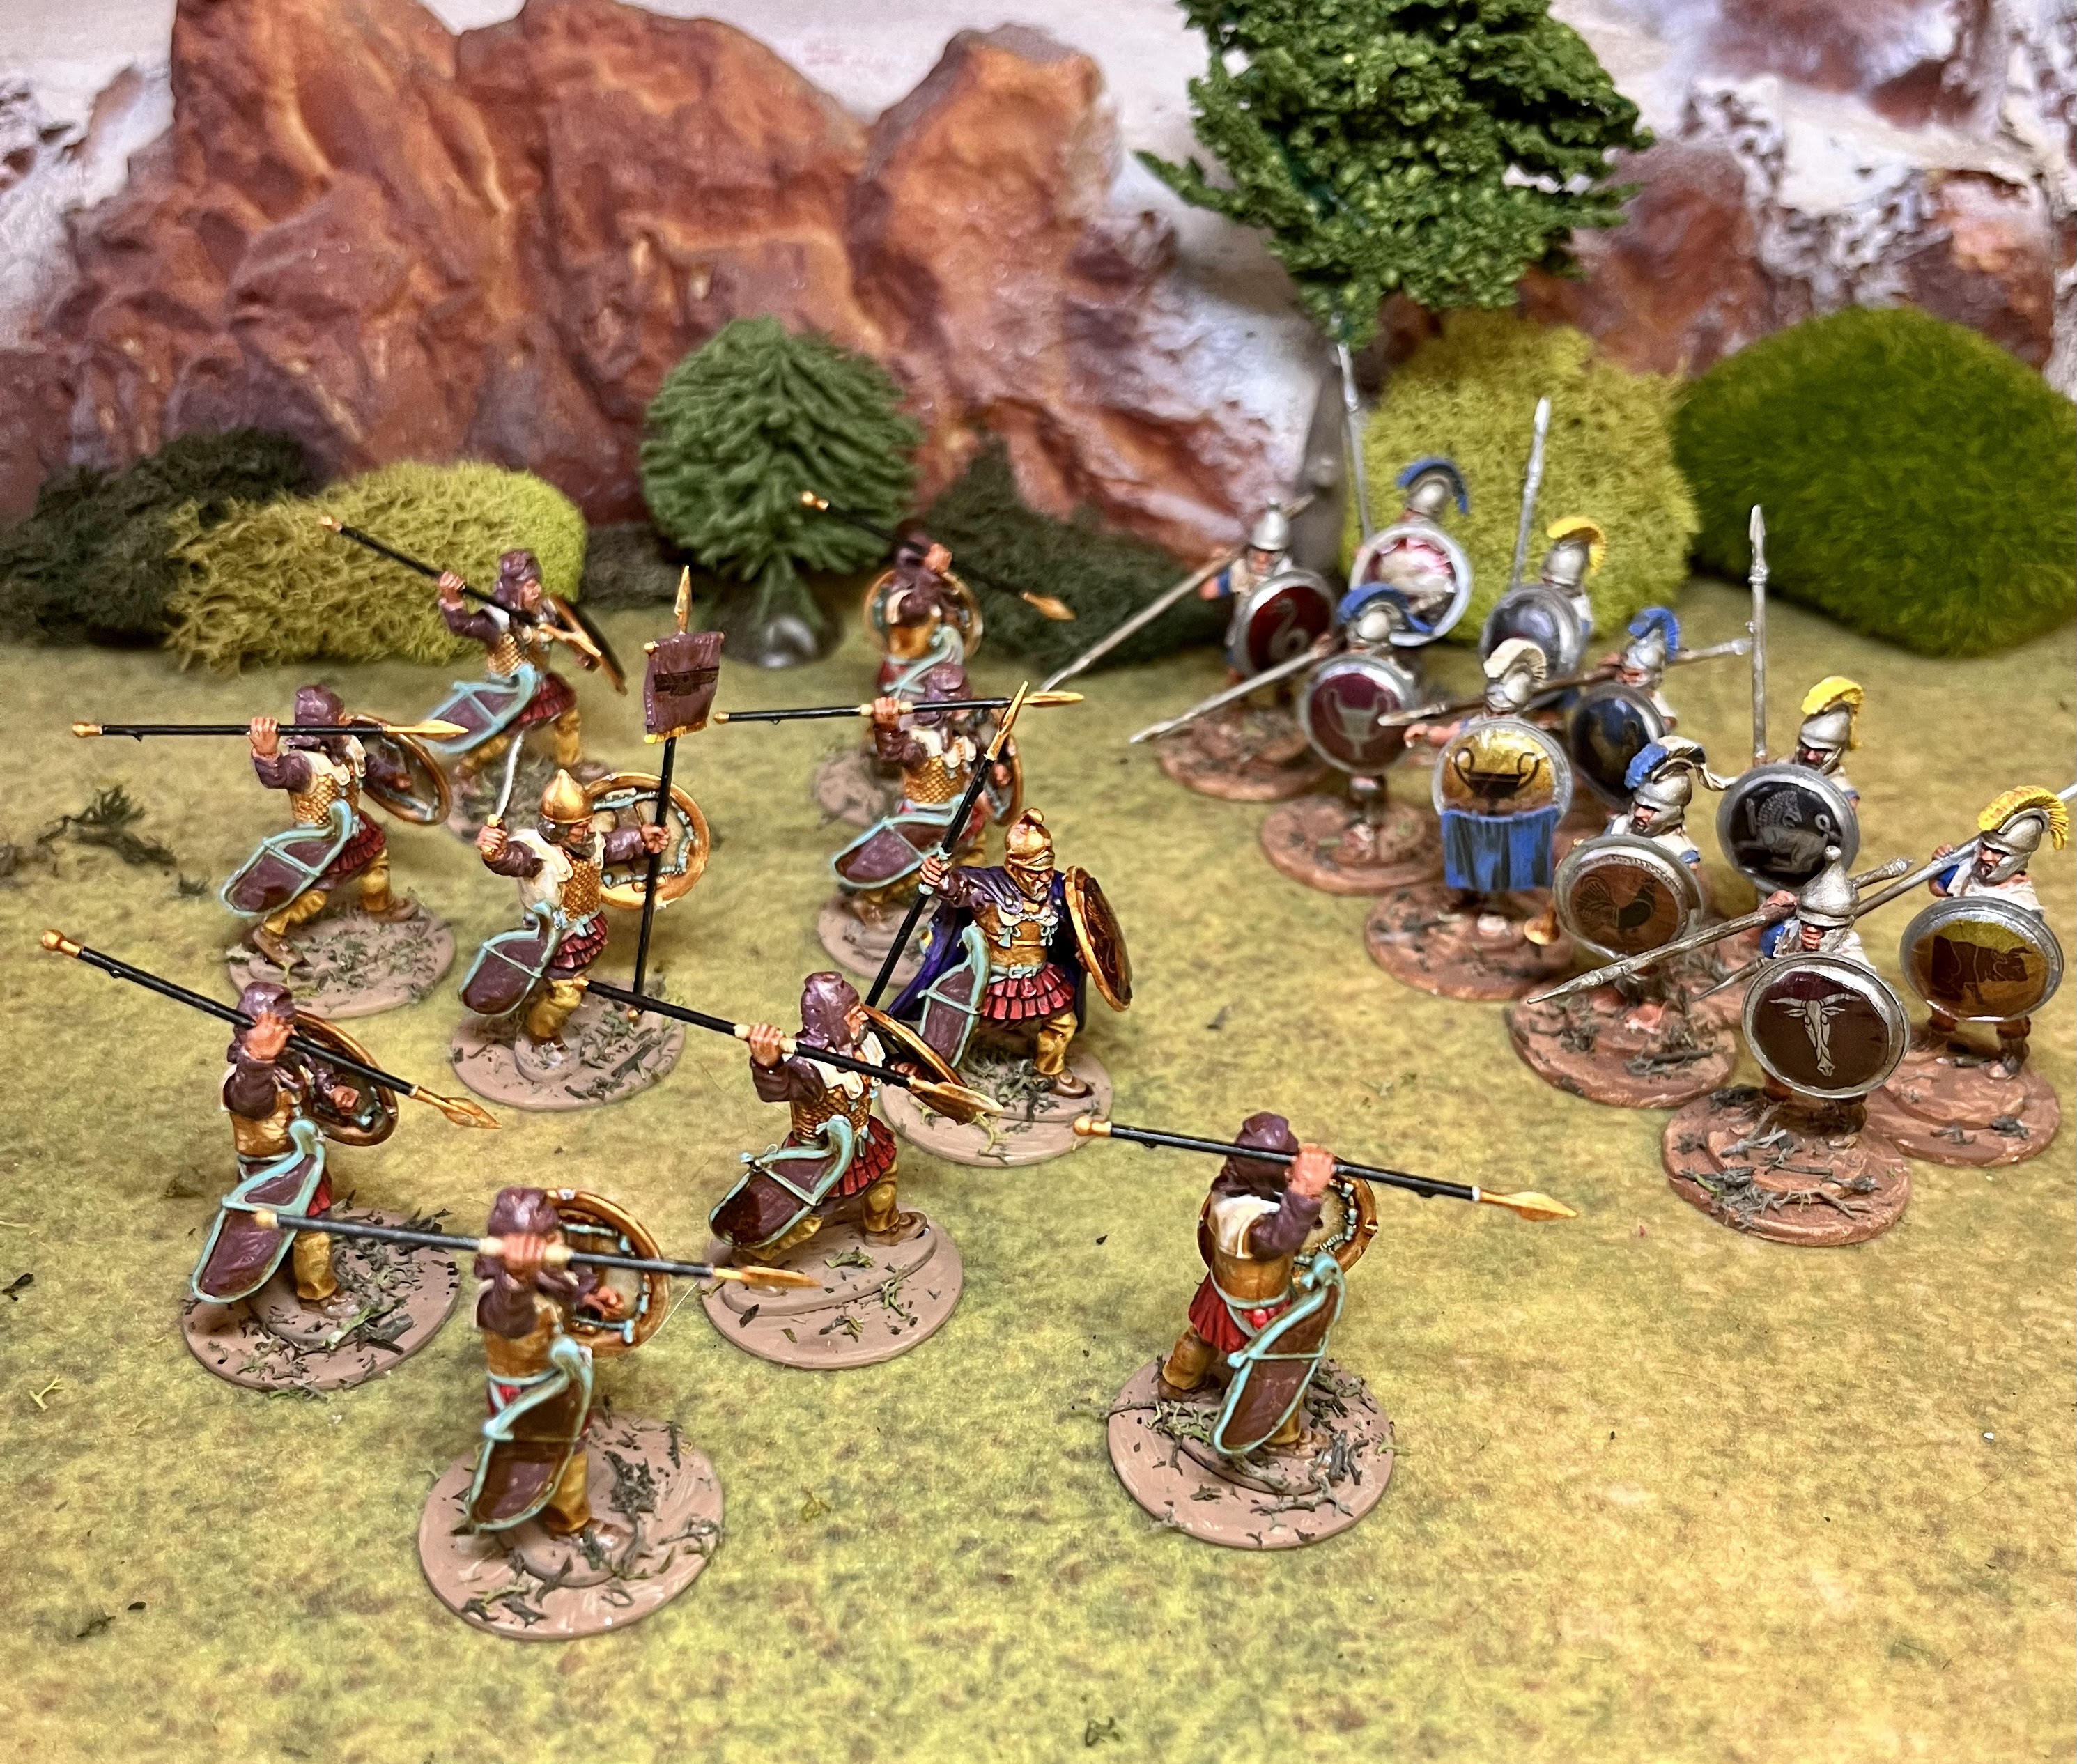
I also managed to get a few action shots of these finished Persian units on the table....

Persian infantry emerge for a field

and....
  

Persian scouts try to find a ford to cross a river

  and, I may have shown this one before, but I like it.....

Persian Immortals engage a group of Ionian Hoplites

There you go.  Onwards and upwards, and it looks like getting the Ionian Revolt supplement out before the end of 2022 will be tight!  I better get painting! 

Onward!


Become a Patron and get access to all the cool stuff, a peak behind the curtain of Blood and Spectacles, and early-access to playtest games!  


You can follow Blood and Spectacles Facebook page or Instagram for more fun! 

Check out the latest publications and contact me at our Blood and Spectacles website

Or purchase all out games at the Blood and Spectacles Publishing Wargames Vault Page!

Monday, October 31, 2022

Battle Report: Under the Martian Yoke - Searching for Scraps


Welcome back to my Solo campaign for the survival horror game Under the Martian YokeThis game is currently available on the Blood and Spectacles Wargame Vault Page.  It can be played solo, co-op, or Versus and any combination in-between!   

Under the Martian Yoke is set after Orson Welles' broadcast of War of the Worlds.  In this game, this was no hoax; but an actual news broadcast.  The Martian invasion has laid waste to the East Coast of the United States, and only a handful of survivors are left.  It is up to them to make it back to survive as long as they can!  If they survive long enough, they might escape out from Under the Martian Yoke!

Annie looked up from the tattered and worn Bible she had found in the farmhouse.  She and her fellow survivors had been using the place as a hide-out, its inhabitants long gone.  Where they ended up, was anyone's guess?  Perhaps they had been vaporized by a heat ray, choked to death on Black Dust, dissolved by Green Gas, or perhaps they were still out there somewhere hungry and thirsty?  

"We still got some canned peaches from Shyville if your hungry?" 

Annie had found Luke hiding here in the Farmhouse when she and Tommy stumbled across it.  Luke hadn't been alone.  Some slick wily named John was here with him.  Luke seemed the decent sort, but she did not trust John as far as she could throw him.  The good book had warned her about people like John.   

Annie reached out and took the can from Luke's hand.  The labelled was faded, and partially torn off.  On the front was a drawing of a happy housewife grinning like a fool and holding aloft a Georgia peach.  Annie pulled out a can opener from her apron, and with a newly practiced ease tore into the can.  

John wandered into the room, "Maybe we should head back to Shyville and see if we can find more supplies?  Your gun's still out of ammo Luke?" 

"Yup.  Shyville's too red though." 

"Huh. Well, there has to be somewhere else we can get some eats?" 

Timmy's little voice squeaked up, "I was lookin' for Martians and I saw another farmhouse out yonder,  Not too far.  Maybe there?" 

"We could scoot out there and back in no time.  Maybe they got some ammo for ya' Luke?"

"I reckon' so." 

Annie nodded along.  She wanted to stay put, hide, and take comfort in prayer.  However, what she wanted was no longer important.  They had to keep food, water, and supplies up.  Unlike the Israelites, she did not expect Mana to appear from the heavens to sustain them.... not unless it was canned.  

Survivor Band
In today's battle we have the following 4 survivors.  All survivor bands start with only 4 members.  Most humans were killed or horribly injured in the initial Martian assault, so small bands of survivors are all that is left.   

On the left is Handsome John.  He is a criminal archetype and survived by running for the hills when things went south.   

Activation    Aimed    Suppression    Fight    Brawn    Brains    Nerve
5+/2                6+        3+                    4+        8+            9+        7+
Cool Customer
- Pistol, Knife, Canteen of Alcohol
- Duck and Weave- Shooting attacks have a -1 TN when he has moved. 

Next is Tommy Wilkins.  He is just a kid, and survived when a building collapsed on his family.  He managed to dig his way out, but no one else did.  

Activation    Aimed    Suppression    Fight    Brawn    Brains    Nerve
3+/2             9+                8+               6+          4+        7+          5+
Pitter Patter of little feet, Fear of Enclosed Spaces
- Improvised Fight weapon, Satchel, Good Shoes

The lady is Annie.  Annie McCall is a devout believer, trying to process what exactly is going on.  She was part of an ambushed evacuation, and forced to flee.  

Activation    Aimed    Suppression    Fight    Brawn    Brains    Nerve
6+/2              7+            5+                   9+        8+          4+         3+
Pray, +3 Experience
- Pistol, Map, Bandages, and Knife

Last up is Luke Goodson, the leader of this little band of survivors.  He survived when he was suddenly knocked unconscious.  

Activation    Aimed    Suppression    Fight    Brawn    Brains    Nerve
5+/2              7+           6+                    4+       8+           9+        3+      
Do As I Say, Do Not Be Afraid
- Knife,  Canteen of Water, Flares
- Revolver is out of ammo and left at Hide-out

Scenario
The survivors were able to see another farmhouse in the distance that they could walk to easily.  Hopefully, their would be some scraps left over, but they might also be Martian traps.  

This scenario has 5 loot markers randomly placed on the board.  When a survivor picks up a marker, you roll a 10.  On an even it is Loot that can be picked up.  On an Odd it is a Martian Trap!  A Trap brings on a Martian foe within 6 MU.  

The objective is to gather as much loot as you can before you are forced to scatter, all go unconscious and possibly dead, or the danger level gets too high.  

Set-up
The area to be searched for scraps is a lone farmhouse at the end of a dusty roadway.  Next to it is a weed choked ruined out-building.  There is a nearby dying field, and a barren orchard.  There is also a small pond in the area.  There are 5 loot markers scattered randomly from the center of the board.  


The board itself is 36MU by 36MU.  1 MU equals 1 inch in today's scenario.  There are no Martian foes starting on the board.  The survivors decide to deploy on the west side, near the destroyed out-building.  Annie and Tommy stick together, while John and Luke stay together on the opposite corner.  They start 6 MU in from the deployment edge.   

The group also decided to set off just before dusk, and arrive at their destination at dusk.  However, poor timing also means that bad weather has rolled into town with wind, rain, and thunder.  This automatically starts the danger at 11! That stinks! 

Turn 1 - Danger 11 Yellow
Annie skulks across the gap between the out-building and the house, and takes some cover.  Tommy gets to the edge, and tries to activate again to run, but fails! That Yellow Danger level starting strikes! Handsome John moves to a corner and covers one of the markers with his pistol.  Luke runs ahead, and then tries to activate again.  He barely succeeds and grabs the first loot marker.  It is a 3, so real loot and not a Martian monster! 


Danger Phase:
The current Danger Score is 13, and the dice roll for new dangers comes up 22.  No new threats yet!  

End Phase: 
None

Turn 2- Danger 13 Yellow
The sun is beginning to set now, and Line-of-Sight is reduced to 30 MU.  

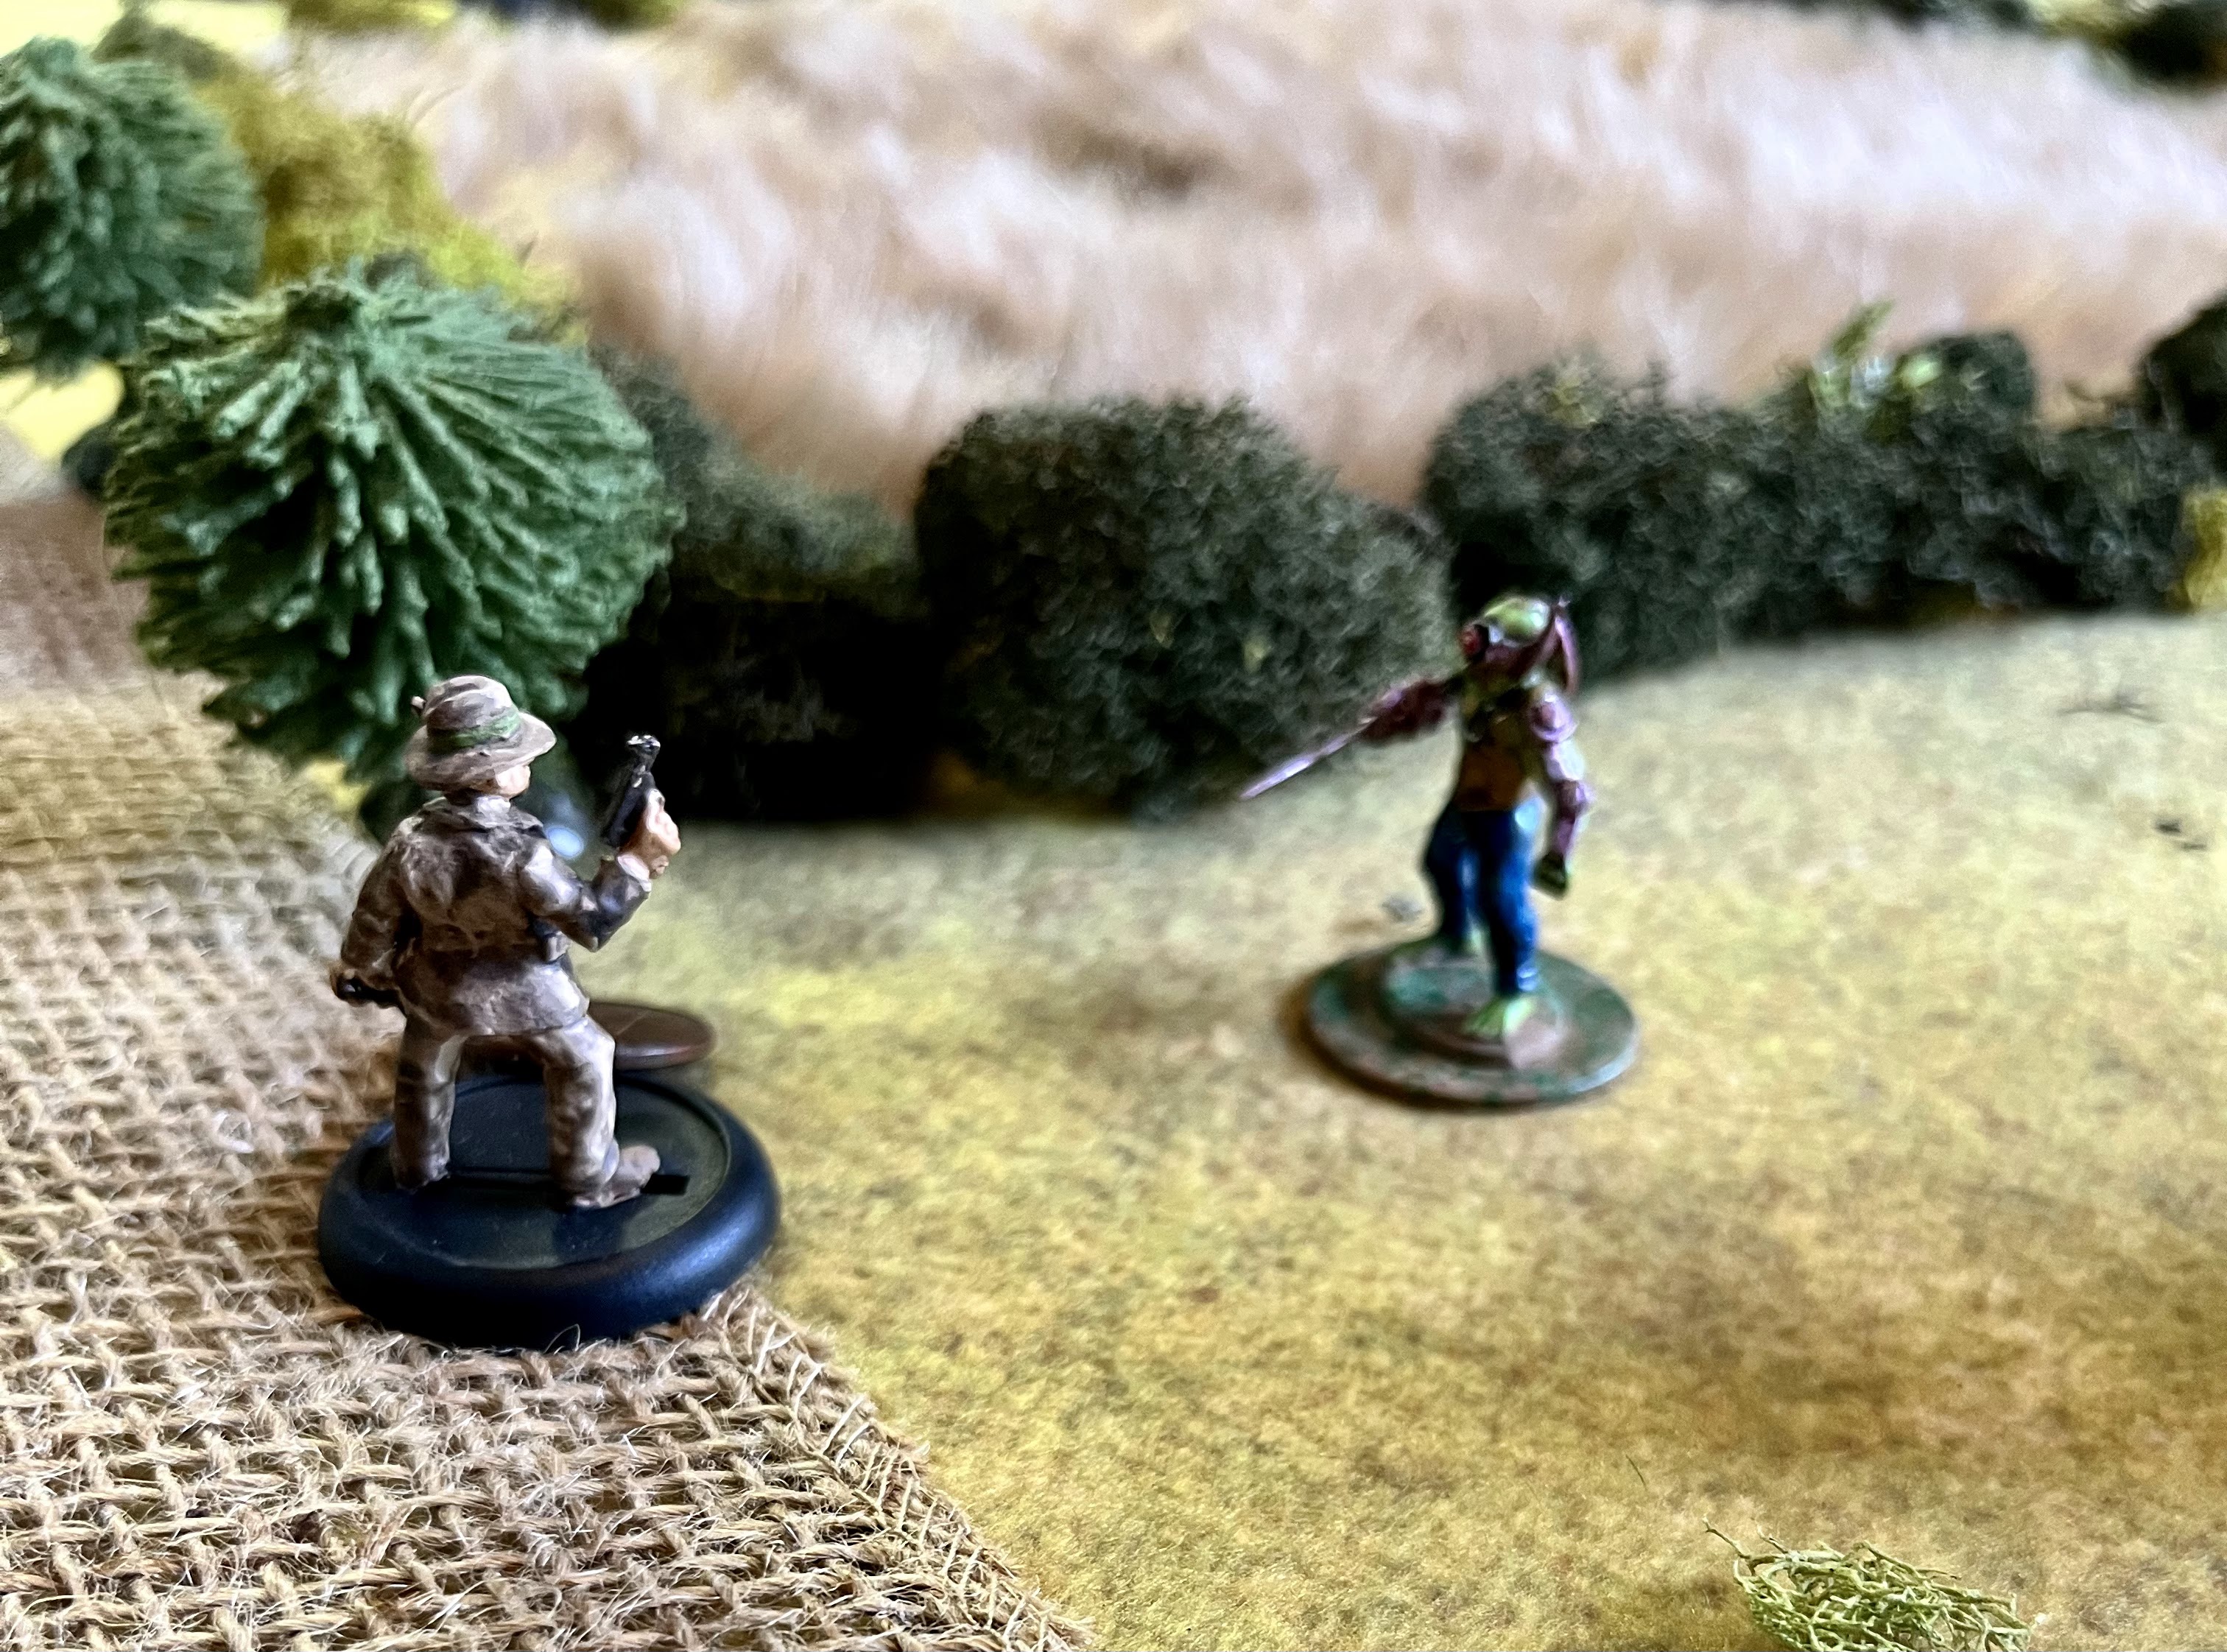
Luke runs across to the road, and tries to pick-up another loot marker.  It is Even, so this time it is a Martian Trap!  A Gunner unburies itself from near the pond!  

Handsome John sees it dig it's way out and must make a Fear test!  He barely passes, and decides to take careful aim.  He knows he needs to shoot to kill that monstrosity!  However, he fails his second activation test instead of firing.  His fear got to him! 

Tommy makes a run for another loot marker, but fails his second activation test to try and get to it!  That is very unlike him. 

Annie moves onto the porch of the house, trying to get an angle on the new foe while covering Tommy.  She has line-of-sight, but decides not to risk a second activation this time.  

Danger:
The Gunner mindlessly fires at Luke, and the survivor fails his suppression test!  He immediately drops prone to avoid getting hit further!  He is suppressed by the shooting.  

The Danger Level is 15, and the dice roll is 8.  A new danger arrives!  This time, a Rabid arrives on the board.  It starts heading towards Handsome John, unconcerned about the pond between them.  


End: 
Luke decides it is time to Get UP!  He passes his fear test and gets to his feet.  

The criteria for a Scatter are not met.... yet! 

Turn 3 - Yellow 15
This time Line-of-sight is 24 MU as the sun sets! 

Handsome John aims and tries to fire again.  He fails again! 

Tommy moves up and grabs some loot, and the roll is a 3.  It is real loot!  This time, he passes his second activation and runs for the board edge! 

Luke skulks towards the last loot marker, but fails to get to it.  He tries to activate again, but fails! 

Annie takes careful aim, and fires on the Gunner, but misses.  

Danger: 
The Rabid tries to make a Dynamic action test to get across the pond, but fails. 

The Gunner sees Luke up and moving, and fires again at the target.  This time the shots go wide enough where Luke is unphased.  

The Danger level is at 18, and the dice come up....16.  More Martian menaces appear! Three wild dogs appear by the edge of the field and begin to move towards the house Annie is at.


End: 
Scatter is not triggered. 

Turn 4- Danger 18- Yellow
The sun is setting fast, and the Line-of-sight is only 18 now. 

Luke grabs the last loot marker, but it is another Martian trap! This time a Butcher digs its way out of the ground!  


Handsome John just starts shooting!  It isn't quite enough to take down the Gunner by overflowing pins to damage.  Both his activations have been spent.  

Tommy manages to run off the board with his loot.  


Annie moves to follow Tommy, but fails to activate for her second activation.  

Danger:
The Danger Level is at 20, but the dice come up 24!  A short reprieve! 

The Gunner fires on Luke, who is forced to duck down, but avoids being suppressed.  Good thing as that Butcher would have probably caught up to him if he had been pinned! 

The Rabid passes its Dynamic movement test and wades across the pond towards Handsome John.  

The wild dogs charge recklessly towards Annie, while the Butcher slowly shambles towards Luke.  


End: 
The survivors can choose to scatter if they wish.  However, there is a chance they will lose the Loot that Luke has.  There is no more Loot on the board, so the Humans decide now is a good time to Scatter! 

Luke drops his loot as he high tails it away!  


Conclusion: 
Our plucky band of survivors managed to fall back through the wind, the rain, and the ensuing darkness to get under cover at their farmhouse.  No injuries again. 

Wow, there were a lot of bad guys out there.  I managed to escape just before things got serious.  My shooting was completely ineffective, but thankfully so was their shooting.  Luke got the worst of it, but thanks to his high Nerve ability managed to weather most of it and escape.  I was lucky no one got hurt or suppressed so I have the full crew for post-game procedures.   

Post- Game Sequence: 
Luckily, all my survivors managed to make it out of there alive, unharmed, and unsuppressed.  That means no Psychological or Serious Injury this time.  However, Timmy got off the board with 1 Loot, so let's see what it was: 

- 4 Food
- 3 Water 

That will help us keep our stash up! 

Experience looks like this:
Handsome John- 3 + 1 = 4
Annie McCall- 7 + 1 = 8
Tommy Wilkins - 4 + 4 = 8
Luke Goodson - 7 + 1 = 8

No upgrades this time.  We barely got out of there alive, and didn't get to do much else.  

That leads to the survivors assigning jobs for the post-game.  Tommy will scout for Martians, John and Annie will go scavenge, and Luke will try to Repair his pistol.  

The bad weather and darkness seem to have thrown the Martians off the trail.  The Farmhouse is secure.  Meanwhile, Luke tries to fix his revolver but it is beyond his ability.  In retrospect, I should of had someone with a better Brains stat try this, and sent Luke scouting. 

Annie finds a dark hole beneath a wrecked garage.  She steals herself and lowers herself into the hole, and finds a old hidey hole for bootleggers!  It has a variety of items stored inside including: 

- 7 Food
- 9 Water
- 2 Scrap
- Extra Ammo for her Pistol

John comes across the twisted remains of a burned out tank and a barricade, the last stand of some soldiers.  They are no where to be found.  A distant clank causes terror to fill John, as he imagines a Martian tripod closing in.  He grabs what he can and runs for it, gathering up only 1 useful piece of scrap.  

The band goes into the Depravation stage with a decent amount of stash and gear.  To keep the band away from depravation they need 8 food, 8 water, and 4 scrap.  Thankfully, they have what they need to keep going.  When all is said and done their stash is:   
 
- 11 Food
- 14 Water
- 2 Scrap

They are in pretty good shape, as long as no one gets hurt, they should be set for a few more days. They are still down a revolver that they failed to replace.  

Thunder shook the house.  Annie bolted up, but caught herself before she screamed.  Terrible visions flashed in her head, but she shook them clear.  

She looked around the darkened room.  She was not alone.  Luke was there, sawing logs and blissfully unaware of the storm.  Tommy was also curled up under a make-shift blanket made from an old sack.  It had taken Annie two hours to calm him enough to sleep.  

John was sitting at the small table across the room.  He had his pistol in his hand, and Annie could see him visibly shaking.  She slowly got up and took a few tentative steps towards him, clearly in his line of sight. 

"John?" 

He did not respond.  Annie closed the distance over what felt like an hour, slowly putting one foot in front of the next.  In an instant that took a lifetime, she was at the table.  Carefully, she placed her hand over John's.  It was sweaty and cold.  At this distance, she could see perspiration beaded across his forehead.  

"It's okay John.  Everything is fine.  Just a storm." 

She slowly and carefully slipped his hand off the grip of his gun.  With effort, he slowly turned his head at her.  In the darkness, a pale moon beam shone through a boarded up window, and gleamed off his teeth, as his lips slowly curled into a rictus grin. Thunder shook the room.  

"Annie?" 

Check out the Blood and Spectacles Wargame Vault page for your copy of Under the Martian Yoke


Become a Patron and get access to all the cool stuff, a peak behind the curtain of Blood and Spectacles, and early-access to playtest games!  


You can follow Blood and Spectacles Facebook page or Instagram for more fun! 

Check out the latest publications and contact me at our Blood and Spectacles website
Or purchase all out games at the Blood and Spectacles Publishing Wargames Vault Page!