Showing posts with label Star Wars. Show all posts

Monday, February 26, 2018

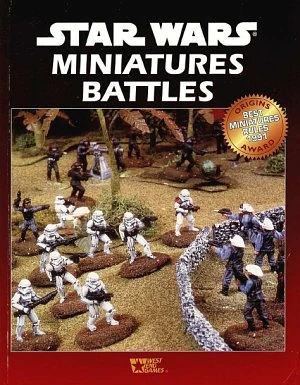
Review; Star Wars Miniature Battles- West End Games

A long time ago, in a hobby shop far, far away…..

As a young lad, I was a typical nerd kid.  I liked war gaming and had gotten my start in the Warhammer worlds of Fantasy and Rogue trader.  However, I also liked RPGs and played AD&D, Shadowrun, and of course West Ends Star Wars RPG.  I had stumbled across the Star Wars Miniature Battles rules as well but could never find the scratch to buy it.  Plus, I was not very fond of the Star Wars metal miniatures of the time.  Consequently, I never picked it up. 

However, today is a different age.  No longer do I need to poke around dusty, dark bookshelves and avoid the store cat to find such archaic oddities!  No, thanks to the wonders of the internet you can find old, no longer produced titles available from anywhere across the globe!  In my wandering I ran across that which I had not tried before…. Star Wars Miniature Battles.  I got a copy and decided to give it a go!   

I have clearly played Star Wars themed wargames before.  Upon receiving my goodies of nostalgia, I rushed home and dug out the Galoob Micro Machine Strom Troopers and Rebels that I had available and scanned through the basic rules.  I was eager to see what this book held and the long held promise of Star Wars wargaming from yesteryear.  With FFG’s Legion rules on the horizon, now seemed like a good time to give these a review. 

May the Force be with us!
From Wookiepedia

Things That I Liked
The game has a consistent mechanic for resolving actions.  There are two types of rolls, Straight Skill Rolls and Opposed Rolls.  For these you simply roll a d6 and add your skill level compared to a Target Number.  If you beat the TN you succeed.  Opposed rolls have the players roll against each other and add a relevant stat, the higher one wins.  Shooting is a Straight Skill, while Damaging and Close Combat are opposed rolls.  They maintain these two simple mechanics for the entire ruleset.  That is better than most other wargames from the time can manage.  

The game uses a 1 always fails and counts as a 0 result, while a 6 is an “exploding” dice that can be re-rolled and add to the results.  This means any soldier can get lucky and hurt even elite enemy troops, and no one is invincible.  Even an Ewok can take out a Stormtrooper.

The game has lots of diagrams and examples to give you a good feel for how it all works.  This made the rules very clear and easy to interpret. 


Things I Do Not Like
This game has a lot of modifiers.  This probably stems from the time period and the RPG heritage of the game.  There are situations that are +1, +2, and beyond.  This means you will want a quick-reference sheet handy.  However, the game encourages you use unit stat cards, which make a ton of sense since the game also has a lot of Stats. Some of them seem a bit useless except for one off situations and edge cases.  The core game does not really use most of them, and they come into greater play when you add the unique armory, force powers, creatures, droids, etc.      

This game uses alternate activation by phase.  Therefore, Player A moves a squad then Player B until all squads have moved.  Then they alternate firing.  Then Close Combat is resolved, etc.  This allows them to use an Overwatch mechanic where a unit can choose to fire at an enemy moving unit by foregoing their normal move and shooting.  An early action/reaction mechanic!

It uses individual troopers as a basis for many mechanics even though it is a squad based game.  This includes true Line-of-Sight, wounds, facing, close combat, etc.  This really bogs the game down with tokens and other needless crunch and slows the game down.  I found this very disappointing and could see at a glance ways to modernize these rules.  However, for the period they are pretty par for the course. 

All injuries do not take effect until the end of the fire combat phase, and all hits are randomized.  Therefore, a squad hitting 12 times might all hit the same guy.  Then, you can’t change him over to injured/dead until all shooting is complete.  I am not sure how you keep track of it all until the end, but there you go.  I guess this is to add “realism” that everyone will shoot the first Stormtrooper through the breech of the door, but just makes wound resolution/tracking even clunkier.   

Morale has 4 levels from good, to shaken, to demoralized, to routed.  It is one level too many in my book.  Plus, the Threat Rating vs Command opposed roll is a bit clunky.


Meh and Other Uncertainties
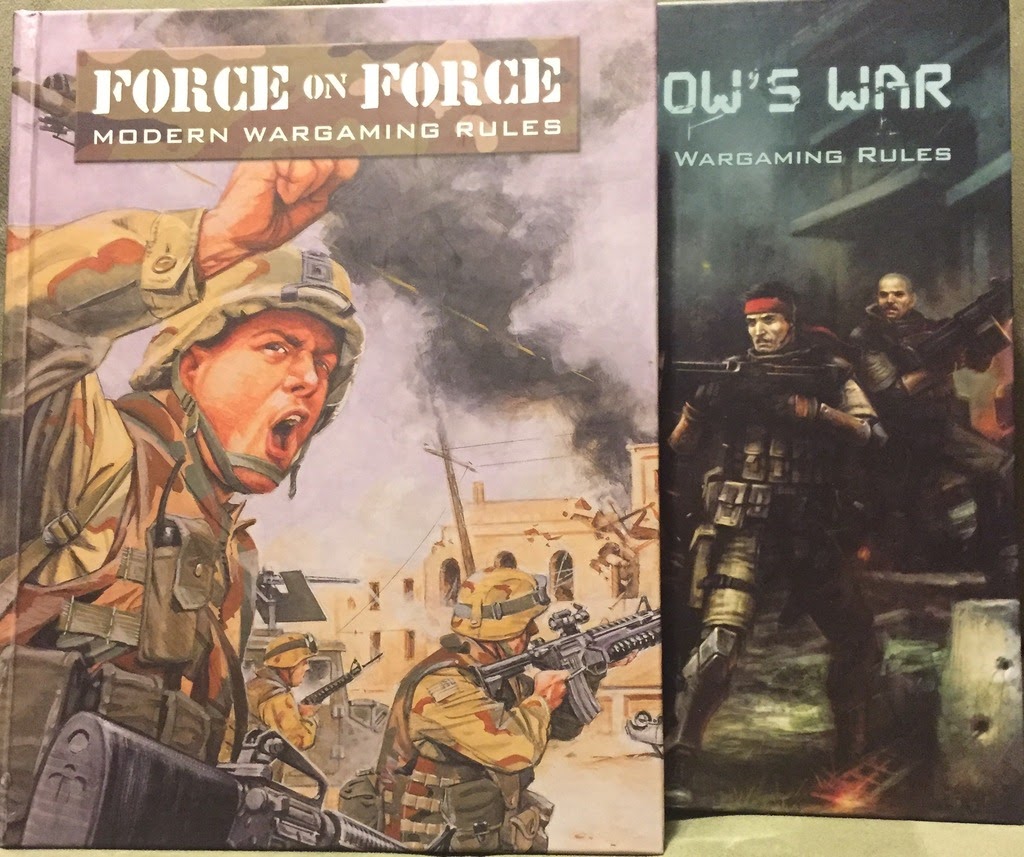
The game covers all the Star Wars items you would want from armory, creatures, force powers, droids, etc.  If you saw it on the screen, you can stat it up and play it in the game.  There is a unit creation system so you can bring the things from shows to life.  In addition, you can add your own gribblies and aliens too. I am sure this system is easily abusable, and it is a bit clunky; but it is there.  The only thing missing are vehicles as this is an infantry based game.  There are a lot of tools in the Advanced Rules tool box that a player could use, but doesn’t have to.  It reminds me of Force-on-Force/Tomorrow’s War in that way.   

Close combat involves pairing off, and means out-numbering a foe is a big benefit.  However, it will be tough to get into Close combat anyway, as the attackers and defenders must both pass morale tests, and then the defender can also shoot at the incoming attackers.  You need to be a Jedi (or at least a hero) to get a Close Combat off successfully. However, that doesn’t feel off since most combat in Star Wars is resolved at range

There is an entire section about using a Gamemaster in this book.  Again, I think this is more a product of the time the book was made.  However, I tend to like GMed games and feel they have their place.  I know many do not favor this, and I do not feel the game “requires” a Game master to run properly. 

The book does not have a campaign system at all, but it does have three scenarios.  1 is a basic scenario, and the other two are in the advanced rules section. 


Conclusions
This is clearly a product of its time.  The cover proudly claims an Origins Award for Best Miniature Rules for 1991!  You can see the “popular” mechanics of the time in the mechanics of the Star Wars Miniatures System such as individual figure resolution, Gamemasters, and wound resolution.  It is a bit clunkier than modern games, but yet you can still see some of the ideas that allowed it to be the Best Miniature Rules of 1991!  I can see the evolution of modern sci-fi wargames in its design even if it is still a bit unwieldly by today’s standards.

 I can also see where the mechanics and stats were designed to tie in a bit to the West End Games RPG with the “exploding dice” and the stat choices.  That would make it easy to translate an RPG character into the Miniature Battle game and create cross-over opportunity.  That could equal more sales!

The only glaring omission is vehicles, but that might get covered in the supplements such as the Companion and Imperial Entanglements, which I also have my hands on.  Maybe after trying this out in the field, I will review those two supplements as well. 


Overall, I got it for the right price-point, so do not hate that I have this.  I do not see it being a staple of my gaming unless I am having a “retro night”.  I think other more modern games do the same thing, slightly better.  I would not go out of my way to track it down, but if you want to give it a go, look here: http://www.d6holocron.com/downloads/wegminiatures.html

Friday, October 20, 2017

Wargame Design: Innovation is Over-rated

Yup.  I said it.  Innovation is over-rated.  I feel this is especially true in the field of wargames design.  Too many people are trying way too hard, to be way too clever.  Most of the people I see try to re-invent the wheel end up stalling their project and never getting anything to a playable state.  There is no reason to try and make games if you never have anything to play. 

 
Alternatively, they get something to a playable state, but it comes out way to different and complicated that no one wants to play it.  The players can’t wrap their heads around it, or it requires a lot of tracking, or there is too much table clutter, etc.  People read the rules, scratch their heads and never look back.  Most of the time I see someone trying to innovate a mechanic or system they spiral into If This/Then That style of rules.  Instead, keep it simple.  If you use a method to roll over a target number to resolve an action, use that same model for everything else that requires a test.  Use the same core mechanics over and over in the rules.            
 
Once, a long time ago I took a class on screen writing.  The professor shared something that stuck with me for a long time and I recognize the truth of.  He said that if you want to actually sell manuscripts for movies and books do not try to be innovative.  Many people are afraid of that which they do not understand or feel comfortable with.  Innovative ideas are not comfortable and therefore lead to a lack of buying.  Instead, take an existing model and re-skin it.  Change the setting, a plot point, or a character around.  The skeleton is the familiar, the innovation or uniqueness is how you combine the pieces.    
 
My young ears were shocked by this notion.  Then, I actually started to look around at what the entertainment industry was offering me and realized with horror that he was right.  That was exactly what was happening for the most part.  Let’s look at “arguably” the first Blockbuster movie and nerd classic; Star Wars.  There is nothing new in Star Wars.  In fact, it is very “traditional” in its narrative.  The big change was simply placing it in a new setting.  How many times has the Seven Samurai been re-done?  The innovation is putting a new spin or use on a classic idea.  People do not feel alienated by the innovation and instead embrace the subtle change or re-use. 
        

Therefore, if you want to make games that you can play don’t try to re-invent the wheel.  Innovation is over-rated.  Instead focus on what you are trying to accomplish with your game and look at what other games do to achieve it.  Do they roll to beat a target number, cross-reference a chart, use opposed rolls, use an interrupt system?  Instead of trying to invent a whole new method, use one that works and apply it to your game.  Always remember what you are trying to accomplish and you will not go wrong.
 
Someone else probably thought of it somewhere first.  That is why it is so important to stay current with new systems and games.  You will slowly create an “inventory” of mechanics that you can then apply to the design problems you face.  These ideas become your “Tool box” where you apply these mechanics together into new and interesting ways.  It is this re-combination of mechanics and how you apply them to new or different problems where you will find innovation.  It is not creating something new from whole cloth.  It is something new from the sum of its parts.
 
 
If you read the rules for Castles in the Sky, you will find that it takes liberally from several games systems.  This includes Battlefleet Gothic, Aeronautica Imperialis, Battletech, All Quiet on the Martian Front, Dystopian Wars, and a few other game systems.  In fact, if you are familiar with all of these games then you can probably tell me exactly what mechanics came from which game.  However, how they all work together is what gives the game a unique feel and play style.  Plus, it is a complete and playable game system! 
 
Too many designers focus on creating the perfect mechanic, instead of just getting on with it and making the game.  Innovation is over-rated if it stops you from completing your wargame project.  Instead, remember what you are trying to accomplish and use the existing mechanics that will allow you to get there.  The innovation will come with how the mechanics integrate together to make the sum of the game.                   


Wednesday, April 26, 2017

Rampant Stars: Battle Report- Star Wars Lost and Found

An Imperial Tie Striker was lost on routine air patrol on the forest planet of Tabletooine.  The Imperial pilot escaped and is evading rebel troopers in a nearby outbuilding.  Imperial Stormtroopers from a nearby garrison have been sent in to locate and rescue him and recover the Tie’s recorder device. 

Hmmm, does that set-up sound familiar?  It should, it was the exact same set-up I used for my last game of Tomorrow’s War.  It is based on the first scenario in the main rulebook.  You can see the results of that battle report here.   The Stormtroopers proved why they are one of the most feared shock troops in the galaxy in that battle. 

Today, I thought it would be fun to play the exact same battle, but this time use the rules for Rampant Stars instead.  Let’s see what happens. 

Forces:

Imperial Stormtroopers of the Galactic Empire
3 units of Stormtroopers of the Galactic Empire
Alpha- Command
Bravo
Charlie

Regular Infantry- 3 pts
Armored- +2 pts
Disciplined- +2 Pts

Force= 21 Points

Rebel Scum
4 Units of Rebel Scum
Team 1- Command
Team 2,3, 4

Irregular Infantry- 2 Pts.
Rapid Fire- +2 Pts
Rapid Movement- +1 pt

1 unit has the Commanding Leader- +2 Pts.

Force= 22 Pts

Today’s miniatures are old Micro Machine toys from Galoob. 

Mission:
Normally, Missions in Rampant Stars are determined randomly.  However, I want to play the same mission as Tomorrow’s War Lost and Found.  The mission is for the Imperial Stormtroopers to get to the Imperial Navy Pilot and escort him off the board back to base.  They can do this by moving him into coherency and “picking him up”.  If the unit is destroyed or wiped out the pilot remains where the unit was until another unit “picks him up” by moving into coherency.  Only the Imperials may pick-up the pilot and the pilot can not be killed by shooting or assault. 

The game lasts 1 hour, 8 turns, or until one side is destroyed/routing. 

Now, Rampant Stars also typically has Complications and Locations as well.  This location is Outdoors, Jungle.  We will not be using a complication for this battle. 

Set-up:
In the center of the board is my trusty electrical box barn surrounded by a fence.  There are two bridges over the center stream.  The outskirts of the board are all jungle with some jungle in the center.  The pilot is in the barn.  The Rebels start in the edges of the Jungle while the Imperials are in the south edge near some ruins. 

Turn 1:
Rampant Stars uses a relatively simple I-Go-U-Go system with the Attackers usually going first.  In this scenario, that means the Stormtroopers are going to be giving orders first. 

All the Stormtrooper squads move forward with successful command rolls.  Two even double time it forward.  All Rebel Units managed to fail their orders and start the game shaken!  That was a poor bit of rolling to get us going.  Even the Inspiring Leadership failed to do anything.  

Turn 2:
Stormtrooper units rush towards the first bridge. 

Rebel team 2 and the command squad rally.  The others are still confused. 


Turn 3:
Stormtrooper squad Alpha (The command squad) begins moving across the bridge using a Move and Shoot order.  They target the Rebel Squad two in cover.  They manage to reduce them three effectiveness points.  Stormtrooper squad Charlie rushes towards the second bridge, while Bravo is momentarily confused by the shooting. 

Rebel team 4 stays shaken.  In the meantime, team 3 rallies.  The command squad double times it to the edge of the barnyard. 

Team 2 returns fire on Stormtrooper squad Alpha on the bridge.  There shots are true and the Stormtroopers lose 2 Effectiveness. 

Turn 4:
Alpha squad doesn’t both shooting and instead hoofs it across the bridge towards the pilot.  Charlie moves forward and shoots at the shaken Team 4 and reduces them 3 effectiveness at long range.  Bravo rallies. 

Rebel team 4 is shaken from the Stormtrooper shots and can not rally.  Team 3 rushes towards the second bridge. 

Meanwhile the command squad opens up on the Alpha team approaching the pilot.  Their shooting is accurate and reduces them 2 Effectiveness rating and causes them to retreat to the bridge shaken. 
Rebel team 2 also fires on the retreating Alpha, but their shooting is ineffective.


Turn 5:
Charlie moves to the stream edge and fires across the barnyard at the command squad and reducing them 1 effectiveness.   Alpha rallies while Bravo pours fire into Rebel Team 2.  They are down to 4 effectiveness and just barely keep from retreating. 

Team 4 stays shaken.  Team 3 moves up and fires on Charlie but fails to find the mark.  The command team’s accurate fire again causes Alpha to retreat, the Imperial Navy Officer appears unwilling to risk his own skin in this battle.  Team 2 tries some long range potshots at the retreating unit reducing them an additional 1 effectiveness. 


Turn 6:
Charlie and Bravo concentrate fire on the Rebel Command squad and reduce it to 4 Effectiveness.  However, they refuse to retreat from their position!  Meanwhile, Alpha rallies.   

Rebel Team 4 rallies!  However Team 2 and 3 are confused and shaken momentarily.  The Command Squad moves to a position out of fire behind the barn. 

Turn 7:
Alpha fires on Team 2 and causes them to retreat back.  They are at Effectiveness 3 only.  Charlie gets confused and shaken.  Meanwhile, Bravo double times it across the bridge desperate to get to the Pilot. 

Team 4 finally does something and shoots into Charlie squad reducing them 1 effectiveness!  Team 3 fails to rally.  Team 2 fails to rally.  The Command Squad moves into the Barnyard to contest the Pilot from squad Bravo. 


Turn 8- Final Turn
Bravo team opens fire on the Command squad and shoots them down to 0 Effectiveness.  Alpha team tries to rout Team 2, but fails to cause anymore damage.  Charlie rallies.

Team 4 shoots up Charlie squad and reduces them another Effectiveness rating.  Team 2 and 3 fail to rally and end the game shaken.              


Conclusion:
The game ends after 8 turns and 45 minutes of game play with photos and documenting.  Stormtroopers were reduced 8 Combat Effectiveness and the Rebels lost 20 Combat Effectiveness.  However, despite the lopsided Combat Effectiveness totals, the rebels won the scenario by holding off the Stormtroopers long enough! 

The battle took a sudden with familiar whip-crack of X-wing blaster cannons.  The ground around the barn was ripped apart as the rebel X-wing zoomed in from overhead.  The Imperial officer was forced to sound a withdrawal as his troopers had nothing that could put that X-wing down.  The remaining rebels looked around confused for a moment before a ragged cheer went up.  The X-wing circled for a few moments and waggled his wings in victory before peeling away to a new challenge.  Rebel troopers had soon rousted out the Imperial pilot and took him prisoner. 

Final Thoughts:
The scenario ended much differently for the Imperials in Rampant Stars than it did in Tomorrow’s War.  In this battle, the Rebels were out classed but were able to stall the Stormtroopers long enough for the win.  The Disciplined Trait of the Stormtroopers helped them push forward consistently, while the rebels Rapid Fire skill allowed them to still make long range shooting deadly.  A well matched game that went down to a few key decisions and dice rolls. 


If you are interested in reading more Rampant Stars battle reports look here and here.  You can pick-up the rules for yourself here.

Monday, April 24, 2017

Tomorrow's War: Battle Report- Star Wars Lost and Found


This is the first scenario in the Tomorrow’sWar rulebook called Lost and Found.  Hopefully after this battle report you can see for yourself how accurate my review was.  Some people feel that this scenario is unbalanced.  We will have to see what happens.    

An Imperial Tie Striker was lost on routine air patrol on the forest planet of Tabletooine.  The Imperial pilot escaped and is evading rebel troopers in a nearby outbuilding.  Imperial Stormtroopers from a nearby garrison have been sent in to locate and rescue him and recover the Tie’s recorder device. 

The miniatures are old Star Wars Micro Machine toys that are probably 10mm scale or so?  The terrain is my trusty green mat, lichen, and electrician’s box that have served me well for so many games.    

Forces:

The Galactic Empire
1 Squad of Garrison Stormtroopers
Troop Quality/Morale: d8/d10
Tech Level 3
Armor: 2D

1 Imperial Navy Leader- Blaster Rifle

Fireteam Alpha
1 Repeating Blaster
1 Concussion Grenade Launcher
3 Blaster rifles

Fireteam Bravo
1 Repeating Blaster
1 Concussion Grenade Launcher
3 Blaster rifles

Fireteam Charlie
1 Repeating Blaster
1 Concussion Grenade Launcher
3 Blaster rifles


Rebel Scum
Rebel infantry
Troop Quality/Morale: d6/d10
Tech Level: 2
Body Armor: Blast Vests 2D

Team 1
1 Leader with Blaster rifle
1 Medic with Blaster rifle
1 Repeating Blaster
1 Concussion launcher
3 Rebels with Blaster Rifle

Team 2
1 Repeating Blaster
1 Concussion Grenade Launcher
3 Blaster rifles

Team 3
1 Repeating Blaster
1 Concussion Grenade Launcher
3 Blaster rifles

Team 4
1 Repeating Blaster
1 Concussion Grenade Launcher
3 Blaster rifles

Mission
Imperial forces are attempting to rescue their downed pilot and retreat with them off board.  A Stormtrooper team needs to come within cohesion distance of the pilot to add them to the squad and get them off board.  The Rebel Scum are trying to stop the Imperials form succeeding. 

The pilot adds no firepower, defense, or morale to a squad they are with.  If the squad they are with is wiped out, then they move to the nearest cover.    

Terrain is 1D defensive terrain. Woods and building block LOS.

The Rebel Scum are in ambush so they will fire first.  In addition, they can not be targeted unless they are in optimal range and a TQ check is passed.   
  
Turn 1:
The Stormtroopers survey the scene and push forward.  Alpha and Beta move up and take position in the ruins.  Charlie rushes ahead and takes cover by a woodline.  Their officer surveys the scene.  According to his intel, the pilot should be near the barn in the courtyard.  Everything seems quiet.

In the far barn, the rebel officer watches the Stormtroopers begin to deploy in his magnoculars.  Her is confident that he has set-up a kill-zone around the barn.  Team 3 moves secretly in the woodline to approach the barn out of Line-of-sight.  Squad 4 moves up in the cover of the stream bed, and out of view of the Imperials.

No one takes a shot, instead they are waiting for the optimum time to fire. 


Turn 2:
The Stormtroopers maintain the Initiative. 

Alpha squad moves forward to secure the stream bed by the nearest bridge while Bravo covers them.  Charlie repositions to cover the bridge crossing as well, but hugs the tree line.  With no enemy sighted, the Officer and Alpha squad breaks cover and dash to the streambed by the bridge for cover.  Still no sign of the enemy, this could be a cake walk after all.     


The rebels continue to creep into position for an ambush.  Team 3 rushes from the jungle and to the edge of the barn out of sight of the advancing Imperials.  Team 1 leaves the barn and moves through the jungle into a better firing position on the approach to the barn.  Team 4 hugs the stream bed and moves forward.  Team 2 readies to fire next turn. 

Tension is mounting as the Stormtroopers approach their objective. 

Turn 3:
Charlie and Bravo take positions to cover Alpha as they move across the first bridge.  As they approach the opposite side, the point Trooper calls out a warning.  Rebels have been spotted in the tree line.  Since the unit was all ready declared active and action taken before spotting the rebels, the Stormtroopers are caught out in the open!

Team 2 decides to open fire at the Imperials, but the Stormtroopers try to react with movement.  They succeed by 1!  The Imperials scramble to cover in the barnyard for cover.  The rebels can still fire at them, but the Stormtroopers will have improved Defense dice. 


Team 2 is 5 rebels with 2 light support weapons for 7 Firepower Dice.  The Stormtroopers are 6 troopers with +2 dice from armor, and +1 dice for cover for 9 dice.  The rebels score 4 successes and the troopers score 7.  No damage. 

Rebel team 3 comes around the barn, and captures the Stormtroopers in the open in optimal range.  Since the Rebels were in Ambush, the Stormies can not try to fire back.  The Rebels have Firepower of 5 figures +2 for light support and +1 for optimal range.  8 dice vs Stormtroopers with a defense of 6 +2 for armor, but no cover this time for 8 Defense dice.  The Imperials get one success more than the rebels so no hits are taken!

Rebel Team 1 also fires on Alpha squad, but the Imperials can not fire back as it is an ambush!  9 figures with +2 for light weapons vs. 6 figures with +2 armor and +1 cover.  11 firepower vs. 9 defense.  They both score 6 successes and no casualties! 

Finally, Rebel Team 4 in the stream bed moves up and fires on Charlie.  Firepower 5, +2 for light support, and +1 for optimal range.  Charlie has Defense 5, +2 for armor but no cover.  3 hits vs. 4 defense.  No injuries are taken by the Imps. 

There was a lot of shooting, but not much hitting by the rebels. 

Turn 4:
The Stormtrooper keep the initiative. 

Bravo rushes the bridge with a move and fire on Team 2 of the rebels.  The Rebels try to react by going deeper into cover to block Line-of-sight.  However, the Rebels fail to react.  Stormies shoot with firepower 5, +2 for light vs. Defense 5 and +2 for armor and +1 for cover.  6 firepower vs. 5 defense dice.  Two rebels go down! 

Charlie decides to shoot at Rebel Team 4 in the stream bed.  The rebels try to react with fire.  The Stormtroopers win and shoot first.  One rebel goes down in the round of fire. 

Alpha decides to move up to rescue the pilot and shoot at the Rebels in the barnyard, and the rebels opt to react by trying to move out of Line-of-sight. 


The Imperials win the reaction test again.  10 firepower vs. Defense of 7 dice.  The close range firefight leaves all the rebels down and injured.

Team 2 activates and checks its casualties.  1 gets back up, but the other is seriously injured.  They decide to return fire on the Stormtroopers who try to react with fire of their own.  The Stormies win and open up first.  3 rebels go down, and they last fires back hopelessly and ineffectively. 

Team 1 opens fire and the stormies try to react with movement this time to take cover.  The rebel shots from Team 1 rip up the streambed, but leave the Stormtroopers unscathed. 

Team 4’s causalty is lightly wounded.  They decide to fire on Alpha in the barnyard.  The Stormies of Charlie and Alpha try to react with fire of their own.  The Imperials win the reaction tests again and light up the rebels by the stream.  Two more rebels go down.  Their own shooting is ineffective. 

Turn 4:
Imperials maintain the initiative.

Alpha moves behind the barn to secure the downed rebels of Team 3 as prisoners.  However, Team 1 tries to react with fire.  They fail and Alpha secures the downed rebels and has the pilot. 


Bravo aggressively moves towards Team 2 who try to react with movement.  The Rebels succeed and flee back into the jungle and away from the oncoming troopers. 

Charlie opens fire on Team 4 who react with fire of their own.  Impies win and shoot away.  Charlie takes out the Rebels in team 4. 

Team 2 checks for injuries.  1 dead and the a mix of serious and light wounds.  They choose to fallback off the board and disengage from the battle.  Team 1 surveys the battlefield and decides to fallback as well.   Their best chance at securing the Imperial pilot has now passed and there is little point in losing more men in a futile gesture. 

The Imperials are left in control of the field with the pilot.


Conclusion:

Imperial Victory!

Fireteam Charlie quickly secured the rebels in Team 4 as additional prisoners.  The Imperial troops marched the rebels back to their garrison along with the Imperial Pilot safely in tow.  10 Rebels captures, 5 dead or injured, mission accomplished, and no casualties.  The boys in white showed why they are the most feared troops in the galaxy today!

Final Thoughts:
I had read that this scenario was one-sided at I can’t help but agree.  It is intended to teach you the basics of the game, and it does.  It also serves as a cautionary tale about the importance of building a solid foundational scenario to work with.  The Troop Quality d6 vs. d8 was decisive as the Stormtroopers were pretty much doing whatever they wanted whenever they wanted to do it.  The rebels only won a single reaction test all game, so by the time they got to shoot they didn’t have enough firepower to even scratch the Imperials white armored Defense. 

Perhaps if the rebels had more troops in each Team they could have weathered the firepower and then used it to return fire effectively against smaller fireteams of Stormtroopers.  However, I am not sure since the Stormtroopers were winning most dice offs (Reactions, Firepower, Defense) handily.


Next, I plan on replaying this scenario using Rampant Stars rules to see what happens! It should play very differently.