Showing posts with label Korean Air War. Show all posts

Monday, December 4, 2023

Battle Report: White Star/Red Star - April 12th, 1951 "Black Thursday"


Dateline: April 12th, 1951
Location: Northwest Korea, MiG Alley

In early 1951, the Communist forces were able to dislodge UN forces out of the Kimpo area.  This success also led to an increase in Communist air activity in northwest Korea; MiG Alley.

April 12th, 1951 was nicknamed "Black Thursday" after 30 Mig-15s engaged and attacked 48 or so B-29 Bombers in MiG Alley.  The Bombers were escorted by F-80s and F-84s that were no match for the Soviet aircraft.  Several B-29s were lost or damaged.  No MIGs were lost.  This caused bomber operations to cease over North Korea for three months.

Today we will be playing another Bomber intercept mission similar to our last engagement.  However, this time we will be using a few more defenders and attackers and see if we get a different outcome from the historical, Black Thursday results.  

Forces:

USAF
3 B-29 Bombers - Experienced Pilots
4 F-84 Thunder Jets- Experienced Pilots
4 F-80 Shooting Stars- Experienced Pilots


Soviets
4 MiG-15s - Experienced Pilots
1 Mig-15- Ace Pilot


Mission: 
This will be a Bomber Intercept sortie with the USAF as the Attackers.  They gain a kill for each Bomber that makes it off the board. 

Set-up:
Today we are using 1 MU = 1 inch on a 72MU by 48MU across board. 

However, the sky is overcast at High Altitude, meaning that Detection is harder for aircraft at High Altitude and shooting is reduced to Combat range only. 

For fun and flavor, we scattered some Low Altitude terrain across the board at random.  These will only impact flying at Low Altitude.  


If an aircraft is off its base, it is at low altitude.  If it is on the base it is at Combat altitude.  If it has a dice behind it, the aircraft is at High-altitude.  As usual, I will be breaking the game down into three phases, Maneuver, Battle, and End phase.  I will not be tracking the turn-by-turn action as it makes recording the game and playing it easier.  

Maneuver Phase:
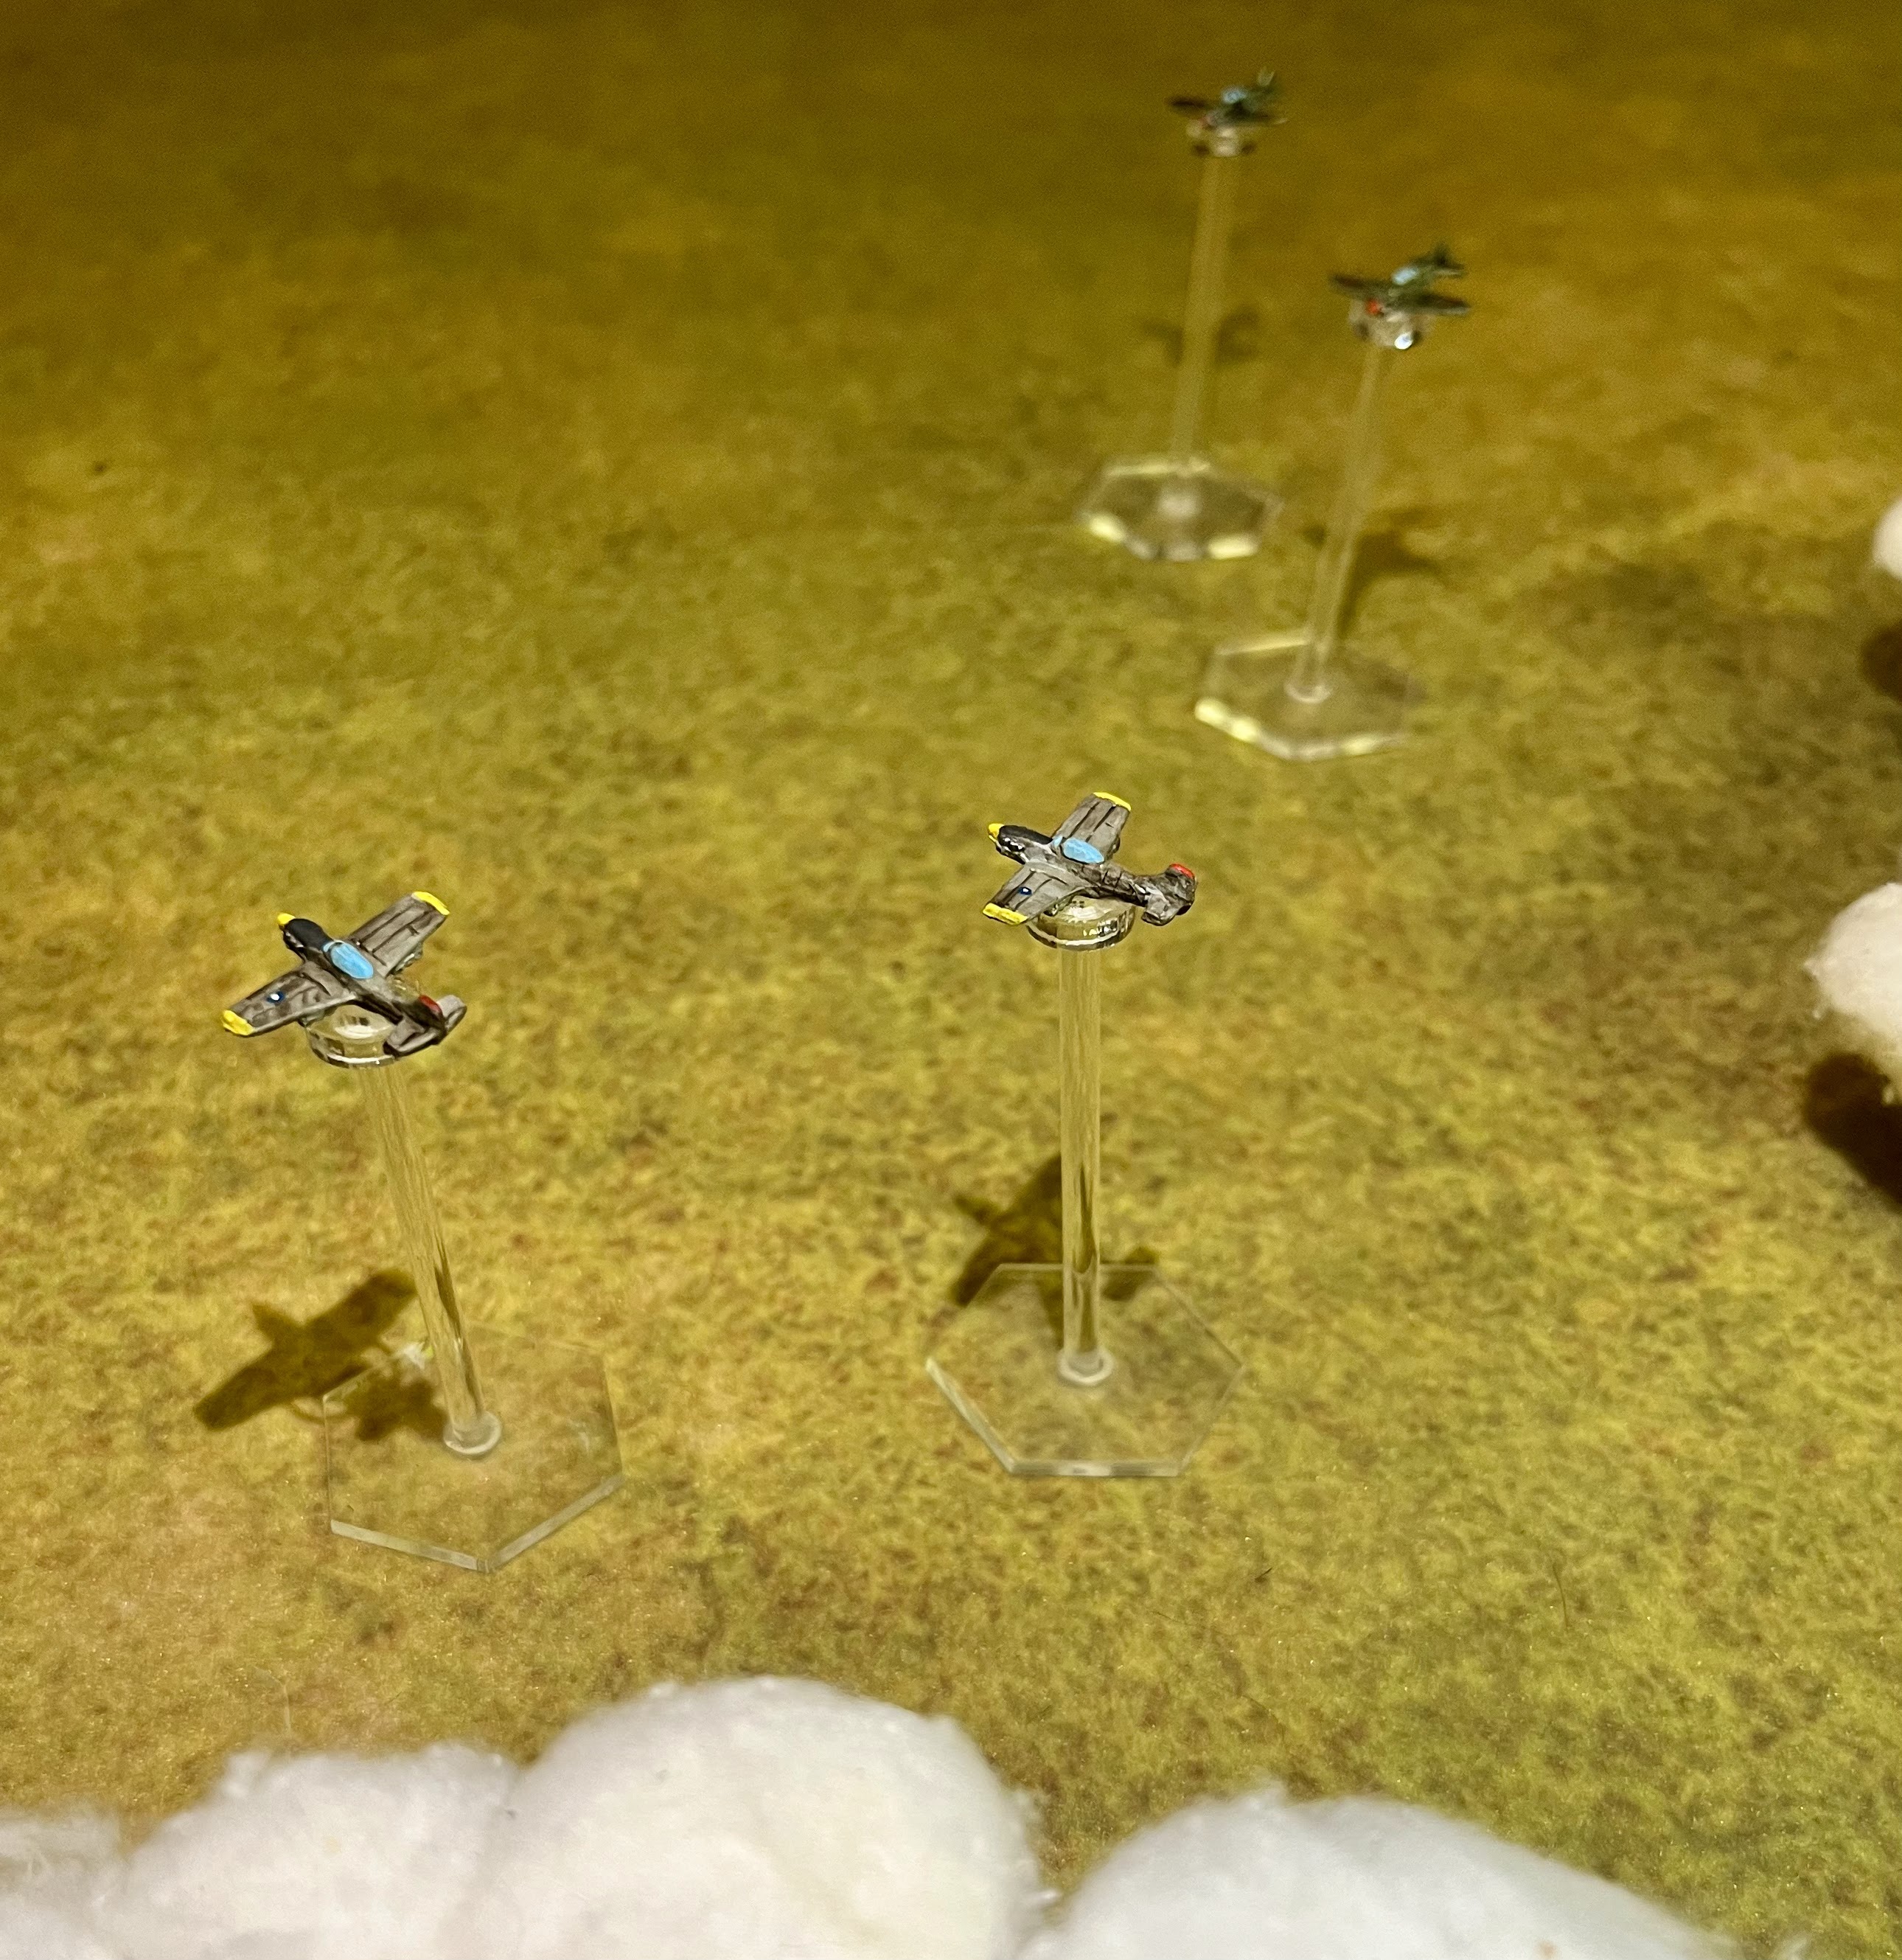
As normal for games of White Star/Red Star the table starts clear of any aircraft as none have been detected yet. A strong Soviet detection roll let them spot the B-29s and escorting Shooting Stars at High altitude, even with the Cloud Cover before they made it very far onto the board.  The following turn, the Thunderjets were also detected.  

Finally, the MIg-15s were spotted coming in low, along the hard deck.  They use their speed and low altitude to sneak beneath the F-80s in front.  


Battle Phase: 
The Soviet pilots use the amazing climbing ability of the Mig-15s to race up and engage the B-29s.  The Migs swarm the Bombers, and manage to take one down in a fire ball.  

1 Bomber Down!

However, it doesn't all go the MiGs way, as fire from one of the B-29's also takes out a passing MiG. The experienced MiG pilots race past, needing to reposition for another pass.  However, the Ace does a high-G turn and targets another bomber, but fails to bring it down. 

Scratch 1 MiG!

After frantically trying to shift position and get back into the fight, the MiGs manage to get in behind the second bomber and blast it from the sky.  The MiG on the outside runs out of ammo tangling with some F-80s, but no one goes down.  The Soviet Ace over-shoots the last Bomber, and has to break-off, pursued by USAF F-80s.  
2nd Bomber Down!

The pair of MiGs manage to be in a tailing position on the last bomber, after finishing off his companion, and they down the last B-29.  

The last Bomber just before getting shot down!

Disengagement Turn:
The USAF go back to High Altitude and turn for home.  The MiGs avoid any further engagements with their mission complete and break-off back across the Yalu river. 

F-84 Thunderjets flee for home.

Conclusion:
Soviets scored 3 Kills to the USAF 1.  A clear win to the Communists! 

A "Black Thursday" indeed.  The MiG-15s proved why they were so feared and effective at their job.  They easily out maneuvered the F-80s and F-84s and took the B-29s apart.  As the USAF player, I never had a chance as I was always out of position with my escorts.  I think I managed to fire with them twice.  Meanwhile, most of my shooting came from B-29s!  The Soviet Ace was all over me.  Being able to maneuver in all three phases is pretty good, but thankfully he couldn't hit the broadside of a B-29 or this would have been over much faster! 

I think next time we will have to put some Sabres up against some MiGs.  The Shooting Stars and Thunderjets are not up to the challenge! 


Become a Patron and get access to all the cool stuff, a peak behind the curtain of Blood and Spectacles, and early-access to playtest games!  


You can follow Blood and Spectacles Facebook page or Instagram for more fun! 

Check out the latest publications and contact me at our Blood and Spectacles website

Or purchase all out games at the Blood and Spectacles Publishing Wargames Vault Page!  


Monday, November 20, 2023

Battle Report: White Star/Red Star - Bandits Inbound! November 21, 1950


Dateline: November 21th, 1950
Location: MIG Alley

By August of 1950, UN forces had taken Pyongyang and the North Korean air force had been silenced.  However, the war continued as UN forces closed in on the Yalu river border with China.  B-29 bombers were hitting targets across North Korea.  However, the entire war changed when Chinese forces attacked the UN in October throwing back the Eight Army  However, the 1st Marine Division engaged near the Chosin Reservoir and reached the Yalu on Nov. 21st.  

Far East Air Force (FEAF) aircraft supported these counter-attacks and defensive actions.  B-29s and assorted fighter-bombers continued to attack targets of strategic and tactical value.  It was in November that a flight of F-51 Mustangs first encountered the Mig-15 by the Yalu River.  However, soon the Communists were contesting air superiority across the North with this new threat. 

With that said, we will be playing an engagement between Mig-15s and USAF aircraft.  We rolled up a Sortie and got a Bomber Interception mission.  The Mig-15s main role was to stop the bombers from getting through! 

Forces

USAF

3 B-29 Super Fortress
- Experienced Pilots

2 F-80 Shooting Stars
- Experienced Pilots


Soviets

3 Mig-15s
- Experienced Pilots


Mission:
Today's Sortie is a Bomber Intercept mission.  Each Bomber that escapes off the table counts as a Kill for the Attacker.  

Set-up:
1 MU will equal 1 inch and the board will be 48 by 48MU.  

There is no difficult terrain on the board and the weather is clear.   

In this case, the USAF is the Attacker.  The Russians are the defenders. 

Weather, sortie type, and Attacker were all determined using the methods found in the main White Star/Red Star rulebook.  

If an aircraft is off the base, it is at Low altitude, on the base is combat altitude, and on a dice is High altitude. I won't be following the details on a turn by turn basis.  Instead, I will break it down into three broad phrases; Maneuver Phase, Battle Phase, and Endgame and try to cover the battle in broad strokes rather than turn-by-turn, aircraft by aircraft detail. 

Maneuver Phase:
No planes are deployed until they are detected.  However, they are all detected all at once.  The 4th turn the USAF and the Russians are detected.  The B-29s are set-up across the board at maximum forward movement at high altitude.  The Shooting Stars are at High and Combat between B-29 1 and 2.  The Mig-15s stack up coming in on B-29 2 in the center, at all three altitudes.  


In the initial pass, the Mig manages to down the 2nd B-29!  The Shooting Stars close in and engage, but the Migs dodge away from the incoming fire.  Everyone still has ammo. After the Experienced and Ace phases, the Migs seem out of position, but have 1 kill. 


Battle Phase: 
The Migs try to turn back onto the attack, but a Shooting Star lines up and fires a deflection shot at long range, but runs out of ammo.  The shots fail to strike home!  This causes him to break away and head for home at high altitude. 


Due to poor flying, a Mig breaks off his attack and heads for home.  That leaves his wing leader, and a squadron mate.  The B-29s are almost to their target areas.  


Disengagement Phase: 
The USAF makes a mistake and moves the disengaging F-80 first.  This gives a Mig time to swoop in on a B-29 and blast it apart.  However, the last B-29 and Shooting Star disengage off the board.  This is soon followed by the last remaining aircraft disengaging by the end of the turn.  


Conclusion: 
A very narrow Soviet victory.  The USAF got 1 Kill for a B-29 escaping, while the Soviets downed 2 bombers for 2 Kills.  

The introduction of the Mig-15 changed the complexion of the war.  The USAF had air superiority over the majority of Korea, but the Mig-15 kept the areas close to the Chinese border as contested air space.  Eventually, the USAF suspended day time attacks with B-29s, and switched them over to night time bombing.  

Good, quick fun.  The key to this game is deployment after detection and activation order.  We saw that today.  We have now played through two major engagement types for the early part of the war.  It is now time to move onto 1951, where much of the early air battles involved attacking and defending ground attacks from fighter-bombers.  

Until next time! 


Become a Patron and get access to all the cool stuff, a peak behind the curtain of Blood and Spectacles, and early-access to playtest games!  


You can follow Blood and Spectacles Facebook page or Instagram for more fun! 

Check out the latest publications and contact me at our Blood and Spectacles Website

Or purchase all out games at the Blood and Spectacles Publishing Wargames Vault Page! 


Sunday, October 29, 2023

Battle Report: White Star/Red Star - CAP July 29, 1950


Dateline: June 29th, 1950
Location: Suwon Airfield, Republic of Korea

On June 27th, an attack by the North Korean KPAF 1st Air Division on Suwon Airfield had been thwarted by F-90 Shooting Stars.  Despite this loss, the KPAF returned to the attack on the 29th.  This time, the American defenders were a group of F-51 Mustangs.  US Military leaders were on hand at the nearby town as part of a conference.  They were able to witness the defense of the base first hand.  

These attacks led to Gen, MacArthur to authorize air sorties to attack North Korean targets in order to establish air superiority.  

This will be a classic engagement from early in the war.  I could not really find any information on the North Korean attackers, but knew that the objective was to attack ground targets and that the North Koreans were equipped with a lot of IL-10's.  Those would be of little value in a CAP.  Therefore, I decided to use more "fighter" oriented planes for this sortie. 

Forces: 

USAF
4 F-51 Mustangs with Experienced Pilots


North Koreans
2 Yak- 9 with Rookie Pilots
2 La-9 Fritz with Experienced Pilots

Yaks on the left, Lavochkin's on the right

Mission: 
A simple Combat Air Patrol.

Set-up:
1 MU will equal 1 inch and the board will be 48 by 48MU.  

There is no difficult terrain on the board.  However, there are 4 cloud banks.  There are 3 cloud banks jumbled together at High altitude, and 1 smaller cloud bank at Combat altitude.  

In this case, the USAF is the Attacker.  The North Koreans are focused on getting to the air field to strafe targets.  The Mustangs arriving lead to a dogfight instead. 

Weather, sortie type, and Attacker were all determined using the methods found in the main White Star/Red Star rulebook.  

If an aircraft is off the base, it is at Low altitude, on the base is combat altitude, and on a dice is High altitude. I won't be following the details on a turn by turn basis.  Instead, I will break it down into three broad phrases; Maneuver Phase, Battle Phase, and Endgame and try to cover the battle in broad strokes rather than turn-by-turn, aircraft by aircraft detail. 

Maneuver Phase:
The first three turns go by fast as no planes are detected.  However, the North Koreans spot the Mustangs on Turn 3, and the USAF player has to place his planes up to 18 MU in.  Two Mustangs are at High Altitude near the edge of the board, while the other two are at Combat Altitude going into the cloud banks.  


The next turn, the Mustangs spot the Yak-9s coming in hot on the Mustangs at Combat altitude!  Since the USAF has more planes, they get to move first.  The two forward Mustangs decide to turn into the oncoming North Koreans to try to get in under the guns.  The Yaks fire a burst and then buzz past, the deflection angle was too much for them to score a hit. 


The next turn, the LA-9s are also detected, and they are also coming in hot on the Mustangs. Now, both sides have equal numbers and the Attacker goes first, the USAF.  The Mustangs try to maneuver, but the Experienced LA-9 pilots zoom in for the kill on the wingman of the first squadron. The Lead Fang pilots scores a hit and downs the Mustang! 

Now the real furball is getting started!

Battle Phase;
Now, the North Koreans have more planes, but choose to let the USAF go first. 

The Mustangs at High altitude manage to get in behind the Rookie Yak pilots thanks to their higher experience, and swat them out of the sky!  

However, that Maneuver put them into the sights of the La-9 pilots.  The wing leader manages to blast the Mustang wingman out of they sky, his second kill for the day!  However, he also uses the last of his ammo in the process.  


End Phase:
With both sides at half, this forces a disengagement turn.  It is the final turn of the game.  The USAF can choose to go first or second, and decide to go first. 

The Mustang in danger just throttles it and heads for home, breaking off.  The LA-9's try to maneuver back around, but the last Mustang out-maneuvers them and opens up on the lead aircraft. The USAF Mustang runs out of ammo trying to down the North Korean craft.  However, it is to no effect as the North Korean pilots weaves and dodges his way through the incoming fire.  


Conclusion: 
The battle ended in a draw, and a non-historical outcome!  So, what happened! 

The big sticking point was that the North Koreans managed to see the USAF before the USAF saw them!  This allowed them to get into a good firing position right away, and the Mustangs had a tough time shaking them.  The USAF had a chance for a win on the last attack run, but alas it was not to be! 

It was fun seeing the two players try to do the "Thatch Weave" and end up keeping the engagement close.  The Experienced USAF pilots easily downed the rookie North Koreans in the newer Yak-9s.  However, Experience paid off for the La-9 pilots, in worse aircraft.  

From here, I think I want to run a few games in the various segments of the war until the end.  Of course, this would represent the Air Battle of Korea, which lasted only a few weeks before the UN had gained air superiority over North Korea.  The North Korean offensive lasted until about September 1950.  The next phase of the war was the Chinese Counter-attack from October to January 1951.  This would be the introduction of the Mig-15 as they strove to bring down the day light bombers of the USAF.  

Onto the next battle!  


Become a Patron and get access to all the cool stuff, a peak behind the curtain of Blood and Spectacles, and early-access to playtest games!  


You can follow Blood and Spectacles Facebook page or Instagram for more fun! 

Check out the latest publications and contact me at our Blood and Spectacles website
Or purchase all out games at the Blood and Spectacles Publishing Wargames Vault Page!  


Monday, September 12, 2022

Battle Report: White Star/Red Star - CAP near Taejon, July 1950


July 19th, 1950 the USAF sought to establish air superiority against the invading communist forces.  This was know as the Air Battle of Korea.  At this stage in the war, the USAF was using a combination of piston and jet engine aircraft for this mission.  The primary opponents were the North Korean air force using propeller driven late WWII era aircraft.  

On July 19th, F-80's from the 5th air force took on advanced elements of the North Korean Air Force.  They engaged in a dogfight near Taejon.  In the engagement, the F-80s managed to down 3 enemy Yaks.   

I am super excited to get my Tumbling Dice miniatures out on the table to see how they look and feel on the table! 

Mission:
We used the rules from the book to determine the Sortie for today and came up with a Combat Air Patrol in clear weather.  This is a simple scenario to kill the other sides planes.  

Forces:
We have decided to use the North Koreans and USAF lists.  

USAF
3 F-80 Shooting Stars 
- Experienced pilots


North Koreans
4 Yak - 9 Franks
- 3 Rookie Pilot
- 1 Experienced Pilot


Set-up:
This games starts off with both players undetected.  There is also no need for terrain, but we added some for the look.  

The game is taking place on a 86 x 86 MU board.  1 MU is equal to 1/2 and inch.  

Two of the Yaks are connected as wing-men.  Everyone else is individuals in this furball. 

For reference, if a plane has no stand, it is at low altitude, stand is combat, and on top of a dice on a stand it is High altitude.  

Turn 1: 
Detection:
No one is detected this turn, so no planes enter play yet.  

Turn 2: 
Detection: 
No aircraft detected by either side still.  This is eating into the games turn limit, and allowing planes to deploy further in on the board once detection occurs. 

Turn 3: 
 Detection: 
Nothing. All pilots are still scanning the skies. 

Turn 4: 
Detection: 
The F-80's are spotted, and need to be deployed on the table.  Since it is the 4th turn, they can be deployed up to 24 MU in.  

The F-80's deploy with two at combat altitude and 1 at High.  They re moving diagonally across the board.

Rookie: 
The lead F-80 makes a 45 degree turn and heads towards the village.  The second stays high and straight, while the third makes a 20 degree turn and turns towards the village too. 


Experienced: 
The USAF continue to move.

Ace:
They all move straight, as they are Experienced pilots and can not make moves in this phase.  

Turn 5: 
This time, the USAF sees the North Korean Yaks.  The North Koreans can deploy up to 30 MU in from their board edge.  

The Yaks put their Rookie pair forward, going across the board to try and lure the USAF after them.  The other two are further back, with the last rookie at High altitude. 


Rookie: 
The North Koreans have to start moving planes first, since they have more of them.  Both sides begin to turn into the attack, looking like they are setting up to go head-to-head.  No one changes altitude. 

Experienced: 
The USAF have more Experienced planes and move first. The paired North Koreans have to move together as a pair, since they are a wing-man team.  

The USAF moves to bypass the rookie bait, and head for the North Korean Experienced pilot.  Both sides close the distance, and get ready to fire.  

Ace:
Neither side has any Aces, so the North Koreas move first.  All pilots can only go straight, and not change altitude.  They also can not shoot in this phase.    


Turn 6: 
Detection:
There are no more planes to detect, so this phase is no longer needed going forward. 

Rookie: 
The tailing Yak at high altitude banks 45 degrees to try and set-up against the high F-80.  Meanwhile, the Rookie pair turn at 20 degrees to dissuade the high F-80 from dropping down altitude. 

The Experienced North Korean Pilot and one of the F-80's are going head-to-head.  the North Korean fires, but the range is far enough for the USAF pilot to maneuver around the incoming fire. However, the North Korean pilot kept ammo in the hoppers for another pass with a disciplined burst.

The lead F-80 just misses the angle on the North Korean experienced pilot and can not fire.  The other F-80 is lined up after avoiding the incoming fire, and opens up a return burst.  The North Korean dodges the long range burst as well.  The USAF pilot also has ammo remaining. 


Experienced: 
This time, the USAF has the advantage as they have more experienced pilots.  The F-80 presses home the head-to-head attack on the experienced North Korean pilot, and this time is able to bring him down with a burst.  However, it was a long burst and the F-80's guns go dry.  He will want to break-off and away.  First kill to the USAF! 


The other North Korean pilots can not maneuver, as they are all rookies.  Instead, they go straight.  The High F-80 stays high and turns in to go over the Rookie pair.  Meanwhile, the F-80 leader turns back into the furball. 

Ace: 
No one can maneuver, so they all go straight! 

Turn 7: 
Rookie: 
The Rookie pair dive down to low altitude and make to break-off.  The F-80 that is out of ammo also turns away to break-off.  

The High Altitude North Korean Rookie sees a USAF F-80 bearing down, so he turns into the attack and fires.  However, he fails to hit the mark.  The incoming F-80 returns the favor.  However, he also misses.  Neither plane is out of ammo yet.  


The lead F-80 tries to duck in and cut-off the Rookie North Korean if he tries to break away or go lower.  

Experienced: 
The USAF F-80 fires on the Rookie Yak-9 pilot, who manages to dodge the shots.  The two aircraft race past each other.  Both with ammo remaining.  

The lead F-80 stays at combat altitude, incase the higher Yak dives.  

Ace: 
Everyone goes straight! 

Turn 8: 
Rookie: 
Everyone is faffing about and trying to regain position.  

Experienced: 
The F-80s still in the fight are using their superior speed and skill to get back in on the Yaks, cutting off their turning radius.      

Ace: 
Straight again! 

The F-80 that is out of ammo manages to disengage from the fight and head for home with 1 Kill to their record.  


Turn 9: 
Rookie: 
Lead F-80 is still 1 altitude level above his prey as they try to flee.  The last rookie Yak drops to combat altitude, hoping for a chance on the F-80 leader.  The last F-80 is still turning back into the scrum and at high altitude. 

Experienced:
The F-80s both dive.  However, the Lead F-80 can not get the angle on the pair of Rookie North Korean pilots.  However, their higher altitude pal also has no shot. 

Ace:
Straight ahead! 


Turn 10: 
Rookie: 
The North Koreans go first as they have more planes.  The rear Yak dives, but can not get a shot off.  

The second F-80 is still too high, but gets ready to cut-off the last North Korean aircraft.  

The Rookie pair try to cut in under the attacking Lead F-80, but he manages to fire a burst and take out the tailing plane.  The USAF pilots still has ammo.  


Experienced:
With 1 Kill under his belt, the lead F-80 breaks off from the fight and disengages off the board.  The second F-80 dives at the fleeing rookie Yaks, but misses the angle. 

The last Yak also has no shots, but does not have the skill to try a shot anyway. 

Ace:
They all fly straight. 

Turn 11- Disengagement Turn
With all three phases, the last planes can easily disengage off the board.  

Conclusion:
The USAF F-80s of the 5th Air Force managed to disengage with no losses, and 2 Kills to their record.  A successful day in the Air Battle of Korea

A couple observations from this battle.  Typically, I use 1 MU = 1 inch.  The shorter MU slowed the game down a bit, but allowed more maneuver.  With 1 MU is 1 inch, the game would have lasted closer to 6 or 7 turns instead and the action would have occurred much faster.  I think I will use the 1 MU = 1 inch going forward.  The shorter distance also made the aircraft feel slower as well.  

As the North Korean player, I was too aggressive with my Experienced pilot and when he was knocked down I did not have much to respond with.  My hopes for a draw fizzled when one of my Rookie wing-men got shot down.  Then, it was all about avoiding losing more planes and getting out alive! 

The faster Jets and skill of the American pilots played a part in the battle.  It was this advantages that allowed them to shoot my Experienced pilot down, and bag a Rookie.  A historically accurate result in this engagement.  


Become a Patron and get access to all the cool stuff, a peak behind the curtain of Blood and Spectacles, and early-access to playtest games!  


You can follow Blood and Spectacles Facebook page or Instagram for more fun! 

Check out the latest publications and contact me at our Blood and Spectacles website

Or purchase all out games at the Blood and Spectacles Publishing Wargames Vault Page! 


Monday, September 5, 2022

Wargame Design: White Star/Red Star


I have been working on a Korean Air War game for a while.  You can now find it on the Blood and Spectacles Wargame Vault page, and it is called White Star/Red Star.  The kernel of White Star/Red Star game were two main objectives: 

  1. How to model this "transition" period between WWII and Modern air warfare?
  2. How to reduce the complexity of flying for the player to focus on the wargame?
As many people know, I am a big fan of Aeronautica Imperialis as it gives a lot of tactical depth with simple rules.  The easy solution would have been to simply re-skin one of my favorite rules systems and make Korean War profiles for it!  However, that did not solve the fundamental challenges I wanted to focus on.  Even AI, you spend a lot of time simply flying your planes, and that was an area I wanted to explore simplifying.  

Therefore, I had a few different objectives as I built these rules: 

1. Simplify flying and assume that all pilots know how to fly, the player do not have to
2. Use action economy to differentiate pilot skill
3. Make detection a key component of the game
4. Finish games quick while including critical player decision making
5. Represent the key tactical challenges and aircraft of the Korean Air War
6. Scale and Model agnostic

Let's take a look at how I went about tackling these objectives then.


Simplify the Flying
At this stage, I made a number of abstractions to make flying easier on the player.  The rules first assume that the pilots all know the basics of flying.  They are skilled enough to not crash and keep the craft from stalling and the like.  Therefore, since the Pilot is doing the flying, the player is more concerned about where the plane will go in relation to the other planes on the board.  

1. All planes are assumed to be going at combat speed.  There are no speed adjustments to track.
2. Altitude is simplified to 3 levels only.  You can change altitude or turn in an activation, not both
3. Turns are simplified into basic categories; 20 degree, 45 degree, 90 degree, and 180 degree

These simple mechanics allow the player to put the planes where they want in relation to their fellows quickly and easily.  


Use Action Economy to Differentiate Pilots
Sure, all pilots know how to fly but some are simply better at flying than others.  Only a handful have the killer instinct it takes to become an Ace pilot.  What is the difference between a rookie pilot, an experienced pilot, or an Ace?  

In White Star/Red Star pilot skill level is differentiated by Action economy.  All pilots can participate in the Rookie phase, where they move and shoot using alternating activation as normal.  In the Experience Phase, Experienced and Ace pilots can move and shoot normally.  Rookies can only fly straight.  Meanwhile, in the Ace Phase only Ace pilots can move and shoot normally.  Everyone else just flies straight.  These escalating activations give Aces the edge in out-flying and acting compared to their lesser peers.  

In addition, when a pilot can initiate a turn action differs based on their skill level.  Rookies have the most limited window of action.  Experienced pilots have more latitude to change course.  Meanwhile, Aces can initiate turns freely.  It is also important to remember, that a pilot can either change altitude in an activation or turn.  With the stacking Phases, Aces will be able to make this choice three times as often as a Rookie.  


Make Detection a Key Component of the Game
Often times, the difference between living and dying in air combat is knowing the enemy is around.  The majority of kills occur on an unsuspecting target.  Therefore, detection is a critical and often overlooked component of air combat.  

To reflect this, deployment in this game is a bit unique.  Each turn, both sides make a detection role and compare it to the profiles of the enemy aircraft.  If the detection roll is successful for certain aircraft, they can be placed on the board anywhere in the deployment zone, at any facing and altitude.  If failed, the planes are not deployed.  It is easier to detect big multi-engine bombers than small prop planes.  

Every turn, the potential deployment zone is extended.  Therefore, the longer it takes to be detected the further onto the board the plane can be deployed.  As the turns go by, the detection roll gets easier as the forces close.  In playtesting, it was possible for planes to start detected coming in on the tail of an enemy plane!  However, such results were not common. 

Finish Games Quick and Focus on Critical Decisions
One of the key components to assist this was to make dice rolling quick and easy.  A pilot can roll 1 dice per their level of skill; rookies roll 1, experienced pilots 2, and Aces 3.  Success was always a 4+ and most rolls are opposed.  Therefore, whoever scores the most 4+ will win most rolls.  Modifiers take the form of +/- dice to the roll.  Therefore, this unified mechanic makes resolution easy.  

In addition, the game has a maximum number of turns and a disengagement level.  This made sure games did not drag out since a long dogfight during the Korean War lasted 5 minutes at most.  I wanted resolution of the wargame to align closer to actual dogfight times.  Most games are completed in less than 1 hour from beginning to end, with some being as short as 15 minutes.  

As for critical decisions, the dice modifiers are based on range and angle of attack.  In addition, the game has relatively narrow firing arcs so maneuver matters.  In addition, there is an Ammo roll when you take shots so you have to weigh the risk of running out of ammo against the chance of hitting before you roll the dice.  This makes players focus on the critical decisions and trying to get high-probability shots rather than fishing for lucky hits.       


Represent Key Tactical Decisions and Aircraft of the Era
Unlike World War II dogfight, Korean War dogfights between Jets was often vertical rather than horizontal.  The game tries to mimic this by giving the aircraft of the time stats that match the performance of the aircraft.  MIGS were great at climbing, so have benefits to climbing.  Sabres were great at diving, and this is reflected in the rules.  As planes decide to turn or change altitude, it immediately changes how far they can go in that activation based on the type of plane it is.  Since the LA-11 Fang was a poor climber, it suffers a greater loss of speed as it goes up, and it is applied immediately for that activation only.  

The rules also include how to use wingmen and wingman tactics directly.  Instead of acting independently, the wingmen operate together and perform the exact same maneuvers.  If the wing leader goes up 1 altitude, so does the wingman.  If the wing leader turns 20 degrees, so does the wingman.  They work together for good or for ill.   

Scale and Model Agnostic
Like all my games, I wanted it to be scale and model agnostic.  Korean War aircraft models come in all different scales from 1/1200 up to 1/48!  This system can accommodate any size aircraft you want to use and any space you have.  This is because the game uses generic measurement units that can be the equivalent to any measurement you want based on the play area and models you have.  Larger models and a small table may demand smaller MUs, while small scale and large tables could use larger.  

Also, measurements are from the center of the model, and firing arcs are wingtip to wingtip (or a circle depending).  Therefore, as long as aircraft are the same scale then they will be using the same mechanics for firing arcs and measurements.  Therefore, you can use whatever you want to play.  


Conclusion
This game went together pretty fast compared to my usual efforts.  I think I only worked on this one for 2 years!  However, it got more playtesting than my games normally get due to how quick it plays! Despite the "quick" turnaround, this game went through at least 4 major revisions, mostly to the action economy and detection.  

I am really proud of this game.  It focuses on what I want it to focus on, and I think handles air combat in a unique and innovative way.  The game was so easy, even novice wargamers were picking it up and grasping the tactics of the period right away.  I hope you enjoy them!

If you want to pick up White Star/Red Star at the Blood and Spectacles Wargame Vault page.         


Become a Patron and get access to all the cool stuff, a peak behind the curtain of Blood and Spectacles, and early-access to playtest games!  


You can follow Blood and Spectacles Facebook page or Instagram for more fun! 

Check out the latest publications and contact me at our Blood and Spectacles website

Or purchase all out games at the Blood and Spectacles Publishing Wargames Vault Page!