Thursday, May 18, 2017

Rampant Stars: Battle Report- Rumble in the Jungle


Welcome to my latest battle report for RAMPANT STARS.  This time, I decided to try using the rules as a 1:1 skirmish game instead of a squad based skirmish game.  That means, each “unit” will be a single model with 10 Effectiveness rating each.  A small tweak, but I wanted to get my old Necromunda Cawdor and Demon Blade Shockforce models on the table for a game.   

A Cult in the nearby dome-city stumbled upon an ancient map to the location of a holy data point.  However, the Cult needs to venture outside into the Jungles that surround their hab to locate it.  Little do they know that the datapoint is also sacred to the local Tribals.  As the Cult approaches, the Tribals set-up to stop them    

Cultists
Irregular Infantry Commander- Grenade Launcher Cawdor
Irregular Infantry             Effectiveness rating:  10                                Points: 2 (+3)
Move    Command           Assault                 Defense               Shoot    Armor 
6              4+                           4+                           5+                           4+           1
Traits:
Squad Support weapon (+2)- Double Potential Hits
Blast (+1)- Ignore cover

Irregular Infantry- Sword and gun
Irregular Infantry             Effectiveness rating:  10                                Points: 2 (+3)
Move    Command           Assault                 Defense               Shoot    Armor 
6              4+                           4+                           5+                           4+           1
Traits:
Combat Weapons (+1)- Short range, double dice for assault
Fierce (+2)

Irregular Infantry- Sword and gun
Irregular Infantry             Effectiveness rating:  10                                Points: 2 (+3)
Move    Command           Assault                 Defense               Shoot    Armor 
6              4+                           4+                           5+                           4+           1
Traits:
Combat Weapons (+1)- Short range, double dice for assault
Fierce (+2)

Irregular Infantry- Auto-gun guy
Irregular Infantry             Effectiveness rating:  10                                Points: 2 (+2)
Move    Command           Assault                 Defense               Shoot    Armor 
6              4+                           4+                           5+                           4+           1
Traits:
Rapid Fire (+2)- Double dice at short, 1.5 at long, may not be used with a  move and shoot order

Irregular Infantry- Shot-gun guy
Irregular Infantry             Effectiveness rating:  10                                Points: 2 (-2 +1)
Move    Command           Assault                 Defense               Shoot    Armor 
6              4+                           4+                           5+                           4+           1
Traits:
Obsolete Weapon (-2)- Short 0-8, Long 9-16
Blast (+1)- Ignores cover

Irregular Infantry- Las-gun guy aiming
Irregular Infantry             Effectiveness rating:  10                                Points: 2 (+2)
Move    Command           Assault                 Defense               Shoot    Armor 
6              4+                           4+                           5+                           4+           1
Traits:
Marksman (+2)- Re-roll failed shoot attacks on shoot orders.

Irregular Infantry- Heavy Bolter
Irregular Infantry             Effectiveness rating:  10                                Points: 2 (+4)
Move    Command           Assault                 Defense               Shoot    Armor 
6              4+                           4+                           5+                           4+           1
Traits:
Armor-piercing (+2)
Rapid-fire (+2)

Total Points= 30 points


Tribals
Irregular Infantry Commander- Shaman
Irregular Infantry             Effectiveness rating:  10                                Points: 2 (+4)
Move    Command           Assault                 Defense               Shoot    Armor 
6              4+                           4+                           5+                           4+           1
Traits:
Psionic Powers (+4)

Irregular Infantry- Saw and Shield
Irregular Infantry             Effectiveness rating:  10                                Points: 2 (+3)
Move    Command           Assault                 Defense               Shoot    Armor 
6              4+                           4+                           5+                           4+           1(+1)
Traits:
Combat Weapons (+1)- Short range, double dice for assault
Armored (+2)

2x Irregular Infantry- Las-gun guy aiming
Irregular Infantry             Effectiveness rating:  10                                Points: 2 (+2)
Move    Command           Assault                 Defense               Shoot    Armor 
6              4+                           4+                           5+                           4+           1
Traits:
Marksman (+2)- Re-roll failed shoot attacks on shoot orders

Irregular Infantry- Las-gun guy white hair
Irregular Infantry             Effectiveness rating:  10                                Points: 2 (+3)
Move    Command           Assault                 Defense               Shoot    Armor 
6              4+                           4+                           5+                           4+           1
Traits:
Hover (+2)- Ignores Difficult Terrain to act as a scout
Rapid Move (+1)- Roll d6 for Rapid Movement

3x Irregular Infantry- Las-gun guy
Irregular Infantry             Effectiveness rating:  10                                Points: 2
Move    Command           Assault                 Defense               Shoot    Armor 
6              4+                           4+                           5+                           4+           1
Traits:
None

Total Points= 30 points


Mission
Missions are generated by rolling 3d6 three times and consulting a mission, complication, and Location chart.  Of course, you don’t have to roll any at all, but for a test game we might as well go for it!  

Secure the Datapoint
The defender sets up the board per the terrain guidelines. A token is placed in the center of the board. The attacker chooses a table edge. The defender deploys on the opposite table edge within 6 inches.
The attacker then deploys within 6 inches of the edge. Each side is trying to hold the data-point token at the center of the board by having an intact unit covering it at the end of turn 8, one hour, or until one side is destroyed/routing. The force on the token at the end wins, if no one is on the token, it is a draw.

The Cultists will be the attackers.

Dawn

The battle starts at the break of dawn. Initial Line-of-sight is 0’ inches. At the end of each turn, the Line-of-Sight distance increases by 6 inches. Therefore, at the end of Turn 1 the Line-of-sight is 6 inches, at the end of turn 2 it is 12 inches, at the end of turn 3 it is 18 inches, etc, etc. This continues until the full length of the board is available.

Location
Outdoor, Jungle

The battle takes place on a Jungle world with huge trees, brightly colored foliage, and dense brush. Shooting only has a Line-of-sight of 6 inches while in the jungle. In addition, the entire board is considered to be difficult terrain. Gaps, clearings and paths are normal, open terrain.

Well then…. this should be something. 

Set-up
This board is 4x4 in size using my classic Jungle terrain segments first made for Codex: Catachan.  The brown is considered open trails with normal LOS and terrain.  Anything green is considered jungle and only has a 6 inch LOS and considered in difficult terrain.     

The totem rock in the center of the board is the data-point.  Overlooking it is the ruins of a hilltop fortress, but there seems to be only one winding path that even gets close to the Totem.  The Tribals set-up on the path on their side of the board and are ready to move in towards the totem as quickly as possible.  The Cultists are on the opposite side, spread out along a game trail.


Turn 1:
The Cultists go first, but only the Shotgun guy, auto-gun guy, and Leader manage to press ahead.  The rest are scared of the darkness and the Jungle. 

The Tribal shaman, a Marksman, and a disposable all make for the Totem.  Meanwhile a Marksman tries to move along a flanking path.  The rest are confused by the darkness. 

Turn 2:
As the sun rises, the Jungle begins to stir.  Only the shotgun cultist and the leader keep their wits about them and press ahead.  The rest failed to rally and stay shaken. 

The jungle noises cause the advancing tribal party to pause and survey their surroundings cautiously, stalling their advance up the trail.  However, their flanking Marksman manages to get to a good position over-watching the totem and in cover. 


Turn 3:
The Cultist leader moves up the flanking trail, but comes to a dead end.  He will have to plunge through the jungle to get closer to his target.  Meanwhile, his Marksman brother moves up towards the main trail.  The rest stay crouched and scanning for danger.  
The Tribals quickly gather their wits.  Their lagging troopers scramble forward to join the main warband.  Meanwhile, their Ghost Who Walks moves to the base of the hill fort.  Their Marksman boldly moves forward to block the path forward for the main Cultist troops.


Turn 4:
The Marksman Bretheren dashes up, covered by his buddy.  The Shotgunner gathers his wits and prepares to press forward.  The Cultist Commander presses forward into the jungle.  The Heavy and the Close Combat gangers stay stricken in fear at the path they started on. 


The Marksman Tribal moves and shoots into the cover the Shotgun cultist is in.  The spray of las-shots cause the Cultist to lose 1 Effectiveness rating from fear.  The shaman and two other tribesman move up towards the totem.  The second Marksman double times to his fellow marksman and sets-up to secure the path. 

Turn 5:
The Cultist Leader double times through the Jungle and gets to the base of the Hill top fort.  The Auto-gun cultist sprints towards the totem.  The Shotgun cultist is shaken and fails to act.  Unsurprisingly, the two “fierce” cultists stand around quaking in fear. 

The Marksman turns and fires at the Marksman tribal through cover.  However, careful aims pays off and reduces the Tribal 3 Effectiveness. 

The Shaman uses “New Ways to Motivate Them” on the shield bearing tribal.  One of the Marksman fires on the Cult Marksman and reduces them 1 Effectiveness rating.  The Tribal soldier moves to base-to-base with the totem. 

Turn 6
In a critical turn, all the Cultists fail their Command Check, except 1.  The Marksman fires on the unhurt and unshaken tribal Marksman and reduces him 4 Effectiveness points!  That is pretty good considering he is in cover! 


The shield bearing tribal manages to fail his activation even with the Pscionics on him!  The Shaman fails his action test to move as well.  One Marksman rallies while the other moves into base-to-base with the totem.  Another Tribal grunt rallies near the shaman.  The rest fail to activate. 

Turn 7
It doesn’t look like the Cultists can do much to stop the Tribals from securing the data-point in the totem.  The Shotgunner rallies, but the rest fail their Command checks.  I should have kept the commander closer to his buddies.    

A Tribal Grunt activates and moves into base-to-base with the Totem, securing the objective with a third unit.  The Shield Bearing Tribal rallies, and the others fail to activate or rally as needed.  One of the Marksman fires at the Auto-gun Cultist and reduces them 3 Effectiveness rating. 

 Conclusion:
Tribals win!  They have 1 Marksman and two Grunts securing the Objective.  A pretty convincing win!  

Final Thoughts:
This was a tough Mission, Complication, and Location for Irregular Infantry forces.  They do not have a reliable Command rating to get them to the Objective in 8 turns easily.  Especially since failing a command check sidelines the unit for the next turn as well while they rally.  Two of the Cultist Units never even moved from the starting point as they could not pass a rally test all game!  Perhaps I should have used a 3x3 board to help the units get into the action quicker? 

The system worked just as well using individual models as it does with squads.  Its simplicity is the key to its versatility.  The Marksman were worth the points and managed to get good shots in tough cover and ranges.  The Pscionist not so much, and Hover/Rapid Movement guy not so much either.  The CC oriented units were absolutely worthless in this game and I will need to see how they fair in other games. 

In addition, I found a few more typos in the rules so I updated the PDF.  Nothing disastrous but some errors in target numbers for Pscionic powers to activate using 2d6 instead of a d6.

This game was set-up, played, documented, and stripped back to bare table again in 1 hour and 15 minutes.  One goal for the game was quick gameplay.  I think Rampant Stars delivers on that front. 


Feel free to try out the rules for yourself here: http://www.wargamevault.com/product/209268/Rampant-Stars?src=newest_recent

Tuesday, May 16, 2017

Aeronautica Imperialis: Battle Report- Raid on Platform Delta-9 Zulu


This was part of the Fued of the Red Clouds campaign and was initially played in 2012.  Some aircraft and rules were custom to the campaign.  All models are scratch built.  

*********************************************  

Raid on Platform Delta-9-Zulu 
Warzone: 3- Station Alpha

Kor' Kau'ui Sa'cea- Graceful Hunters
Ix-02 Interceptor – Pilot: R'ian- Ace: Going Ballistic 
--Additional Weapon Load, Escape Pod

Barracuda- Pilot: Sh'ue

Tiger Shark – Pilot: H'dao
--Seeker Missiles, Target Lock, Stabilization System

Barracuda 1- Pilot: O'shan
--Weapon Load 1

Total--101 pts

Cabal of the World Walkers
Hellblade- Pilot: Rae'Ven
Hellblade- Pilot: Blak'Vind
Hellblade- Pilot: Vul'tourg

Hellfang- Pilot: Klaug

Hellspike- Pilot: H'wok
Hellspike- Pilot: T'llon

Blitzen AA Gun 
Hydra Platform

Total--106pts

Set-up:
We decided to place an aerial platform to be the target. It was 12 inches in from the short table edge, and 24 from the side. On the platform was a radar tower (2 hits), and two buildings (4 hits each), a large landing pad (4 hits), and a control tower (3hits) and the chaos ground defenses. The aerial platform was randomly rolled to be at 3.

The Tau took the opposite board edge, and were divided into two groups. The first group was the “Killing Blow” composed of Elegant 1, the Ace and her Barracuda wing man. They were placed at relatively high altitude. The second group was the “Patient Hunters” composed of the Tiger Shark and ground attack Barracuda. They were also coming in at high altitude. They were moving at max speed. 

The Killing Blow


The Patient Hunters


Meanwhile, the Chaos defenders came roaring in from the opposite board edge, closest to the platform. The Hellbades formed a tight phalanx, followed by the Hellfang. They were at high altitude and max speed. They were coming in to the left of the platform, ready to sweep across. The Hellspikes came in at half speed, but were vectoring straight at the platform, to sweep over it. 

Turn 1:
Initiative: Chaos

For the most part, the two sides moved towards each other. The Hellspikes staying near the platform and the Hellblades and Hellfang covering the far left. The “Killing Blow” with the Ace moved towards the scattering Hellblades. The “Patient Hunters” also closed towards the target area. 

Shooting:
None

Turn 2:
Initiative: Chaos

Moving:
Everyone seems to head for the center of the board, except Hellblade 1 and the Tiger Shark who cruise along opposite board edges. The Ground Attack Barracuda is lined up to go head-to-head with the pair of Hellspikes, but Hellblade 3 is also angling in to attack. 

Meanwhile, the Killing Blow try to get the angle on Hellblade 3, but Hellblade 2 and the Hellfang move to intercept them. Things look like they are about to get ugly!

Things about to get ugly


Shooting:
Hellblade 3 opens fire on the Ground Attack barracuda, at the extreme end of his optimal range. Several rounds find their mark, and the aircraft begins to blow smoke. 

Barracuda 2 locks onto Hellblade 3, and lights him up with a pair of smart missiles. Hellblade 3 is incinerated in the blast, along with the pilot. The same craft's drone cannons target Hellblade 2, and several lucky shots blast through the cockpit and kill the pilot of Hellblade 2! Dang, what is happening! 

Hellspike 1 takes aim at the oncoming smoking Barracuda, and let's loose with a las-cannon shot. The beam arcs out lazily, and slices the wing right off of the Ground Attack Barracuda. As the craft plummets into the lower atmosphere to be crushed, the Air caste pilot fails to eject. Vengeance!

The Hellfang targets Elegant 1, and opens fire at optimal range. A storm of auto-cannon shells slam into the Ix-02 Interceptor, and thin trails of fluid and smoke begin to billow from the plane. However, it continues to fly on. The interceptor returns the favor by hitting the Hellfang with a drone pod seeker missile, sending shrapnel cutting through the aircraft's delicate avionics. However, it isn't enough to bring it down. 

Things got ugly!


Turn 3
Initiative: Chaos

Moving:
The Tigershark dropped down for a strafing run and moved towards the target area. Meanwhile, the Hellspikes used wingman tactics to get Barricuda 2 between them, and the Hellfang moved into tailing position on Elegant 1. 

Shooting:
The Hellfang again took a shot at the Interceptor, but this time he was a bit too close. However, the spray of shells manages to find a weak spot, and blast the engines apart. The Interceptor's escape pod ejects, and the R'ian the Tau ace lives to fight another day as her aircraft gracefully arcs down into the Red Clouds below. 

The drone cannons of Barracuda 2 spray Hellspike 2, but the pilot weathers the storm of shots and presses his attack. 

The gun crew of the Blitzen swing into action and fire on the oncoming TigerShark. However, in their haste they fail to bring the target in line before firing. The shells explode harmlessly above the oncoming bomber. In return, the Tigershark's Target Lock homes in on the Blitzen and fires. The seeker missile locks on and strikes a bullseye. The extra damage sends the gun up in a sheet of flames and exploding ordinance. 

Hellspike 2 returned fire with his lascannon on Barracuda 2, but fails to find his mark.
 

Turn 4: Disengagement Turn- All ready! That was fast!
Initiative: Chaos

Moving:
Barracuda 2 tries to disengage off the board with a Power Dive, but fails to make it. He is pursued by Hellpsike 2. Meanwhile, Hellspike 1 breaks off and barely stays on the board. 

The Tigershark slows down and moves right over the Aerial Platform, ready to rain down death before disengaging. Hellblade 1 and the Hellfang pursue it, but only the Hellfang will get a shot.
Shooting:
The Hellfang opens fire, but fails to damage the TigerShark. In return, the Tiger Shark's drone cannons pepper the Hellfang, but fail to cause any real damage. The Tiger Shark engages its Target Lock on its Ion cannon and opens fire on the aerial platforms buildings. It heavily damages the nearest barracks buildng (Reducing it to 1 Damage left) in the barrage. The Hydra platform returns fire, but fails to hit the target. 

Finally, the Hellspike takes a parting shot at Barracuda 2. He takes careful aim, and pulls the trigger. The cockpit monitor began beeping that the battery pack was dry. However, the beam arced through the sky and bored straight through the engine of the fleeing Barracuda. The Tau pilot ejected, as his plane went into a flat spin and tumbled down. The final kill of the game.

Conclusion:
Wow, that was close and went down to the wire. If Hellspike 2 hadn't got incredibly lucky with hitting and damaging, then the game would have gone to the Tau. However, the Cabal of the World Walkers finally won the day! Their first campaign win! 

After Barracuda 2 took down two Hellblades and their pilots I started to get a bit nervous. However, The Hellspikes did one heckuva job and took down two of the attacking craft. The Hellfang did pretty well too, and effectively neutralized the Tau Ace early in the game. 

Like the Supply Drop, the bomber got through, but the supporting elements suffered for it. Both of us are going to have to think about exactly how to play these kinds of missions more effectively as the attacker going forward. 

Monday, May 15, 2017

Aeronautica Imperialis: Battle Report- Clash of Aces


This battle took place in 2012 as part of the Feud of the Red Clouds campaign.  It uses customized rules from the campaign and scratchbuilt aircraft.  

*********************************************
Clash of Aces
Warzone: 3- Station Alpha

Kor' Kau'ui Sa'cea- Graceful Hunters
Ix-02 Interceptor – Pilot: R'ian- Ace: Going Ballistic 32pts
- Additional Weapon Load, Escape Pod

Barracuda- Pilot: Ki'ra 20pts
-Escape Pod

Barracuda- Pilot: Sh'ue 18pts

Barracuda- Pilot: H'deo 18pts

Barracuda- Pilot: An'lou 18pts

Total 106 pts

Cabal of the World Walkers
Hell Razor -Pilot: Blakroe the Aspirant- Ace: MoT 29pts
- Weapon Load

Hell Razor- Pilot: Ve'Grath 24pts 
- Weapon Load

Hellfang- Pilot: Klaug 24pts

Hellfang- Pilot: Lon'Bherd 24 pts

Total 101pts

Set-up:
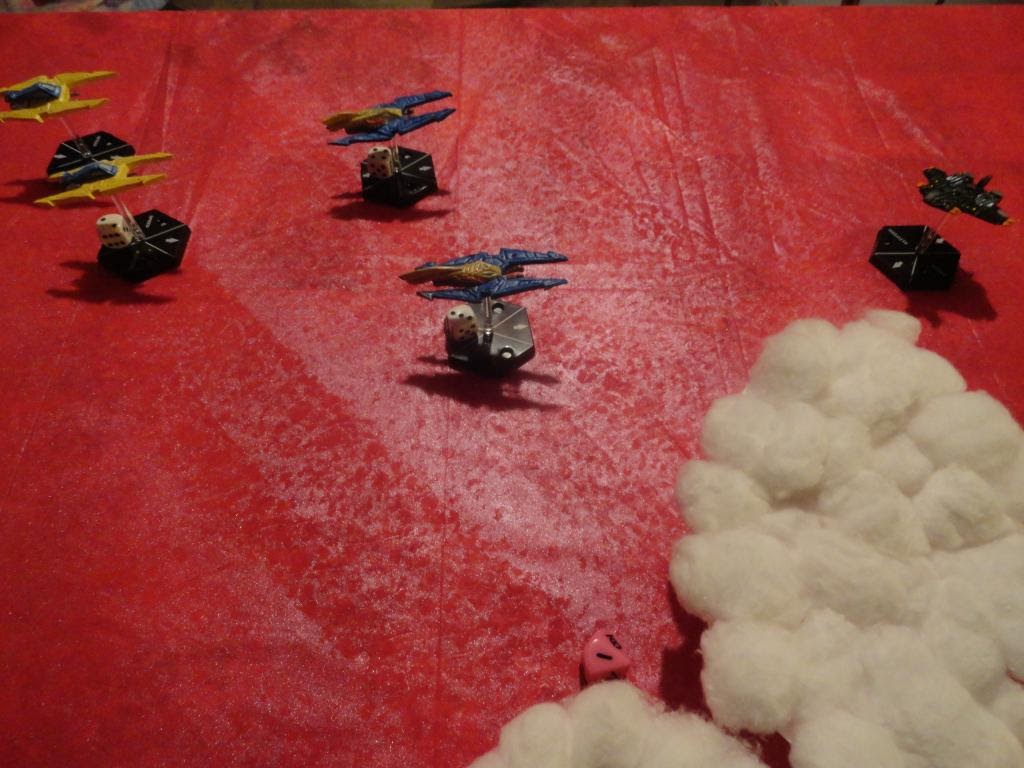
We decided to use the optional advanced rules for clouds found in the Feud of the Red Clouds/Airspace Rules Compendium. A large batch of clouds somewhat bisected the board, and two other patches flanked it. We randomly determined the altitude, and I was disappointed that they ended up at relatively low levels, being at 3, 1 in the center, and 2 respectively. 

We also decided to place a platform on the board to add more potential hazards for clumsy flying. We placed it just off the center of the board not far from the center cloud bank. The platform ended up at level 3. 


Blakroe and his wingman entered the board at the center of their deployment zone. They came in high and slow. Their comms blaring out a challenge to any Tau craft in the area. The Hellfangs flew with them, so they formed a big clump of chaos fighters in the middle of the board.
 

R'ian and her Elegant Hunters came in on the opposite side, picking up the challenge On the far right, R'ian and her wingman came in at mid speed and high altitude. On the opposite side, came a group of three barracudas, spread across the various altitudes, but moving at mid-speeds. The Tau were cautious of the Chaos aircraft's speed. 


Turn 1:
Initiative: Chaos

Movement:
The Chaos aircraft break to the left and stay high and fast. The Tau Ace and her wing man sideslip to the left and stay high and at mid-speed. The other Tau flight adds some height, and moves straight. 

Shooting:
None

Turn 2
Initiative: Tau

Movement:
The Chaos forces turned back in and started skirting the edges of the board, heading towards the Tau Ace. They managed to scatter to different altitudes. The Tau turned in to meet them. 

Shooting:
The Tau Ace takes a long range missile shot at Hell Razor 2, but fails to cause any damage. 

Hellfang 2 fires a full burst of auto-cannons and Lascannons. The altitude difference saves many of the shots from hitting the Tau Ace, but a shell manages to strike home. 

Long shot missile from Blakroe and his wing man shoot across the Tau Ace's bow, but miss.


Turn 3:

Initiative: Chaos

Movement:
Everything turned into a huge furball in the middle as planes dropped and maneuvered into position.

Blakroe used an extreme maneuver to drop into position on Barricuda 3. 


Shooting:
Hellfang 1 saw Barracuda 2 drop onto his 6, so he opened fired at close range on Barracuda 5, and managed to sink a few shells into the xeno plane. However, it wasn't enough to down the craft.

Barracuda 3 desperately tried to knock the Aspirant off his attack angle and opened fire with his drone burst cannons. In an unbelievable piece of luck, the shells tore through the Aspirants Hell Razor and sent it spiraling down. Things looked bad, but at the last moment, Blakroe managed to eject. 

In a mad rage, Hell Razor 2 fired at close range on Barracuda 5, and managed to blast the plane from the sky. However, the Tau pilot ejected to safety. 

Inspired by Barracuda 3, his wing mate in Barracuda 4 fired at close range on the passing Hell Fang 2. His drone cannons locked on and put a wall of shells in the chaos fighters path. They tore through the plane and knocked it our of the sky. However, the pilot managed to eject. 

Finally, Barracuda 2 opened fire on Hell Fang 1 at close range. Hellfang 1 prayed that the difference in altitude would be enough. Despite unloading all of his weapons on the Hell Fang, nothing seemed to strike home. 


Turn 4: Disengagement Turn- Yeah, this battle was that fast....
Initiative: Chaos 

Tailing Fire: 
Barracuda 2 opens fire on Hell Fang 1, and a missile and Ion blast put paid to that order. The Pilot attempts to eject, but he is caught in the fury of fire surrounding his plane and killed. 

Movement:
The last Chaos fighter dives and accelerates away from the battle and out of reach. 

The Tau give half-hearted chase, but are content to let the last Chaos airplane disengage. 

Conclusion:
Tau win! Again, the Cabal of the World Walkers face defeat during this campaign. So, what went wrong? My initial move on Turn 1, made it too easy to determine where they would be in turn 3 and 4. Plus, I don't think I had a clear plan of attack once the game started. As a result, my pilots suffered. 

Of course, it didn't hurt that the Tau had some amazing (some would say lucky) accuracy with their drone cannons. Again, my fault as I let them get too close to me. The Hellfang pilot Klaug who downed the Tau Ace R'ian last game.... well he got killed this time around.